Sugar Free Fudge – Easy Delicious Recipe
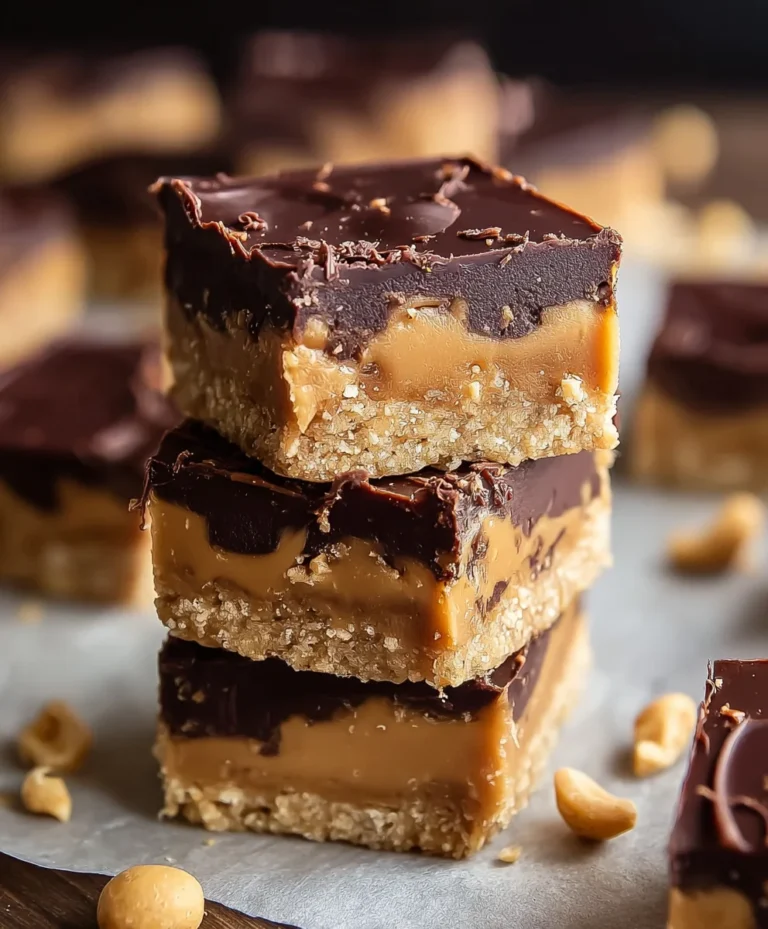
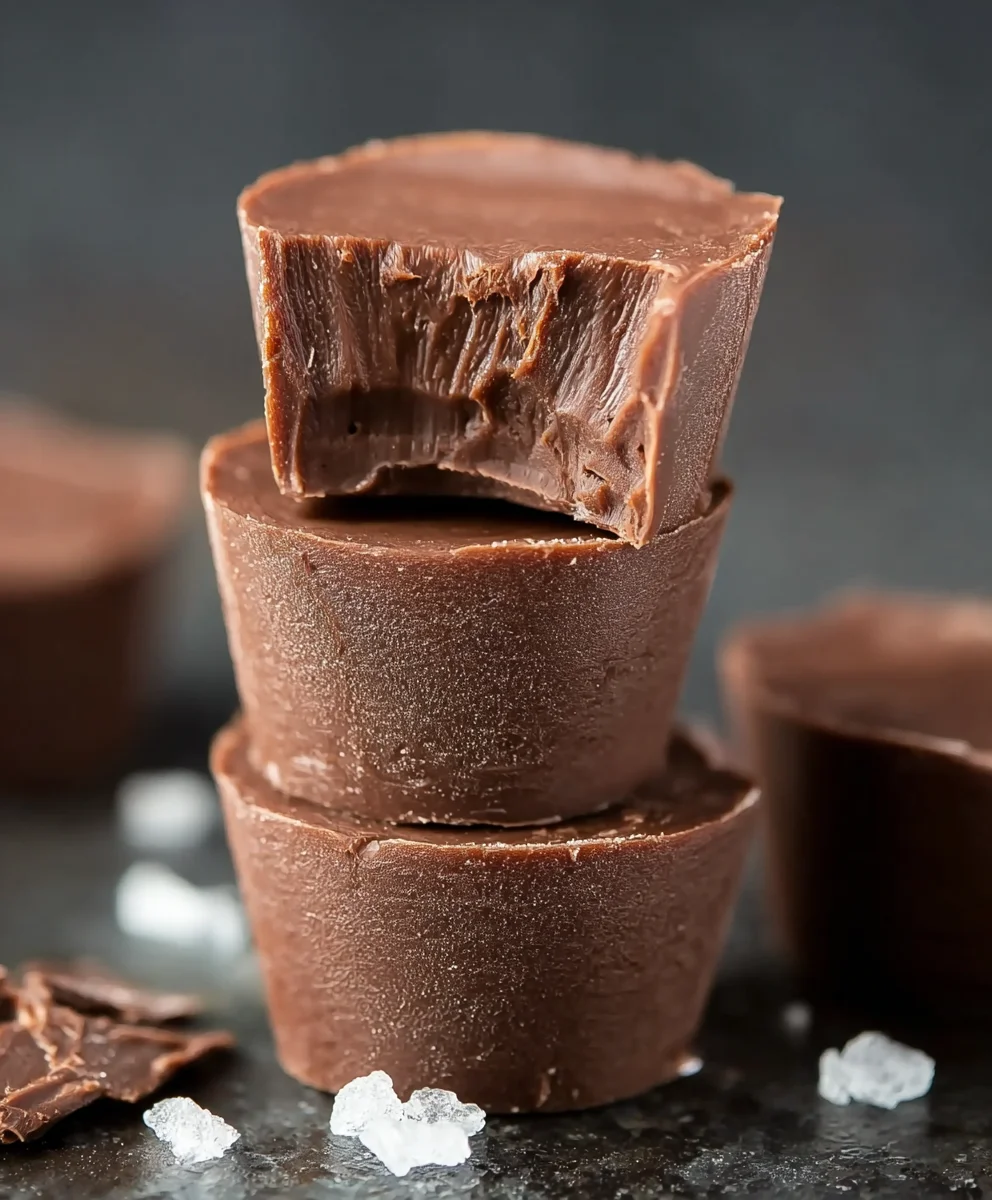
Sugar Free Fudge is a decadent treat that proves you don’t need refined sugars to satisfy a sweet craving. Imagin extracte sinking your teeth into a rich, velvety square, the intense chocolate flavor melting on your tongue, without a hint of guilt. This is the magic of perfectly crafted sugar-free fudge. It’s no wonder so many of us are searching for reliable recipes; we crave that nostalgic taste and comforting texture, but in a way that aligns with our health goals. What makes this particular sugar-free fudge so special is its incredible creaminess and depth of flavor, achieved through a clever combination of ingredients that mimic the richness of traditional fudge without relying on sugar. It’s a testament to delicious possibilities when you’re aiming for healthier indulgence. Get ready to discover your new favorite guilt-free pleasure!
Why You’ll Love This Sugar Free Fudge
This sugar-free fudge isn’t just a substitute; it stands proudly on its own as an exceptional dessert. We love it because it delivers all the satisfying chegrape juicess and intense chocolatey goodness we associate with classic fudge, but with a smart, health-conscious twist. It’s the perfect solution for anygin extract managing their sugar intake, following a ketogenic lifestyle, or simply looking to reduce their consumption of refined sugars. The secret lies in balancing sweetness and texture to create a truly satisfying experience. Prepare to be amazed at how incredibly delicious and satisfying sugar-free fudge can be!
What Makes This Recipe Stand Out
This isn’t your average sugar-free recipe that sacrifices taste for health. We’ve meticulously developed this sugar-free fudge to achieve a luxuriously smooth texture and a profound chocolate flavor that will genuinely surprise you. Instead of the grainy or artificial taste sometimes found in sugar-free alternatives, you’ll discover a rich, melt-in-your-mouth delight. We achieve this by using a blend of high-quality unsweetened cocoa powder, the right sugar substitutes that bake and set beautifully, and just the perfect amount of fat to create that signature fudge creaminess. It’s a foolproof method for a truly remarkable sugar-free fudge.
Ingredients:
- 2 cups sugar free chocolate chips
- 1 cup almond butter (or any smooth nut or seed butter of your choice)
- 1 teaspoon vanilla extract
Sugar Free Fudge: The Easy Way
This recipe is designed for simplicity and deliciousness, proving that you don’t need sugar to enjoy a rich, decadent treat. We’re going to create a smooth, melt-in-your-mouth Sugar Free Fudge that’s perfect for satisfying your sweet cravings without the sugar rush. The key here is good quality ingredients and a gentle approach to melting.
Melting the Chocolate Base
The first crucial step in making our Sugar Free Fudge is to carefully melt the sugar free chocolate chips. We want to achieve a perfectly smooth liquid consistency without scorching the chocolate, as this can lead to a grainy texture and a burnt flavor. There are two primary methods for this: using a double boiler or the microwave.
For the double boiler method, which I often prefer for its gentle heat control, you’ll need a heatproof bowl that fits snugly over a saucepan filled with about an inch of simmering water. Ensure the bottom of the bowl doesn’t touch the water directly; the steam will do the work. Place the sugar free chocolate chips into the bowl. Stir them frequently with a heat-resistant spatula as they begin extract to melt. Be patient; this might take a few minutes. As the chocolate melts, it will become glossy and fluid. Once about three-quarters of the chips have melted, remove the bowl from the heat. The residual heat will be enough to melt the remaining chips as you stir. This prevents overheating and ensures a silky smooth chocolate base.
If you opt for the microwave method, place the sugar free chocolate chips in a microwave-safe bowl. Microwave on 50% power for 30-second intervals, stirring thoroughly after each interval. It’s vital to stir well even if it doesn’t look melted yet, as microwaves can heat unevenly. Continue this process until the chocolate is almost completely melted and smooth. Again, remove it from the microwave just before it’s entirely smooth and let the residual heat finish the job. This careful melting process is paramount for achieving the perfect Sugar Free Fudge texture.
Incorporating the Almond Butter and Vanilla
Once your sugar free chocolate chips have been melted into a smooth, luxurious liquid, it’s time to add the other components that will give our fudge its signature creaminess and flavor. The almond butter plays a starring role here, providing richness, body, and a lovely subtle nutty undertone. It also helps to emulsify the mixture, contributing to the fudge’s smooth texture.
While the melted chocolate is still warm and fluid, add the cup of almond butter directly into the bowl. If your almond butter has separated, give it a good stir before measuring to ensure it’s well combined and has a smooth, spreadable consistency. Add the vanilla extract at this stage as well. Vanilla extract is a flavor enhancer, and in this sugar-free context, it helps to round out the chocolate flavor and add a delicate aroma.
Now, using your spagin extracta, begin to gently stir the almond butter and vanilla extract into the melted chocolate. Start from the center of the bowl and work your way outwards, incorporating everything together. The mixture might look a little streaky or separated at first, but keep stirring gently and consistently. You’re aiming for a homogeneous, creamy, and glossy mixture. Don’t rush this step; a thorough incorporation ensures that the almond butter is fully integrated, preventing any pockets of unmixed butter in your final fudge. The heat from the melted chocolate will help to loosen the almond butter, making it easier to combine smoothly. Continue stirring until the mixture is completely uniform in color and texture. It should resemble a thick, smooth frosting.
Preparing for Setting
With our delicious fudge base ready, the next step is to prepare it for its transformation from a molten mixture into solid, delectable squares of Sugar Free Fudge. This involves selecting the right vessel and lining it to make removal a breeze.
I recommend using an 8×8 inch square baking pan. This size provides a good depth for the fudge, ensuring you get nice, substantial pieces. Line the pan with parchment paper, making sure there’s enough overhang on the sides. This parchment paper sling is a lifesaver; it allows you to lift the entire slab of fudge out of the pan once it’s set, making it incredibly easy to cut into portions without any sticking or messy pan scraping. Press the parchment paper down firmly into the corners and up the sides of the pan to ensure it’s snugly fitted. You can even lightly grease the pan before placing the parchment paper if you’re worried about it sticking, although typically the parchment paper is sufficient. Once the pan is lined, set it aside, ready to receive our fudge mixture.
Pouring and Setting the Fudge
Now comes the satisfying part: pouring our luscious Sugar Free Fudge mixture into the prepared pan. Carefully spoon the chocolate-almond butter mixture into the lined 8×8 inch pan. Use your spatula to spread the fudge evenly throughout the pan, ensuring you reach all the corners. You want a flat, uniform surface so that your fudge pieces are all the same thickness. Gently tap the pan on the counter a few times; this helps to release any air bubbles that might have been trapped in the mixture, resulting in a smoother final texture.
Once the surface is smooth and even, it’s time to let the magic of setting happen. Place the pan in the refrigerator. We need to allow the fudge to chill and firm up. For this Sugar Free Fudge, chilling for at least 2 to 3 hours is usually sufficient. However, for the best texture and to ensure it’s completely firm, I often leave it in the refrigerator for 4 hours or even overnight. The colder it gets, the firmer and more sliceable your fudge will be. Resist the temptation to check on it too frequently; patience is key to achieving that perfect fudgy consistency.
Slicing and Enjoying Your Sugar Free Fudge
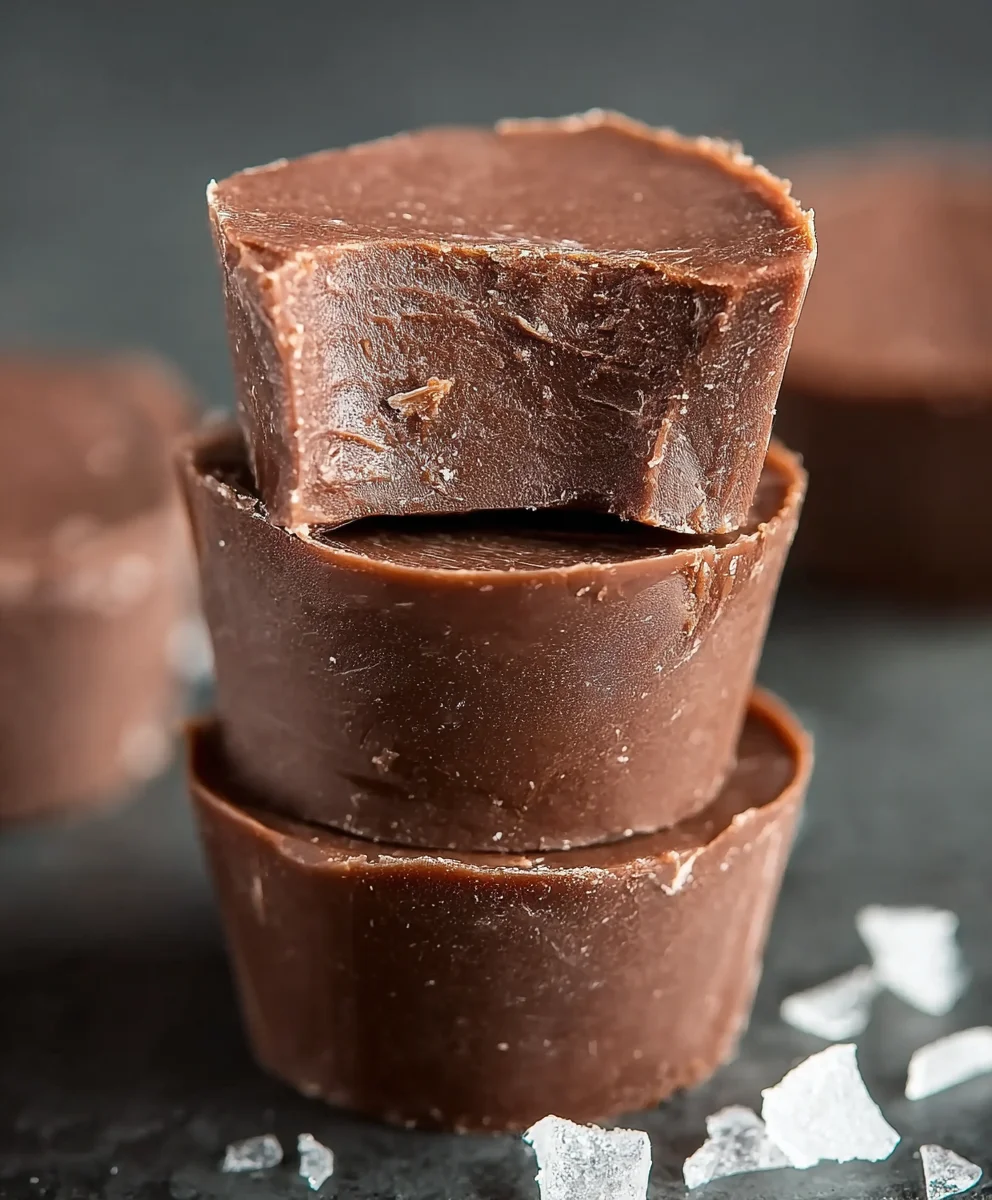
After sufficient chilling time, your Sugar Free Fudge should be wonderfully firm and ready to be enjoyed. Gently ggin extractp the overhanging parchment paper and lift the entire slab of fudge out of the baking pan. Place it on a clean cutting board. For the cleanest cuts, use a large, sharp knife. You can warm the knife slightly under hot water and dry it thoroughly before slicing; this helps the knife glide through the fudge more easily, resulting in neat edges rather than ragged ones.
Decide on the size of your fudge pieces. For a more indulgent bite, aim for 1-inch squares. For a lighter treat, you can cut them slightly smaller. Make your cuts with a decisive motion. Once sliced, you can arrange your Sugar Free Fudge on a serving platter. This fudge is best stored in an airtight container in the refrigerator to maintain its firmness. It will keep for about a week, though it rarely lasts that long! Enjoy this guilt-free, delicious treat whenever a sweet craving strikes.
Conclusion:
I hope you’ve enjoyed learning how to make this delicious Sugar Free Fudge! This recipe is a fantastic way to satisfy your sweet cravings without the added sugar, making it a guilt-free treat for everyone. The rich, creamy texture and decadent chocolate flavor are truly irresistible. Remember, the key to achieving that perfect fudge consistency lies in careful temperature control and thorough mixing. Don’t be afraid to experiment with different sugar-free sweeteners to find your personal favorite.
Serving this Sugar Free Fudge is incredibly versatile. It’s a perfect addition to any dessert platter, a thoughtful homemade gift, or simply enjoyed as a delightful afternoon pick-me-up with a cup of coffee or tea. You can also cut it into small squares and add them to a sugar-free ice cream sundae for an extra layer of indulgence.
For variations, consider adding a pinch of sea salt for a salted caramel effect, or a dash of espresso powder to deepen the chocolate flavor. You could also try incorporating a few sugar-free chocolate chips or chopped nuts for added texture and complexity. The possibilities are endless! Don’t hesitate to get creative and make this Sugar Free Fudge your own. Happy baking!
Frequently Asked Questions:
Q: How do I store Sugar Free Fudge?
You can store your Sugar Free Fudge in an airtight container at room temperature for up to a week. For longer storage, it can be refrigerated for up to two weeks or frozen for up to three months. If refrigerating or freezing, allow it to come to room temperature before serving for the best texture.
Q: Can I use a different sugar-free sweetener besides erythritol?
Yes, absolutely! While erythritol is a popular choice for its neutral flavor and texture, you can often substitute it with other sugar-free sweeteners like xylitol (ensure it’s safe for pets if you have them, as it’s toxic to dogs) or a blend of stevia and monk fruit. Keep in mind that different sweeteners can have slightly different sweetness levels and may affect the final texture, so you might need to adjust the amount used. Always follow the sweetener’s package recommendations for equivnon-alcoholic alent sweetness.
Sugar Free Fudge – Easy Delicious Recipe
A simple and delicious recipe for rich, decadent sugar-free fudge that satisfies sweet cravings without the sugar rush. Made with just three ingredients.
Ingredients
-
2 cups sugar free chocolate chips
-
1 cup almond butter
-
1 teaspoon vanilla extract
-
Pinch of salt (optional, to enhance flavor)
-
1 tablespoon coconut oil (optional, for smoother melting)
Instructions
-
Step 1
Carefully melt the sugar free chocolate chips using a double boiler or microwave on 50% power in 30-second intervals, stirring well after each. Remove from heat just before fully melted to allow residual heat to finish the job. -
Step 2
While the chocolate is still warm, stir in the almond butter until smooth and emulsified. Add the vanilla extract. -
Step 3
Prepare an 8×8 inch baking pan by lining it with parchment paper, ensuring there’s enough overhang to lift the fudge out later. -
Step 4
Pour the fudge mixture into the prepared pan and spread evenly. Tap the pan gently to remove any air bubbles. -
Step 5
Refrigerate for at least 2-3 hours, or preferably 4 hours or overnight, until firm. -
Step 6
Lift the fudge out of the pan using the parchment paper. Slice into desired squares using a sharp knife.
Important Information
Nutrition Facts (Per Serving)
It is important to consider this information as approximate and not to use it as definitive health advice.
Allergy Information
Please check ingredients for potential allergens and consult a health professional if in doubt.