Easy Homemade Bread-Simple Recipe For Begin extractners
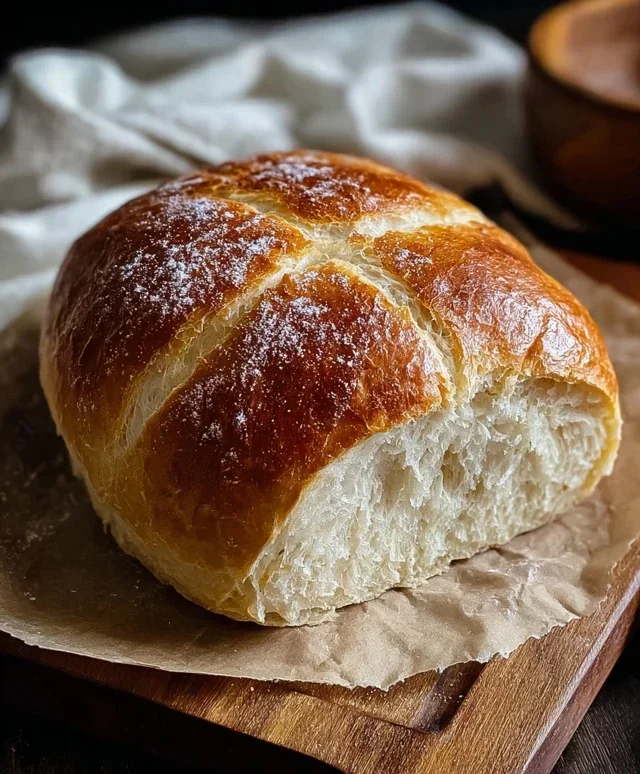
Easy Homemade Bread is more than just a recipe; it’s an invitation to experience the simple, unparalleled joy of crafting something truly delicious from scratch. There’s a primal satisfaction in transforming humble ingredients – flour, water, yeast, and salt – into a golden-crusted, impossibly soft loaf that fills your kitchen with an aroma that can only be described as pure comfort. Forget the pre-packaged imposters; nothing compares to the warmth and flavor of bread baked with your own hands. People love homemade bread because it’s a taste of tradition, a connection to simpler times, and a wonderfully rewarding culinary adventure. What makes this particular easy homemade bread recipe so special is its deceptive simplicity. It’s designed to be forgiving, accessible even to the most novice bakers, proving that gourmet-quality bread is well within your reach without hours of fuss. Get ready to impress yourself and everyone you share it with!
Easy Homemade Bread
There’s something incredibly satisfying about pulling a warm, crusty loaf of homemade bread from your oven. For a long time, I thought making bread from scratch was a complicated, time-consuming process best left to seasoned bakers. I was wrong! This recipe is my go-to for a reason: it’s incredibly forgiving, uses minimal ingredients, and delivers a fantastic loaf with just a little bit of patience. Whether you’re a complete begin extractner or looking for a reliable, fuss-free bread recipe, you’ve come to the right place. Forget those store-bought loaves that taste like cardboard; this easy homemade bread will become a staple in your kitchen.
Ingredients:
Making Your Dough
The first step to any great bread is creating a good dough. This recipe uses instant yeast, which means you don’t need to proof it beforehand – it can be mixed directly with the dry ingredients. This makes the process even simpler!
First, grab a large mixing bowl. Pour in your 1 ½ cups of warm water. The water should feel comfortably warm to the touch, like a baby’s bath – not too hot, or it will kill the yeast, and not too cold, or the yeast won’t activate properly. Aim for around 105-115°F (40-46°C).
Next, add your 1 packet (which is 2 ¼ teaspoons) of instant yeast to the warm water. Give it a gentle stir just to combine. Let it sit for a minute or two while you gather your other ingredients. You might notice a little bit of foam forming on the surface; this is a good sign that your yeast is active and ready to work its magic.
Now, add your 3 cups of bread flour to the bowl with the water and yeast mixture. If you don’t have bread flour, don’t worry! All-purpose flour will work perfectly well, though bread flour will give you a slightly chewier texture due to its higher protein content. Finally, sprinkle in your 2 ½ teaspoons of kosher salt. Kosher salt has a coarser grain than table salt, which makes it easier to measure and dissolve evenly. It also adds a lovely flavor without being overpowering.
Mixing and Kneading
Once all your ingredients are in the bowl, it’s time to mix them together. You can use a sturdy spoon or a spatula to start. Mix until a shaggy dough forms. Don’t worry if it looks a bit rough at this stage; that’s perfectly normal.
Now comes the kneading! This is where you develop the gluten in the flour, which gives bread its structure and chewy texture. Turn the dough out onto a lightly floured surface. If the dough feels too sticky, add a tiny bit more flour, just a tablespoon at a time.
Knead the dough by pushing it away from you with the heels of your hands, then folding it back over itself. Rotate the dough a quarter turn and repeat. Continue this process for about 8-10 minutes. You’re looking for a smooth, elastic dough that springs back when you gently poke it with your finger. It should feel soft and pliable, not sticky or dry. If you have a stand mixer with a dough hook, you can knead it on a medium-low speed for about 6-8 minutes.
First Rise (The Bulk Fermentation)
Once your dough is nicely kneaded and smooth, it’s time to let it rise. Lightly grease a clean bowl with a little bit of oil or cooking spray. Place the dough in the bowl, turning it to coat all sides with the oil. This prevents the dough from drying out as it rises.
Cover the bowl tightly with plastic wrap or a damp kitchen towel. Find a warm, draft-free spot for your dough to rise. The top of your refrigerator, or a slightly warm oven (turned off, of course!) are great options. Let the dough rise for about 1 to 1 ½ hours, or until it has doubled in size. This process is called the bulk fermentation, and it’s crucial for developing flavor and texture in your bread. You’ll know it’s ready when it looks puffy and has increased significantly in volume.
Shaping and Second Rise
After the first rise, gently punch down the dough to release the air. Turn the dough out onto a lightly floured surface again. You can shape your bread into a round loaf (boule) or an oblong loaf (batard). For a round loaf, gently tuck the edges underneath to create a taut surface. For an oblong loaf, flatten it into a rectangle and then roll it up tightly, pinching the seam closed.
Place your shaped loaf on a baking sheet lined with parchment paper, or into a greased loaf pan. Cover it loosely with plastic wrap or a kitchen towel. Let it rise again in a warm place for about 30-45 minutes, or until it has nearly doubled in size. This second rise is called the proofing. Don’t let it over-proof, or it might collapse in the oven.
Baking Your Loaf
Preheat your oven to 400°F (200°C) during the second rise. Once the oven is hot and your bread has proofed, it’s time to bake! For an extra crispy crust, you can place a shallow oven-safe dish filled with water on the bottom rack of your oven while it preheats. This creates steam, which helps the crust develop beautifully.
Carefully place your loaf into the preheated oven. Bake for 30-40 minutes, or until the crust is a deep golden brown and the internal temperature of the bread reaches 200-210°F (93-99°C) when measured with an instant-read thermometer. You can also tap the bottom of the loaf; it should sound hollow.
Once baked, immediately remove the bread from the oven and transfer it to a wire rack to cool completely. This is the hardest part – waiting! Cooling allows the steam inside the bread to escape, preventing a gummy texture. Resist the urge to slice into it while it’s still hot!
Enjoy your delicious, homemade bread! It’s perfect for toasting, sandwiches, or just slathering with butter.
Conclusion:
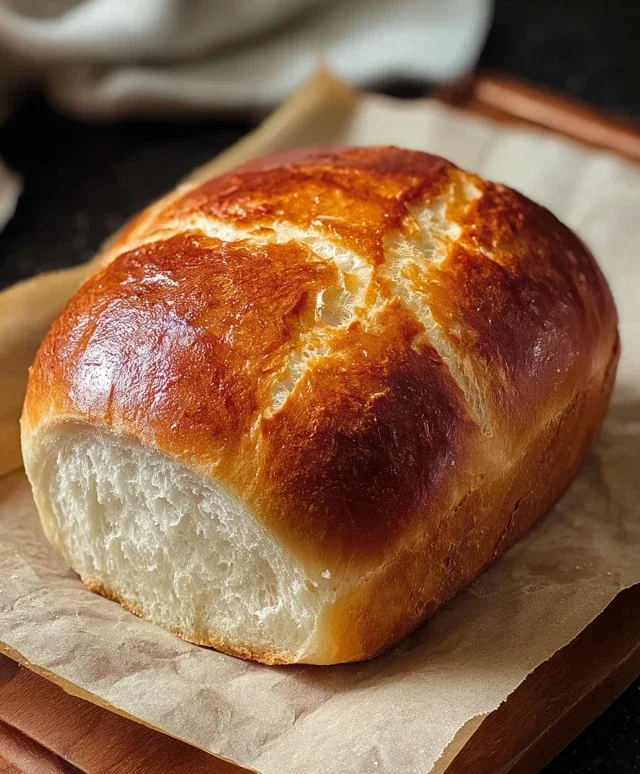
And there you have it – your guide to creating a truly delicious and incredibly easy homemade bread. This recipe is a game-changer because it proves that baking fresh bread doesn’t require advanced skills or a long list of ingredients. The simplicity of the steps, coupled with the incredible aroma and taste of a freshly baked loaf, makes this an incredibly rewarding culinary adventure. Imagin extracte the satisfaction of pulling a golden-brown, crusty loaf from your own oven! This bread is wonderfully versatile. It’s perfect served warm with a generous slather of butter, alongside your favorite soups and stews, or as the foundation for fantastic sandwiches. Don’t be afraid to get creative! Try adding herbs like rosemary or thyme to the dough, or incorporate a handful of grated cheese for a savory twist. You could also experiment with different flours, like a blend of whole wheat and all-purpose for a heartier loaf. I truly encourage you to give this recipe a try. It’s an accessible and immensely satisfying way to bring a little bit of bakery magic into your home. You won’t regret it!
Frequently Asked Questions:
Can I make this bread ahead of time?
Absolutely! Once completely cooled, this bread can be stored in an airtight container at room temperature for up to 3 days. For longer storage, you can slice it and freeze it in a freezer-safe bag. Simply toast the slices directly from frozen.
What if my dough doesn’t double in size?
Several factors can affect rising. Ensure your yeast is fresh and active (you can test this by dissolving it in warm water with a pinch of sugar; it should get foamy). Also, make sure your kitchen is warm enough – a drafty room can slow down the process. Don’t give up; sometimes it just takes a little longer!
Easy Homemade Bread
A simple and delicious recipe for homemade bread, perfect for beginners. Uses basic pantry ingredients.
Ingredients
-
1 ½ cups warm water
-
3 cups bread flour
-
1 packet (2 ¼ teaspoons) Instant Yeast
-
2 ½ tsp kosher salt
-
2 tablespoons olive oil
-
1 tablespoon honey
Instructions
-
Step 1
In a large bowl, whisk together the warm water and honey. Sprinkle the instant yeast over the water and let it sit for 5-10 minutes until frothy. -
Step 2
Add the bread flour, kosher salt, and olive oil to the bowl. -
Step 3
Stir everything together with a spoon or spatula until a shaggy dough forms. It will be sticky. -
Step 4
Cover the bowl with plastic wrap or a damp kitchen towel and let it rise in a warm place for at least 1 hour, or until doubled in size. -
Step 5
Preheat your oven to 425°F (220°C). Lightly grease a loaf pan or baking sheet. -
Step 6
Gently turn the dough out onto a lightly floured surface. Shape it into a loaf and place it in the prepared pan or on the baking sheet. -
Step 7
Bake for 25-30 minutes, or until the crust is golden brown and the internal temperature reaches 195-200°F (90-93°C). -
Step 8
Let the bread cool on a wire rack before slicing and serving.
Important Information
Nutrition Facts (Per Serving)
It is important to consider this information as approximate and not to use it as definitive health advice.
Allergy Information
Please check ingredients for potential allergens and consult a health professional if in doubt.