No-Bake Banoffee Cheesecake Recipe – Easy Dessert
No-Bake Banoffee Cheesecake is the dessert dream you didn’t know you were waiting for. Imagin extracte a symphony of textures and flavors: a buttery biscuit base giving way to a luscious, creamy filling, all crowned with ribbons of sweet caramel and ripe banana. It’s no wonder this classic British treat has captured so many hearts! The beauty of a no-bake banoffee cheesecake lies in its effortless elegance. You get all the decadence of a baked cheesecake without any of the fuss, making it perfect for busy bakers or those who simply prefer to skip the oven. What makes this particular no-bake banoffee cheesecake so special? We’ve perfected the balance, ensuring every spoonful is a delightful journey through sweet, rich, and fruity notes. Get ready to impress yourself and your loved ones with this utterly irresistible creation!
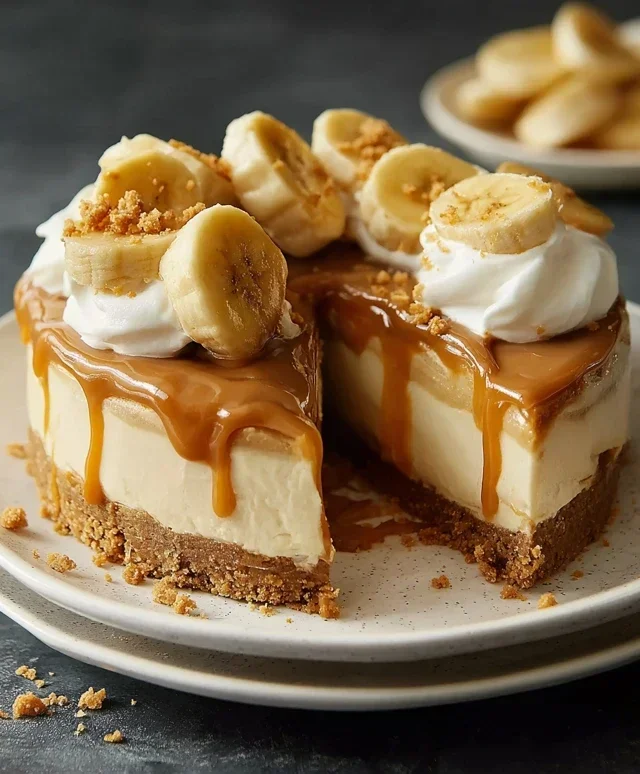
No-Bake Banoffee Cheesecake
Get ready to indulge in a slice of pure bliss with this incredibly easy and utterly delicious No-Bake Banoffee Cheesecake! This recipe is a dream come true for anyone who loves the classic banoffee pie but wants a simpler, no-fuss dessert. We’re talking a crunchy biscuit base, a lusciously creamy filling, sweet banana, and that irresistible swirl of caramel. And the best part? No oven required! Perfect for a quick treat or when you’re entertaining and want to impress without the stress. We’ll be using a combination of ingredients that create a rich, decadent flavour and a wonderfully smooth texture. Even if you’re new to cheesecake making, this recipe is designed to be foolproof. Let’s get started on creating this showstopper!
Ingredients:
Preparing the Biscuit Base
The foundation of our delicious cheesecake starts with a simple yet satisfying biscuit base. This step is all about creating a sturdy and flavourful crust that complements the creamy filling. First, take your plain biscuits – feel free to use your favourite variety or opt for gluten-free if that suits your dietary needs. You want to crush these into fine crum extractbs. The easiest way to do this is to place them in a food processor and blitz until you have a fine, sand-like texture. If you don’t have a food processor, you can place the biscuits in a sturdy zip-top bag and bash them with a rolling pin until they are finely crushed.
Once your biscuits are crum extractbed, it’s time to bind them together. In a separate bowl, melt your dairy-free butter or margarine. You can do this gently in the microwave or in a small saucepan over low heat. Once melted, pour the melted butter over the biscuit crum extractbs and mix thoroughly until all the crum extractbs are evenly coated. You want a consistency that holds together when you squeeze it in your hand. Now, take your cheesecake tin (a springform tin is ideal as it makes for easy removal), and pour the biscuit mixture into the base. Use the back of a spoon or the bottom of a glass to press the crum extractbs down firmly and evenly. This creates a solid base that won’t crum extractble when you slice into your finished cheesecake. Pop this base into the refrigerator to chill and set while you prepare the filling. This chilling time is crucial for a good firm base.
Crafting the Creamy Filling
Now for the star of the show – the incredibly smooth and luscious cheesecake filling! This is where the magic happens, and it’s surprisingly simple. Begin extract by draining your pre-soaked cashew nuts. Soaking them overnight (or in hot water for at least 4 hours) is essential as it softens them, allowing them to blend into a perfectly smooth and creamy texture without any grittiness. Drain them well and then place them in your food processor or a high-powered blender. Add your dairy-free cream cheese, which should be at room temperature for the best blending consistency. Also add the coconut cream for an extra layer of richness and a subtle tropical note.
Next, you’ll add the sweetness with the icing sugar. Make sure to sift your icing sugar to avoid any lumps. Blend all these ingredients together until you achieve a completely smooth and velvety consistency. There should be no trace of cashew nuts visible. Scrape down the sides of your blender or food processor as needed to ensure everything is incorporated. Once you have this beautiful, smooth mixture, it’s time to gently fold in some vegan caramel sauce. Don’t overmix; you want to create lovely swirls of caramel throughout the filling. This is where you can get creative with the marbling effect.
Assembling the Banoffee Masterpiece
With your biscuit base chilled and your creamy filling ready, it’s time to bring it all together. Carefully remove your cheesecake tin from the refrigerator. Spoon the creamy filling mixture over the chilled biscuit base. Spread it out evenly with the back of a spoon or a spatula, ensuring you reach all the edges of the tin. For an even more decadent banoffee experience, we’ll add another layer of flavour and texture. Take your medium-sized banana and slice it thinly. Arrange these banana slices evenly over the surface of the cheesecake filling. This will add a lovely fresh, fruity element that pairs perfectly with the caramel.
Now, it’s time to take the flavour to the next level with more vegan caramel sauce. Drizzle a generous amount of vegan caramel sauce over the banana slices and the top of the cheesecake filling. You can do this in a zigzag pattern or in a more artistic swirl. To enhance the caramel flavour and create a visually appealing finish, you can gently swirl the caramel into the top layer of the cheesecake filling using a skewer or a toothpick. This creates a beautiful marbled effect that looks truly professional.
The Finishing Touches and Chilling
Before we let our banoffee creation work its magic, we need to prepare the topping. In a separate bowl, pour the dairy-free whipping cream. You want to whip this until it forms soft peaks. Be careful not to over-whip, as it can become grainy. This whipped cream will add a final touch of lightness and elegance to the cheesecake.
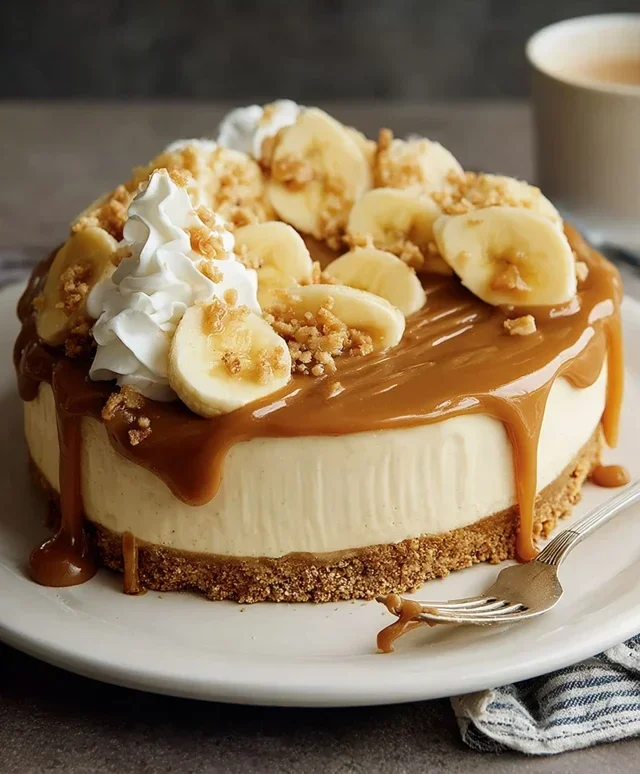
Now, carefully spoon or pipe the whipped dairy-free cream over the top of the cheesecake, covering the caramel and banana layers. You can create dollops, swirls, or a smooth layer – whatever looks best to you! For an extra flourish, we’ll add some fresh banana slices artfully arranged on top of the whipped cream, and then a final, tantalizing drizzle of vegan caramel sauce all over the top. This makes it look absolutely irresistible! Once it’s beautifully decorated, it’s time for the crucial step: chilling. Cover the cheesecake gently with cling film or pop it into an airtight container and place it in the refrigerator. It needs at least 4-6 hours to set completely, but overnight is even better. This allows all the flavours to meld together beautifully and for the cheesecake to firm up to the perfect slicing consistency.
Serving Your No-Bake Delight
After its essential chilling period, your No-Bake Banoffee Cheesecake is ready to be unveiled! Carefully remove the sides of your springform tin. You can use a pnon-alcoholic alette knife or a thin spatula to gently loosen the edges if needed. Slice into generous portions using a sharp knife that you’ve run under hot water and dried – this will give you clean, neat slices. Serve immediately and watch as your guests marvel at this simple yet spectacular dessert. It’s a guaranteed crowd-pleaser that’s surprisingly easy to make, proving that you don’t need an oven to create something truly extraordinary. Enjoy every single delicious bite!
Conclusion:
And there you have it – your delicious No-Bake Banoffee Cheesecake is ready to impress! This recipe truly shines because it delivers all the decadent flavors of a traditional banoffee pie and a creamy cheesecake without the need for an oven. It’s perfect for those hot summer days when you don’t want to turn on the heat, or anytime you’re craving a show-stopping dessert that’s surprisingly easy to make. The combination of the crunchy biscuit base, the luscious caramel, the sweet bananas, and the smooth cream cheese filling is simply irresistible.
For serving, I love to top it with a generous swirl of whipped cream, a sprinkle of chocolate shavings, and a few extra banana slices. It’s also fantastic served alongside a scoop of vanilla ice cream for an extra layer of indulgence. Don’t be afraid to get creative with variations! You could add a drizzle of chocolate sauce to the top, mix some chopped toffee bits into the cream cheese filling, or even add a touch of coffee liqueur extract to the caramel for an adult twist. Give this No-Bake Banoffee Cheesecake a try – I promise you won’t be disappointed!
Frequently Asked Questions:
Can I make this cheesecake ahead of time?
Absolutely! This No-Bake Banoffee Cheesecake is best made at least 4-6 hours, or even the day before, you plan to serve it. This allows the flavors to meld beautifully and the cheesecake to set firmly, making it even easier to slice.
What if I don’t have digestive biscuits?
No worries! You can easily substitute digestive biscuits with other plain, crum extractbly biscuits like grabeef ham crackers, shortbread, or even amaretti cookies for a slightly different flavor profile. Just ensure you have about 250g of crushed biscuits.
How long does the cheesecake last in the refrigerator?
Stored in an airtight container in the refrigerator, your No-Bake Banoffee Cheesecake should stay fresh and delicious for up to 3-4 days. However, I doubt it will last that long with how good it is!
No-Bake Banoffee Cheesecake
A delicious and easy no-bake cheesecake with layers of biscuit base, creamy filling, banana, and caramel.
Ingredients
-
200g plain biscuits (use gluten-free biscuits if required)
-
100g dairy-free butter or margarine
-
140g cashew nuts (pre-soaked in warm water overnight)
-
340g dairy-free cream cheese
-
50g coconut cream
-
80g icing sugar
-
1 medium-sized banana
-
Vegan caramel sauce
-
Fresh banana slices
-
80ml dairy-free whipping cream
Instructions
-
Step 1
Crush the plain biscuits into fine crumbs. Melt the dairy-free butter or margarine and mix it with the biscuit crumbs until well combined. Press this mixture firmly into the base of a 20cm (8-inch) springform tin. -
Step 2
Drain the soaked cashew nuts. In a blender or food processor, combine the drained cashew nuts, dairy-free cream cheese, coconut cream, and icing sugar. Blend until completely smooth and creamy. You may need to scrape down the sides a few times. -
Step 3
Pour the cashew cream mixture over the biscuit base in the springform tin. Smooth the top with a spatula. -
Step 4
Slice the medium-sized banana and arrange the slices evenly over the cream cheese layer. Drizzle generously with vegan caramel sauce. -
Step 5
Whip the dairy-free whipping cream until it forms soft peaks. Spoon or pipe the whipped cream around the edges of the cheesecake or over the top. -
Step 6
Chill the cheesecake in the refrigerator for at least 4-6 hours, or until firm. Decorate with fresh banana slices and extra vegan caramel sauce before serving.
Important Information
Nutrition Facts (Per Serving)
It is important to consider this information as approximate and not to use it as definitive health advice.
Allergy Information
Please check ingredients for potential allergens and consult a health professional if in doubt.