Easy Spinach Feta Quesadillas – Quick Recipe
Spinach and Feta Quesadillas are a weeknight wonder, a culinary hug in every bite! If you’re anything like me, you crave meals that are both incredibly satisfying and delightfully simple to prepare. This is precisely where the magic of a perfectly crafted Spinach and Feta Quesadilla truly shines. It’s the ultimate comfort food, a symphony of textures and flavors that has captured hearts (and taste buds) for a reason. The warm, melty cheese, the slightly earthy spinach, and that irresistible tangy punch of salty feta – it’s a combination that’s almost impossibly good. What makes these quesadillas so special is their inherent adaptability; they’re a blank canvas for your creativity, yet utterly delicious in their classic form. Let’s dive in and create some cheesy, spinach-feta goodness together!
Why We Love Them
A Quick and Delicious Meal
There’s something incredibly rewarding about transforming a few humble ingredients into a dish that feels both indulgent and wholesome. The quick cooking time makes these Spinach and Feta Quesadillas a lifesaver on busy evenings. They’re perfect for a light lunch, a hearty appetizer, or even a satisfying dinner when paired with your favorite salsa and sour cream. The simplicity is its superpower, allowing the vibrant flavors of the spinach and the salty feta to take center stage.
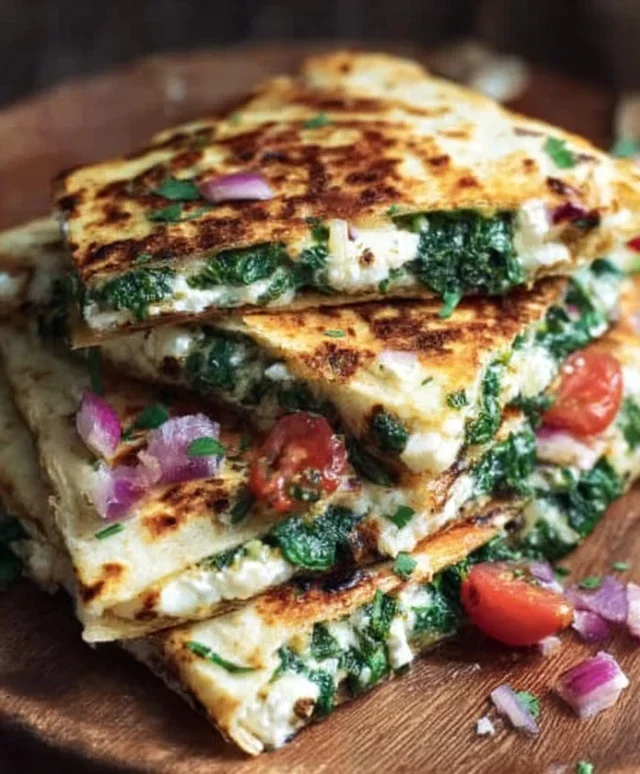
Spinach and Feta Quesadillas: A Speedy and Satisfying Meal
Sometimes, you just need a meal that’s quick, flavorful, and incredibly satisfying. That’s where these Spinach and Feta Quesadillas come in. They’re a fantastic way to use up those odds and ends in your fridge, offering a delightful combination of salty feta, earthy spinach, and savory sun-dried tomatoes. Plus, with the addition of some juicy grilled chicken, they transform into a perfectly balanced and filling meal for lunch or a light dinner. These quesadillas are so versatile; you can easily adapt them to your liking. They’re perfect for busy weeknights when you don’t have a lot of time, but still want something homemade and delicious. The best part is how quickly they come together, making them an ideal option for a last-minute meal.
Ingredients:
Cooking Instructions
Let’s get started on these simple yet delicious quesadillas! The beauty of this recipe lies in its simplicity and speed. We’ll be working in a few key phases to ensure perfect execution.
Phase 1: Preparing the Filling
Before we even think about the heat, it’s important to have our filling components ready. This makes the assembly process smooth and efficient. First, ensure your fresh spinach is thoroughly washed and then roughly chopped. Don’t worry about being too precise here; it will wilt down significantly as it cooks. If you’re using pre-washed spinach, you can skip the washing step, but a quick rinse is always a good idea to remove any lingering grit. Next, crum extractble your feta cheese if it’s not already. The saltiness of the feta is a crucial flavor element, so don’t skimp on it! Chop your sun-dried tomatoes; if they are oil-packed, you can drain them slightly before chopping, or you can embrace the extra flavor they impart. Slice your black olives if they aren’t pre-sliced. Finally, dice your cooked grilled chicken into bite-sized pieces. Having all these elements prepped and ready in separate bowls means you can assemble your quesadillas without any fuss.
Phase 2: Assembling the Quesadillas
Now for the fun part – bringin extractg all those delicious ingredients together! Lay out your four tortillas on a clean work surface. We’ll be making two quesadillas, so we’ll assemble them in pairs. On one half of each of the four tortillas, begin extract layering your ingredients. Start with a generous sprinkle of your crum extractbled feta cheese. This will act as a delicious binder for the other ingredients. Next, add a portion of the chopped fresh spinach. You might think it looks like a lot, but remember it will shrink considerably. Distribute the chopped sun-dried tomatoes evenly over the spinach. Then, add the sliced black olives. Finally, scatter the diced cooked grilled chicken over the top of everything. Don’t overstuff the tortillas, as this can make them difficult to fold and can lead to leakage during cooking. Aim for a nice, even layer of filling. Once you’ve finished filling one half of each of the four tortillas, carefully fold the empty half over the filled half, creating a semi-circle. Gently press down to help the filling settle.
Phase 3: Cooking the Quesadillas to Golden Perfection
This is where the magic happens! Heat your olive oil or butter in a large skillet or on a griddle over medium heat. You want the pan to be hot enough to sizzle, but not so hot that it burns the tortillas before the cheese has a chance to melt. Once the oil is shimmering or the butter is melted and slightly foamy, carefully place one or two of the assembled quesadillas into the skillet. Be mindful not to overcrowd the pan; it’s better to cook them in batches if necessary to ensure even browning. Let the quesadilla cook for about 3-5 minutes per side. You’ll know it’s time to flip when the underside is golden brown and slightly crispy, and you can see some of the cheese starting to melt around the edges. Using a wide spatula, carefully flip the quesadilla and cook the other side for another 3-5 minutes, or until it’s also golden brown and the cheese is fully melted and gooey. The internal temperature should be hot, and the cheese should be wonderfully stringy.
Phase 4: Repeating and Serving
Once the first batch of quesadillas is perfectly cooked, remove them from the skillet and place them on a cutting board. If you’re cooking them in batches, add a little more oil or butter to the pan if needed, and repeat the cooking process with the remaining quesadillas. Once all your quesadillas are cooked, you can let them rest for just a minute before cutting. This allows the cheese to set slightly, making them easier to slice. Using a sharp knife or a pizza cutter, cut each quesadilla into wedges. I usually find cutting them into two or three wedges works best, making them easy to pick up and dip. Serve your warm, cheesy Spinach and Feta Quesadillas immediately. They are absolutely delicious on their own, but you can also serve them with your favorite accompaniments like sour cream, salsa, guacamole, or a side of refried beans for an even more complete meal. Enjoy the delightful combination of flavors and textures!
Conclusion:
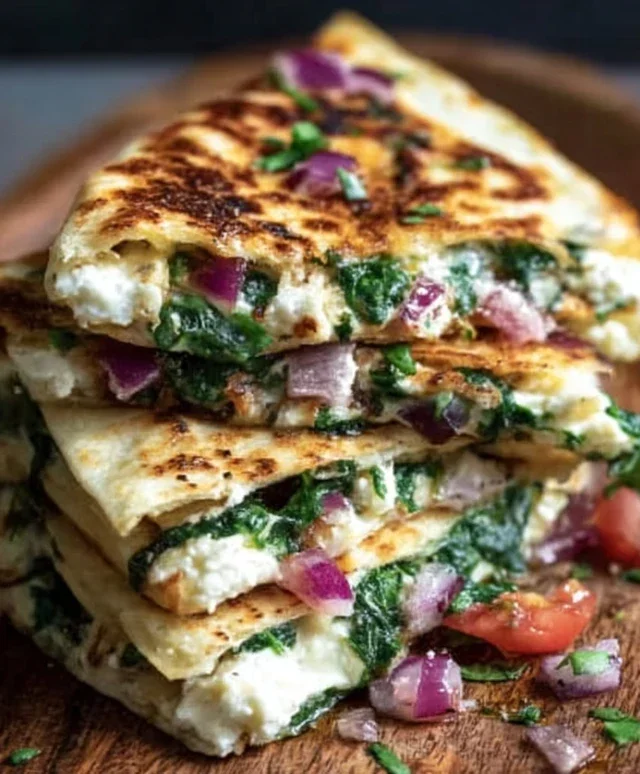
I hope you’re as excited as I am to try these Spinach and Feta Quesadillas! They are truly a fantastic option for a quick, healthy, and incredibly satisfying meal. The simplicity of the ingredients belies the depth of flavor, with the earthy spinach beautifully complementing the salty tang of the feta. They’re perfect for a weeknight dinner, a speedy lunch, or even a delightful brunch. What I love most is how versatile they are – you can easily adapt them to suit your tastes.
Serve these Spinach and Feta Quesadillas warm, perhaps with a dollop of sour cream or Greek yogurt, a side of salsa, or even a light avocado salad. For variations, consider adding caramelized onions for a touch of sweetness, a pinch of red pepper flakes for a little heat, or even some sautéed mushrooms for extra earthiness. Don’t be afraid to get creative with your fillings! I truly encourage you to give this recipe a go; I’m confident you’ll find it to be a new favorite.
Frequently Asked Questions:
Can I use a different type of cheese?
Absolutely! While feta is key to the signature flavor, you can certainly experiment. Monterey Jack, mozzarella, or a mild cheddar would also work well and offer a meltier texture. You might want to reduce the amount of feta if you add another cheese, just to maintain a good balance of flavors.
What if I don’t have fresh spinach?
Frozen spinach works perfectly fine! Make sure to thaw it completely and squeeze out as much excess water as possible before adding it to the quesadillas. This step is crucial to prevent soggy tortillas.
Can I make these ahead of time?
While quesadillas are best enjoyed fresh and hot, you can prepare the spinach and feta filling ahead of time and store it in the refrigerator. When you’re ready to eat, simply assemble and cook them. This can significantly speed up the preparation process!
Spinach and Feta Quesadillas with Chicken
Quick and flavorful quesadillas filled with fresh spinach, salty feta, sun-dried tomatoes, olives, and grilled chicken.
Ingredients
-
4 medium tortillas (flour, whole wheat, or gluten-free)
-
2 cups fresh spinach (chopped)
-
1 cup feta cheese (crumbled)
-
2 tablespoons olive oil or butter
-
1/4 cup sun-dried tomatoes (chopped)
-
1/4 cup black olives (sliced)
-
1/2 cup cooked grilled chicken (diced)
Instructions
-
Step 1
In a medium bowl, combine the chopped spinach, crumbled feta cheese, chopped sun-dried tomatoes, sliced black olives, and diced grilled chicken. -
Step 2
Lay one tortilla flat. Spread half of the spinach and feta mixture evenly over one half of the tortilla. -
Step 3
Fold the other half of the tortilla over the filling to create a half-moon shape. -
Step 4
Heat 1 tablespoon of olive oil or butter in a large skillet or on a griddle over medium heat. -
Step 5
Carefully place the folded quesadilla into the hot skillet. Cook for 3-5 minutes per side, or until golden brown and the cheese is melted. -
Step 6
Remove from skillet, cut into wedges, and repeat with the remaining tortillas and filling, adding more oil or butter as needed.
Important Information
Nutrition Facts (Per Serving)
It is important to consider this information as approximate and not to use it as definitive health advice.
Allergy Information
Please check ingredients for potential allergens and consult a health professional if in doubt.