Easy Artisan Bread Recipe- Bake Like a Pro
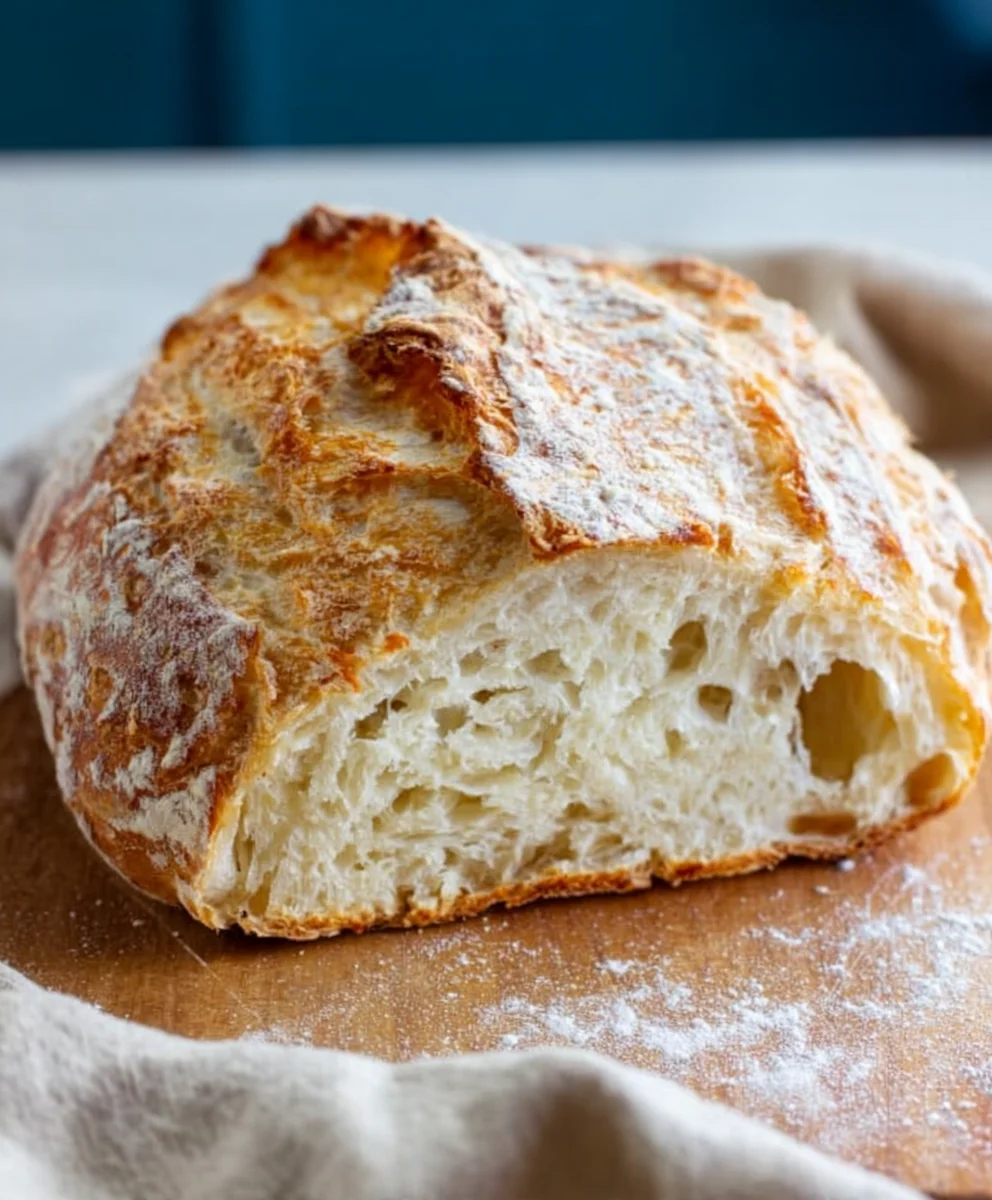
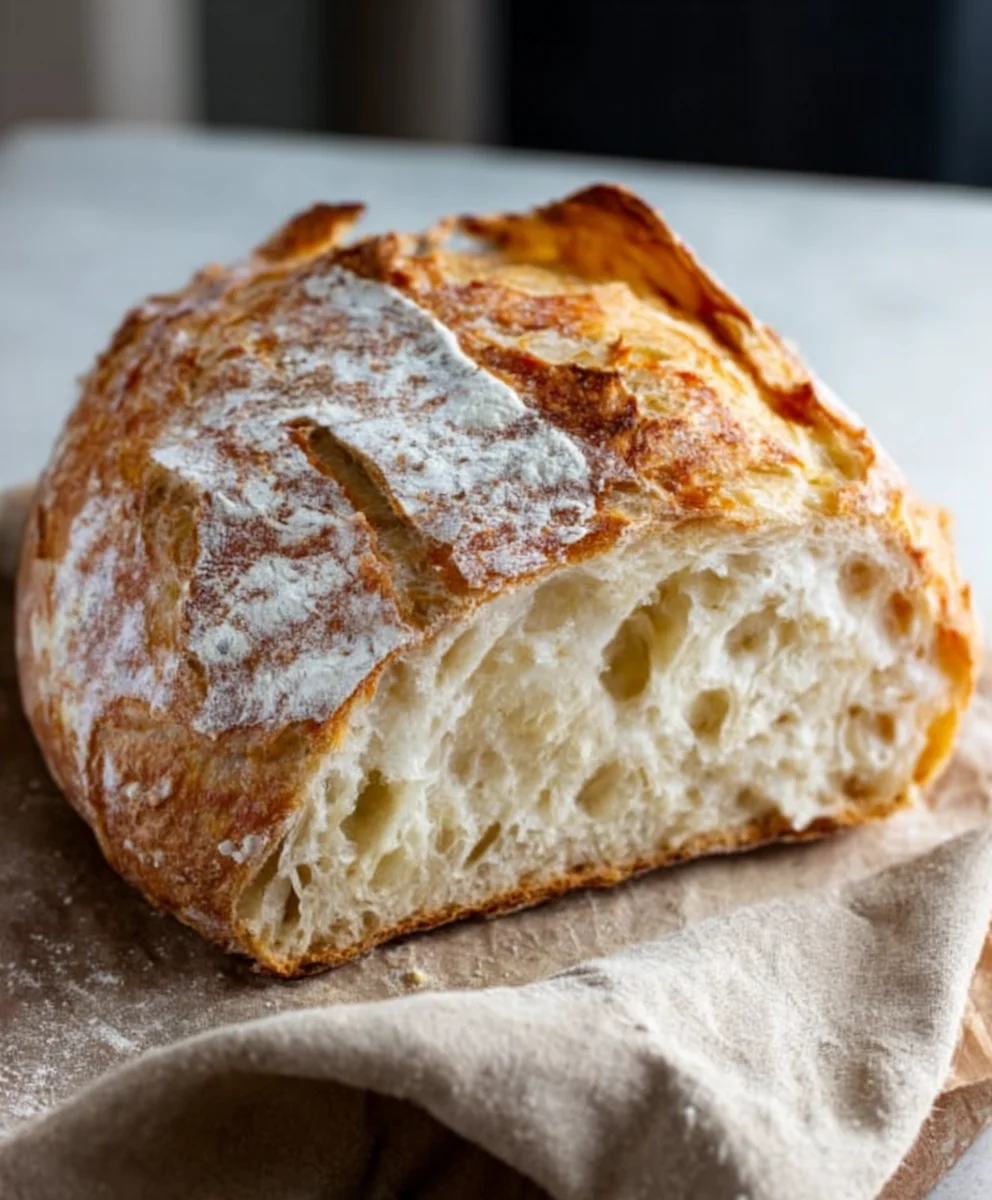
Artisan Bread Recipe – there’s something undeniably magical about it. The smell wafting from the oven, the deep golden crust, the soft, airy interior beggin extractg to be slathered with butter… it’s a sensory experience that elevates any meal from ordinary to extraordinary. If you’ve ever dreamed of recreating that bakery-fresh perfection in your own kitchen, you’re in the right place. This isn’t just any bread; this is a journey into crafting something truly special, a testament to patience and a little bit of kitchen alchemy. People adore this kind of bread because it’s not just food; it’s a labor of love, a connection to tradition, and a source of immense satisfaction. What truly sets this Artisan Bread Recipe apart is the development of a beautiful open crum extractb and a wonderfully crackly crust, achieved through a simple yet effective no-knead method that makes it accessible evegin extractor beginner bakers. Get ready to impress yourself and everyone you share it with!
Ingredients:
- 3 cups (395 grams) all-purpose flour or bread flour
- ½ tablespoon kosher salt
- ¼ ounce instant or active dry yeast packet (or 2 ¼ teaspoons)
- 1 ½ cups warm water (105°F)
Getting Started with Your Artisan Bread
Mixing the Dough: The Foundation of Flavor
This is where the magic begin extracts for our delicious artisan bread. In a large mixing bowl, combine the flour and kosher salt. Whisk them together thoroughly to ensure the salt is evenly distributed throughout the flour. This even distribution is key to achieving a consistent flavor and crum extractb structure in your final loaf. Next, add the yeast. If you are using instant yeast, you can add it directly to the dry ingredients. If you are using active dry yeast, it’s a good practice to “bloom” it first. To do this, take about ¼ cup of the warm water (set aside from your 1 ½ cups) and sprinkle the active dry yeast over its surface. Let it sit for about 5-10 minutes until it becomes frothy and bubbly. This indicates the yeast is alive and ready to work its magic. Once bloomed, add the yeast mixture to the flour and salt.
Now, it’s time to incorporate the warm water. The ideal temperature for activating yeast is between 105°F and 115°F (40°C to 46°C). Water that is too hot can kill the yeast, while water that is too cool won’t activate it sufficiently. You can test this by dipping your finger in; it should feel comfortably warm, like a baby’s bathwater. Pour the 1 ½ cups of warm water into the bowl with the dry ingredients.
Using a sturdy spoon or a dough whisk, start mixing everything together. Don’t worry about being too neat at this stage. Your goal is simply to bring all the ingredients together until no dry flour remains. The mixture will be shaggy and sticky, and that’s perfectly normal. Once it’s just combined, cover the bowl tightly with plastic wrap or a damp kitchen towel. This will prevent the dough from drying out. Let the dough rest for about 15-20 minutes. This brief resting period, known as autolyse, allows the flour to fully hydrate, making the dough easier to handle and promoting gluten development without excessive kneading.
Kneading: Developing Strength and Structure
After the initial rest, your dough should feel a bit softer and more manageable. Lightly flour a clean work surface – a countertop or a large wooden board works well. Turn the shaggy dough out onto your floured surface. Now, it’s time to knead. Kneading is crucial for developing the gluten network in the dough, which gives bread its structure and chewy texture.
To knead, use the heels of your hands to push the dough away from you, then fold it back over itself. Rotate the dough a quarter turn and repeat the process. Continue this push, fold, and turn motion for about 8-10 minutes. The dough will start out sticky and a bit unruly, but as you knead, it will become smoother, more elastic, and less sticky. You’ll know your dough is sufficiently kneaded when it passes the “windowpane test.” To perform this test, gently stretch a small piece of dough between your fingers. If you can stretch it thin enough to see light through it without it tearing, the gluten is well-developed. If it tears easily, continue kneading for a few more minutes. As you knead, try to incorporate as little extra flour as possible. Too much flour can result in a dense loaf. If the dough is sticking excessively, lightly flour your hands rather than the work surface.
First Rise: Allowing the Dough to Double
Once your dough has been properly kneaded, it’s time for its first rise, also known as bulk fermentation. Lightly oil a clean, large bowl with a neutral oil like vegetable or olive oil. This prevents the dough from sticking as it rises. Place the kneaded dough into the oiled bowl and turn it to coat all sides with the oil. This helps prevent a dry skin from forming on top.
Cover the bowl tightly again with plastic wrap or a damp kitchen towel. Place the bowl in a warm, draft-free spot to rise. An ideal place is a slightly warm oven (turned off, of course!), on top of the refrigerator, or even on a sunny windowsill. The dough needs a consistent, warm environment for the yeast to work effectively. Let the dough rise for 1 to 1 ½ hours, or until it has doubled in size. You’ll know it’s ready when it looks visibly puffier and feels light to the touch. Gently poke the dough with a floured finger; if the indentation remains, it’s ready.
Shaping the Loaf: Creating the Final Form
Once the dough has completed its first rise, it’s time to shape it into your desired loaf form. Gently punch down the dough to release the excess air. This process is called degassing and helps create a morrum extractven crumb. Turn the dough out onto a lightly floured surface. For a classic round artisan loaf, gently gather the edges of the dough towards the center and pinch them together to create tension on the surface. Then, flip the dough over so the seams are on the bottom. Cup your hands around the dough and gently rotate it on the work surface, creating a taut ball. The surface should feel smooth and slightly tight.
If you prefer a more elongated loaf (like a baguette or bâtard), you can shape it accordingly. For a bâtard, gently flatten the dough into a rough rectangle. Then, fold the top third down to the center and the bottom third up to the center, like folding a letter. Pinch the seams together. Then, starting from one end, roll the dough away from you, tucking the seam underneath as you go, to create a long, oval-shaped loaf. Be gentle but firm during shaping to maintain the air bubbles that have developed.
Second Rise and Baking: The Final Transformation
After shaping, place your loaf onto a piece of parchment paper or into a floured proofing basket (banneton). If using parchment paper, you can transfer the loaf directly onto a baking sheet later. If using a proofing basket, gently invert the loaf onto parchment paper before baking. Cover the shaped loaf loosely with plastic wrap or a damp towel. Let it rest for another 30-45 minutes. This second rise allows the dough to relax and puff up again slightly.
While the dough is on its second rise, preheat your oven to 450°F (230°C). If you have a baking stone or cast-iron Dutch oven, place it in the oven during preheating. A hot baking surface helps create a beautiful, crispy crust. Once the oven is fully preheated and the dough has had its second rise, it’s time to bake. Carefully transfer your loaf (on the parchment paper) to the hot baking stone or Dutch oven. If using a Dutch oven, you can score the top of the loaf with a sharp knife or lame (a razor blade tool for scoring bread) before placing the lid on. Scoring allows the bread to expand in a controlled way during baking. Bake for 20 minutes with the lid on (if using a Dutch oven) or in the preheated oven. After 20 minutes, remove the lid (if applicable) and continue baking for another 20-25 minutes, or until the crust is a deep golden brown and the internal temperature of the bread reaches 200-210°F (93-99°C) when measured with an instant-read thermometer. The aroma of freshly baked bread will fill your kitchen – a truly satisfying reward for your efforts. Let the bread cool completely on a wire rack before slicinrum extracto allow the crumb to set properly.
Conclusion:
And there you have it – your very own beautiful, crusty Artisan Bread Recipe! Baking this bread at home is such a rewarding experience, filling your kitchen with incredible aromas and offering a taste of pure satisfaction. The simple ingredients transform into something truly special with a bit of patience and care. I hope you’ve enjoyed this journey of creating your own homemade sourdough-style loaf. This Artisan Bread Recipe is perfect for any meal, from a simple breakfast toast with butter to serving alongside a hearty soup or stew. For an elevated touch, try serving slices brushed with olive oil and sprinkled with fresh herbs. Don’t be afraid to experiment! Feel free to add seeds, nuts, or even dried fruits to the dough for a unique twist. You can also play with different flour combinations to discover your favorite texture and flavor profile. The possibilities are endless!
Frequently Asked Questions:
Q1: My Artisan Bread Recipe didn’t rise as much as I expected. What could be wrong?
Several factors can affect rising. Ensure your yeast is active (test it in warm water with a pinch of sugar beforehand). Make sure your environment is warm enough for the dough to proof; a slightly warm oven (turned off!) can be a great spot. Over-proofing or under-proofing can also impact the final volume. It might take a few tries to get a feel for the dough’s stages.
Q2: Can I make this Artisan Bread Recipe without a Dutch oven?
Absolutely! While a Dutch oven creates excellent steam for a superior crust, you can achieve great results without one. Try placing a pan of hot water on the rack below your baking bread to create steam. You can also experiment with baking on a pizza stone or a baking steel for a crispier bottom crust.
Easy Artisan Bread Recipe- Bake Like a Pro
Learn to bake delicious, crusty artisan bread at home with this easy-to-follow recipe. Perfect for beginners looking to bake like a pro.
Ingredients
-
3 cups (395 grams) all-purpose flour or bread flour
-
½ tablespoon kosher salt
-
¼ ounce instant or active dry yeast packet (or 2 ¼ teaspoons)
-
1 ½ cups warm water (105°F)
-
Neutral oil for greasing bowl
Instructions
-
Step 1
In a large mixing bowl, combine flour and salt. Whisk well. If using active dry yeast, bloom it in a small portion of warm water for 5-10 minutes until frothy. Add yeast (bloomed or instant) to the dry ingredients. -
Step 2
Add warm water (105°F) and mix with a spoon or dough whisk until just combined and no dry flour remains. Cover the bowl tightly and let rest for 15-20 minutes (autolyse). -
Step 3
Turn the dough onto a lightly floured surface and knead for 8-10 minutes until smooth, elastic, and passes the windowpane test. Lightly flour hands if needed, avoiding too much extra flour. -
Step 4
Place kneaded dough in a lightly oiled large bowl, turning to coat. Cover tightly and let rise in a warm, draft-free spot for 1 to 1 ½ hours, or until doubled in size. -
Step 5
Gently punch down the dough to release air. Turn out onto a lightly floured surface and shape into a round or elongated loaf. Place on parchment paper or in a floured proofing basket. -
Step 6
Cover shaped loaf loosely and let rest for another 30-45 minutes. Preheat oven to 450°F (230°C), placing a baking stone or Dutch oven inside if using. -
Step 7
Carefully transfer loaf to the hot baking surface. Bake for 20 minutes. If using a Dutch oven, remove the lid. Continue baking for another 20-25 minutes, until deep golden brown and internal temperature reaches 200-210°F. -
Step 8
Cool completely on a wire rack before slicing.
Important Information
Nutrition Facts (Per Serving)
It is important to consider this information as approximate and not to use it as definitive health advice.
Allergy Information
Please check ingredients for potential allergens and consult a health professional if in doubt.