Strawberry Cheesecake Cookie Cups-Easy Sweet Treat
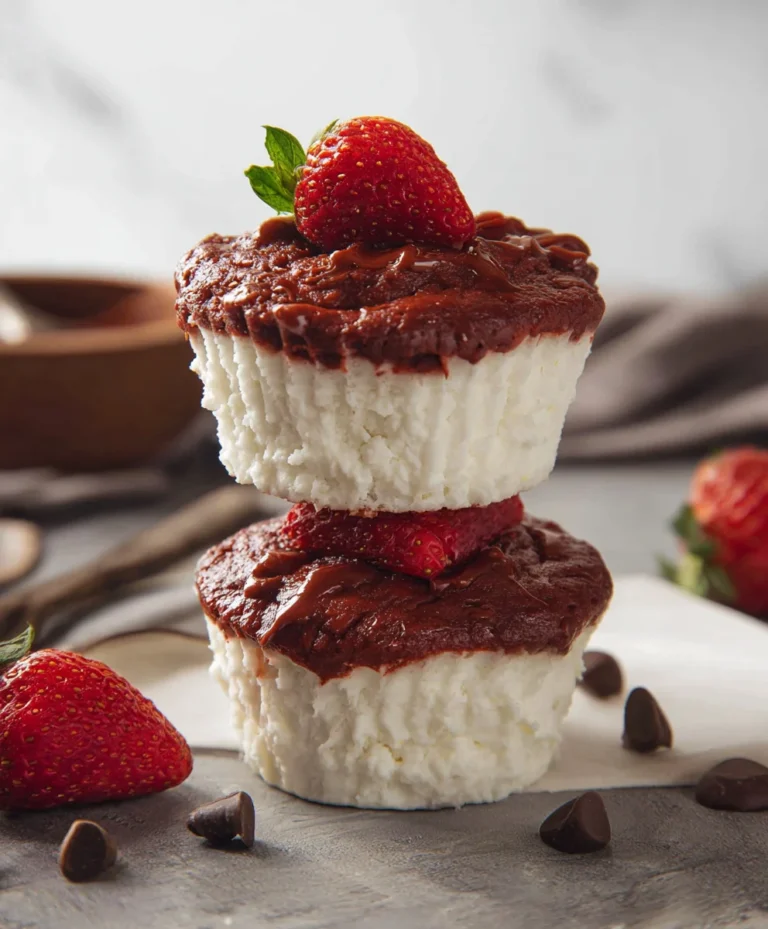
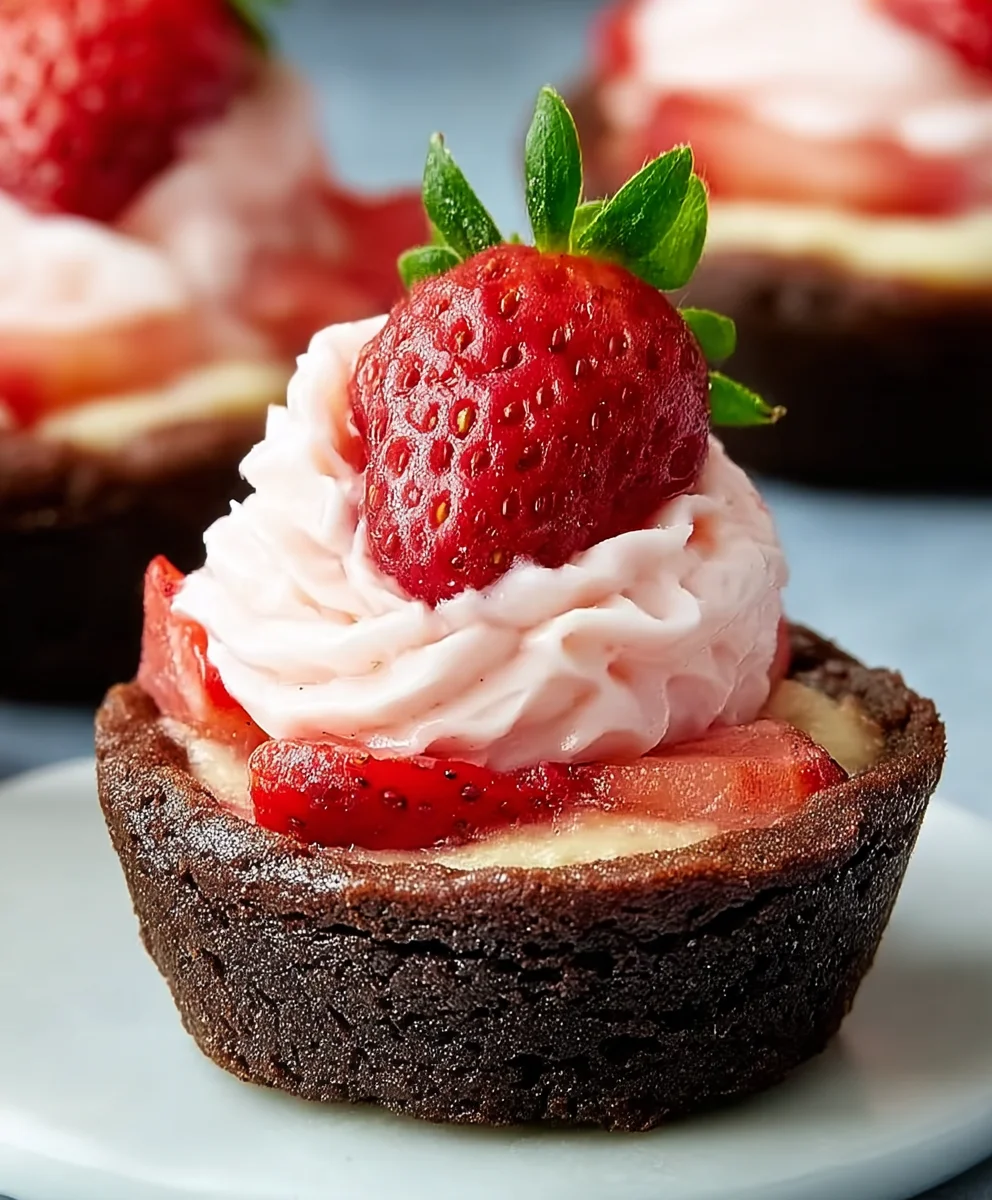
Strawberry Cheesecake Cookie Cups are the ultimate indulgence, a delightful fusion of two beloved desserts that never fails to bring a smile to everyone’s face. If you’re searching for a treat that’s both visually stunning and incredibly delicious, look no further. These little wonders capture the creamy, tangy essence of classic cheesecake within a perfectly chewy, golden-brown cookie base. What truly sets these Strawberry Cheesecake Cookie Cups apart is their ingenious format – no more fussing with springform pans or waiting for a whole cake to bake! Each cup is a miniature masterpiece, allowing for easy serving and delightful individual portions. The vibrant burst of fresh strawberries atop the smooth cream cheese filling creates a beautiful contrast, both in color and flavor, making them a showstopper for any gathering or a special weekend baking project. Get ready to impress yourself and your loved ones with this irresistible recipe!
Ingredients:
- 1 1/4 cups all-purpose flour
- 1/2 cup unsweetened cocoa powder
- 1 teaspoon baking soda
- 2 teaspoons cornstarch
- 1/2 teaspoon salt
- 3/4 cup unsalted butter, softened to room temperature
- 1 cup granulated sugar
- 1 large egg, at room temperature
- 1 teaspoon vanilla extract
- 12 ounces cream cheese, softened to room temperature
- 2 1/4 cups powdered sugar
- 5 tablespoons strawberry puree
- Fresh strawberries, for garnish
Preparing the Cookie Cups
Dry Ingredients Assembly
Begin extract by preparing your dry ingredients for the cookie cups. In a medium-sized bowl, whisk together the 1 1/4 cups of all-purpose flour, 1/2 cup of unsweetened cocoa powder, 1 teaspoon of baking soda, 2 teaspoons of cornstarch, and 1/2 teaspoon of salt. Whisking these ingredients together thoroughly ensures that the leavening agents and salt are evenly distributed throughout the flour mixture. This step is crucial for achieving a consistent texture and preventing any pockets of baking soda or salt in your final cookies. Set this bowl aside.
Creaming the Butter and Sugar
In a separate, larger mixing bowl, or the bowl of your stand mixer fitted with the paddle attachment, cream together the 3/4 cup of unsalted butter, which should be softened to room temperature for optimal creaming, and 1 cup of granulated sugar. Beat these together on medium speed until the mixture is light and fluffy, typically for about 3 to 5 minutes. Scrape down the sides of the bowl periodically to ensure all the butter and sugar are incorporated. The goal here is to incorporate air into the mixture, which will contribute to the tenderness of the cookies.
Adding Wet Ingredients and Combining
Once the butter and sugar mixture is well creamed, add the 1 large egg, which should also be at room temperature to emulsify properly with the fats, and 1 teaspoon of vanilla extract. Beat again until just combined. Gradually add the prepared dry ingredients to the wet ingredients, mixing on low speed until just combined. Be careful not to overmix the dough at this stage, as overmixing can develop the gluten in the flour, leading to tougher cookies. The dough will be thick and rich.
Baking the Cookie Cups
Preheat your oven to 350°F (175°C) and lightly grease a standard 12-cup muffin tin. Alternatively, you can use paper or silicone liners if you prefer. For each cookie cup, scoop about 2 tablespoons of dough and press it into the bottom and up the sides of each muffin cup, creating a small cavity. You can use the back of a small spoon or your fingers to help shape the cups. Bake for 10-12 minutes, or until the edges are set and slightly firm. The centers might still look a little soft, which is perfectly fine as they will continue to cook as they cool. Let the cookie cups cool in the muffin tin for about 10 minutes before carefully removing them to a wire rack to cool completely. This resting period allows them to firm up enough to be removed without breaking.
Crafting the Cream Cheese Filling
Creaming the Cream Cheese and Sugar
While the cookie cups are cooling, prepare the luscious cream cheese filling. In a clean mixing bowl, beat the 12 ounces of cream cheese, which should be softened to room temperature for a smooth texture, until it is completely smooth and creamy. Add the 2 1/4 cups of powdered sugar gradually, beating on low speed until it’s incorporated, then increase the speed to medium-high and beat until the frosting is light and fluffy. Ensure all the powdered sugar is mixed in and there are no lumps.
Infusing with Strawberry Flavor
Next, gently fold in the 5 tablespoons of strawberry puree into the cream cheese mixture. You can make your own strawberry puree by blending fresh or frozen strawberries until smooth and then passing it through a fine-mesh sieve if you prefer a seedless texture. Folding it in ensures that the beautiful pink color and delicate strawberry flavor are evenly distributed throughout the filling without overmixing, which can make the filling too thin.
Assembling and Garnishing
Filling the Cookie Cups
Once the cookie cups have completely cooled and the cream cheese filling is ready, it’s time to assemble. Spoon or pipe the strawberry cream cheese filling into each cooled cookie cup. You can use a piping bag with a star tip for a decorative finish, or simply use a spoon to fill them generously. Aim for an even distribution of filling in each cup.
The Finishing Touch
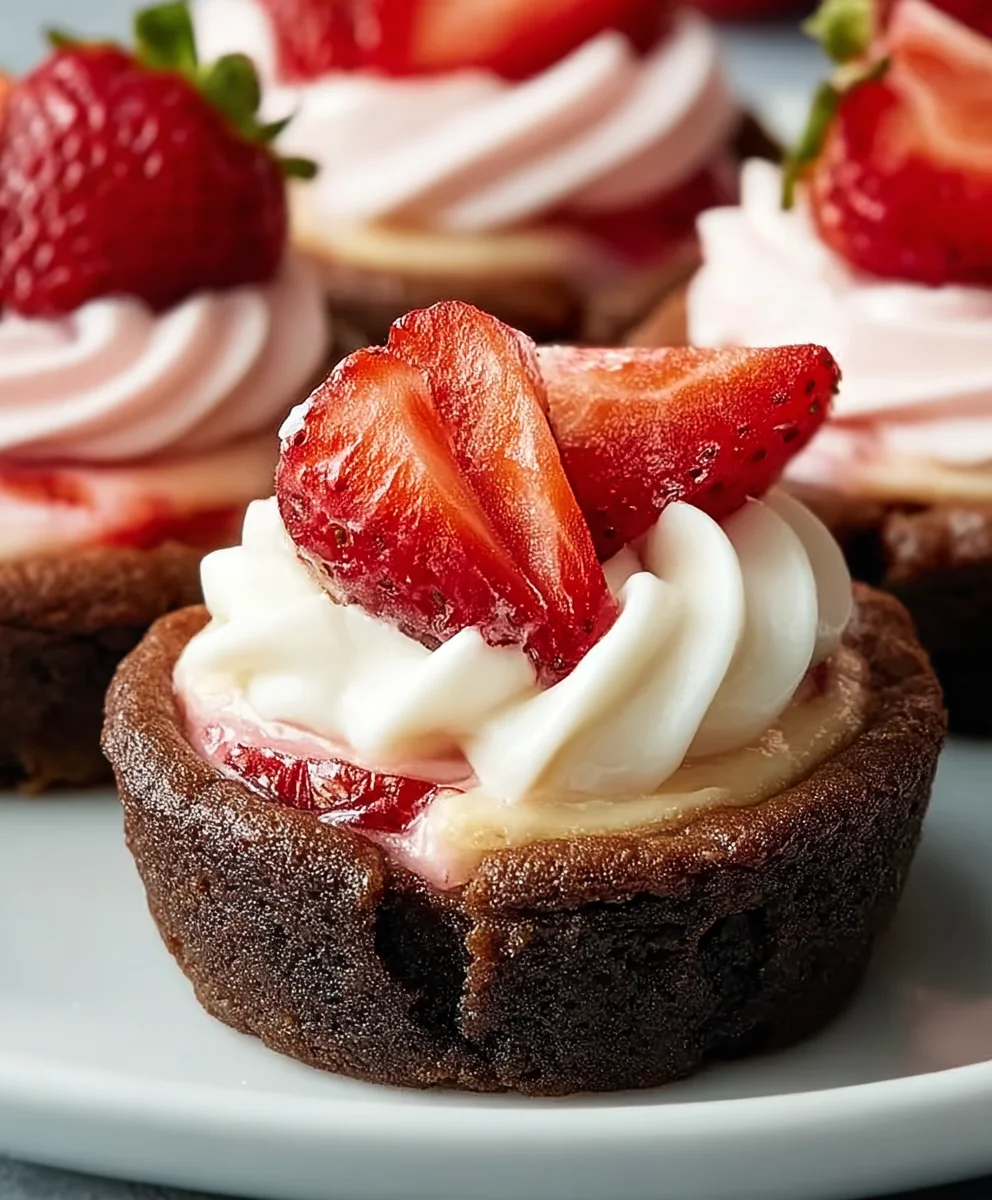
Finally, garnish each filled Strawberry Cheesecake Cookie Cup with a few slices of fresh strawberries. This not only adds a beautiful visual appeal but also provides a burst of fresh strawberry flavor that complements the creamy filling and chocolate cookie base. You can arrange the strawberry slices artfully on top of the filling. Chill the cookie cups for at least 30 minutes before serving to allow the filling to set slightly. This makes them easier to handle and enhances the overall texture. Enjoy these delightful treats!
Conclusion:
And there you have it – your very own batch of delicious Strawberry Cheesecake Cookie Cups! We’ve walked through each step together, from creating the perfect buttery cookie base to whipping up that rich, tangy cheesecake filling, and finally topping it all off with vibrant fresh strawberries. These little delights are surprisingly easy to make and are guaranteed to impress. Whether you’re baking for a special occasion, a potluck, or just a sweet afternoon treat, these Strawberry Cheesecake Cookie Cups are sure to be a hit. Don’t be afraid to experiment with the presentation; a sprinkle of lemon zest or a drizzle of white chocolate could add another layer of elegance. We hope you enjoy making and devouring these as much as we do. Happy baking!
Frequently Asked Questions:
How should I store leftover Strawberry Cheesecake Cookie Cups?
For the best texture and flavor, store any leftover Strawberry Cheesecake Cookie Cups in an airtight container in the refrigerator. They will stay fresh for up to 3-4 days. It’s a good idea to let them come to room temperature for about 15-20 minutes before serving for a softer cookie and creamier filling.
Can I make the strawberry topping ahead of time?
Yes, you can definitely prepare the strawberry topping ahead of time. Simply slice or halve your strawberries and toss them with a tablespoon of sugar and a squeeze of lemon juice. Store them in an airtight container in the refrigerator for up to 2 days. This will allow the strawberries to macerate slightly and release their delicious juices.
Are there any fruit variations I can try?
Absolutely! While strawberries are classic, these Strawberry Cheesecake Cookie Cups are wonderfully versatile. You can swap the strawberries for other fresh berries like blueberries, raspberries, or a mix of all three. Other fantastic fruit options include thinly sliced peaches, nectarines, or even a dollop of raspberry or blueberry jam swirled into the cheesecake filling before baking.
Strawberry Cheesecake Cookie Cups-Easy Sweet Treat
Delightful chocolate cookie cups filled with a luscious strawberry cream cheese frosting and topped with fresh strawberries.
Ingredients
-
1 1/4 cups all-purpose flour
-
1/2 cup unsweetened cocoa powder
-
1 teaspoon baking soda
-
2 teaspoons cornstarch
-
1/2 teaspoon salt
-
3/4 cup unsalted butter, softened
-
1 cup granulated sugar
-
1 large egg
-
1 teaspoon vanilla extract
-
12 ounces cream cheese, softened
-
2 1/4 cups powdered sugar
-
5 tablespoons strawberry puree
-
Fresh strawberries, for garnish
Instructions
-
Step 1
In a medium bowl, whisk together flour, cocoa powder, baking soda, cornstarch, and salt. Set aside. -
Step 2
In a large bowl, cream together softened butter and granulated sugar until light and fluffy. -
Step 3
Beat in the egg and vanilla extract until just combined. Gradually add the dry ingredients to the wet ingredients, mixing on low speed until just combined. Do not overmix. -
Step 4
Preheat oven to 350°F (175°C). Grease a 12-cup muffin tin. Scoop about 2 tablespoons of dough into each cup, pressing into the bottom and up the sides to form a cavity. Bake for 10-12 minutes until edges are set. -
Step 5
While cookie cups cool, beat softened cream cheese until smooth. Gradually beat in powdered sugar until light and fluffy. Gently fold in strawberry puree. -
Step 6
Once cookie cups are completely cool, spoon or pipe the strawberry cream cheese filling into each cup. -
Step 7
Garnish each cookie cup with fresh strawberry slices. Chill for at least 30 minutes before serving.
Important Information
Nutrition Facts (Per Serving)
It is important to consider this information as approximate and not to use it as definitive health advice.
Allergy Information
Please check ingredients for potential allergens and consult a health professional if in doubt.