Rainbow Shortbread Cookies- Piped- Easy Recipe
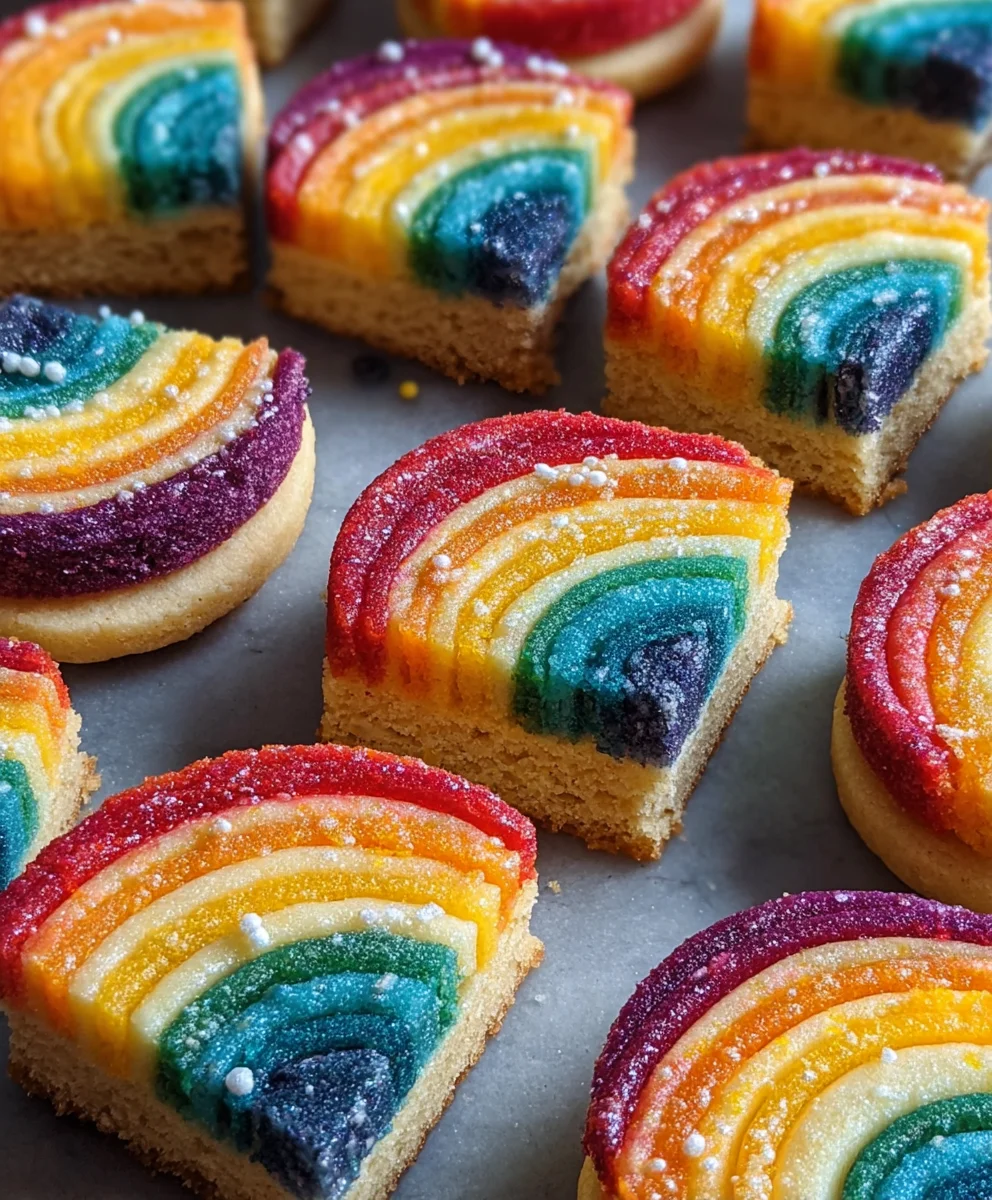
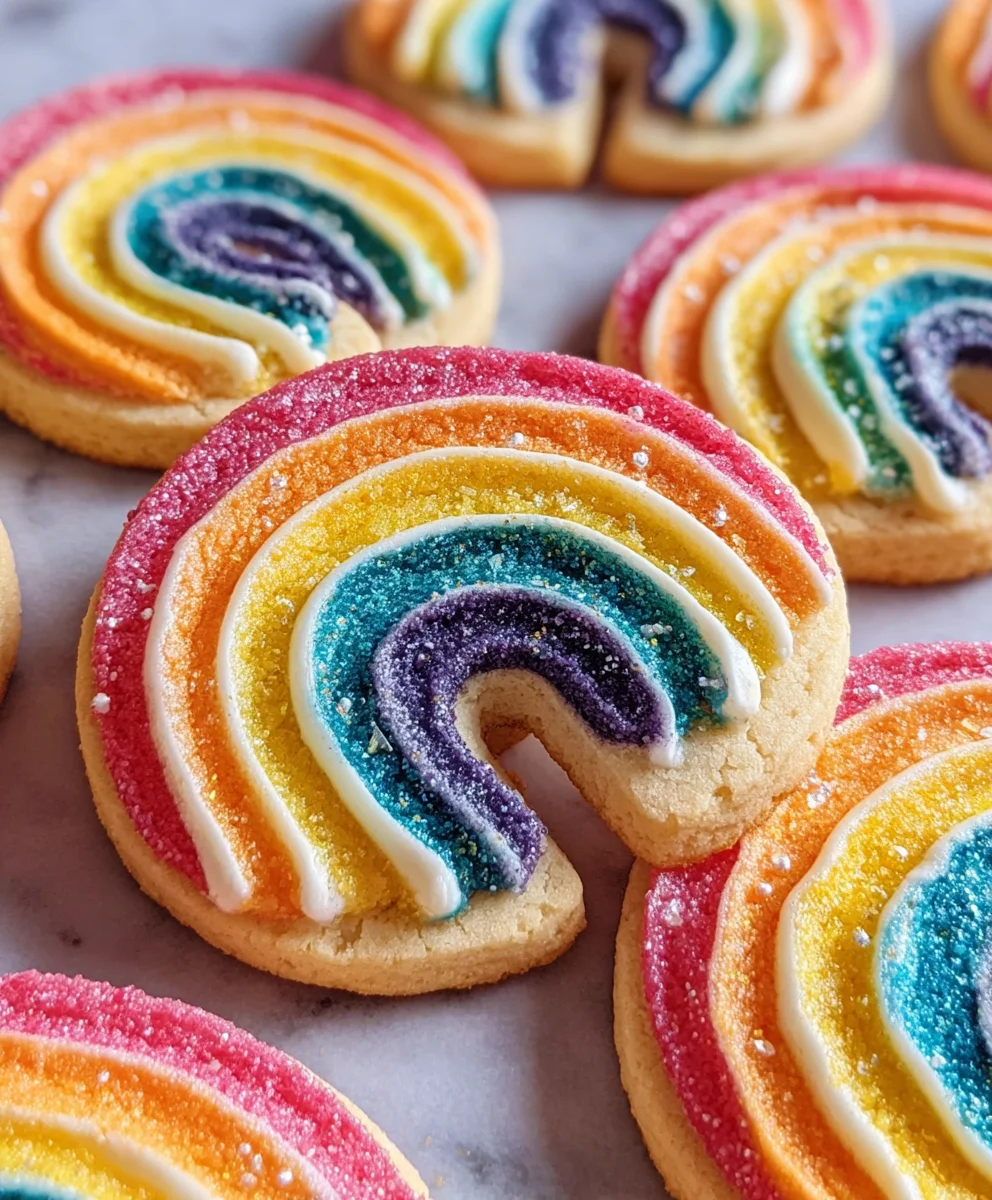
Piped Rainbow Shortbread Cookies are more than just a delightful treat; they are a vibrant explosion of flavor and artistry that will bring a smile to anyone’s face. Imagin extracte the joy of biting into a buttery, melt-in-your-mouth cookie, each one a miniature masterpiece adorned with a cheerful, swirling spectrum extract of colors. It’s this irresistible combination of classic, comforting shortbread goodness and stunning visual appeal that makes these cookies so beloved, especially for celebrations, parties, or just brightening up an ordinary afternoon. What truly sets these Piped Rainbow Shortbread Cookies apart is the satisfying crunch of the perfectly baked shortbread, a canvas for the playful, edible art you create. They’re surprisingly simple to make, yet they deliver an impact that feels incredibly special, transforming humble ingredients into something truly magical. Get ready to unleash your inner artist and create a batch that’s as fun to make as it is to devour!
Ingredients:
- 2¼ cups all-purpose flour
- ¾ cup granulated sugar
- ¼ teaspoon salt
- 1 cup unsalted butter, softened and cut into ½-inch pieces
- Gel food coloring (choose 4 vibrant colors for your rainbow effect)
- 1 cup white melting wafers (for the drizzle)
- Rainbow nonpareils (for festive decoration)
Preparing the Shortbread Dough
This recipe is all about creating beautiful, vibrant Piped Rainbow Shortbread Cookies. The key to their success lies in a well-made, pliable shortbread dough that can hold its shape when piped and bake up to a delicate, crum extractbly texture. We’ll be dividing and coloring the dough to create our rainbow effect. Start by gathering all your ingredients and making sure your butter is at the perfect softened consistency – not melted, but yielding easily to the touch. This ensures it creams properly with the sugar, forming the essential base for tender shortbread.
Step 1: Cream the Butter and Sugar
In a large mixing bowl, or the bowl of your stand mixer fitted with the paddle attachment, combine the softened unsalted butter and the granulated sugar. Cream these together on medium speed until the mixture is light and fluffy. This process can take about 3 to 5 minutes. You’ll notice the color of the butter-sugar mixture will lighten significantly, and the texture will become airy. This aeration is crucial for a tender cookie. Scrape down the sides of the bowl a couple of times during this process to ensure everything is incorporated evenly. Once you’ve achieved this fluffy consistency, add the ¼ teaspoon of salt and mix for another 30 seconds to distribute it evenly.
Step 2: Incorporate the Flour
Now, it’s time to add the all-purpose flour. Gradually add the flour to the creamed butter and sugar mixture, mixing on low speed. Be careful not to overmix at this stage, as overmixing can develop the gluten in the flour, leading to tougher cookies. Mix just until the flour is incorporated and no dry streaks remain. The dough will start to come together and will be quite firm. It might look a rum extracttle crumbly initially, but it should hold together when you squeeze a bit between your fingers. If the dough seems excessively dry and isn’t coming together at all, you can add a teaspoon of milk or water at a time, but usually, this recipe doesn’t require it if your butter was properly softened.
Step 3: Divide and Color the Dough
This is where the magic happens for our Piped Rainbow Shortbread Cookies! Divide the dough evenly into four portions. You can do this by eye, or for ultimate precision, you can weigh each portion. Place each portion into a separate small bowl. Now, take your chosen gel food colorings. Gel colors are best because they are concentrated and won’t add excess moisture to the dough. Add a few drops of one color to the first bowl of dough, a few drops of the second color to the second bowl, and so on, until all four colors are distributed. Using a spatula or your hands (gloved, if you prefer to avoid staining), knead the color into each portion of dough until it’s uniform and vibrant. Be thorough to ensure there are no streaks of white dough remaining. Once colored, gently form each colored portion into a disc, wrap them tightly in plastic wrap, and refrigerate for at least 30 minutes. This chilling step is important as it firms up the dough, making it easier to handle and pipe.
Step 4: Piping the Rainbow Cookies
Preheat your oven to 325°F (160°C). Line baking sheets with parchment paper. Now, prepare your piping bags. Fit each piping bag with a small star tip or a round tip, depending on the effect you desire. Take one disc of chilled colored dough and place it into a piping bag. You can use separate piping bags for each color, or you can rinse and dry a bag between colors. Begin extract piping small, dollop-like shapes, or thin lines, onto the prepared baking sheets. For a rainbow effect, you can pipe concentric circles of different colors, or alternating colored dots. Don’t worry too much about perfection; rustic charm is part of the appeal. Ensure there’s a little space between each cookie as they will expand slightly during baking. You can also experiment with layering colors by piping a base of one color and then adding smaller dots or swirls of another color on top while the base is still soft. If you find the dough is too stiff to pipe, let it sit at room temperature for a few minutes, but avoid letting it get too soft.
Step 5: Baking and Decorating
Bake the Piped Rainbow Shortbread Cookies for 10-14 minutes, or until the edges are lightly golden brown. The exact baking time will depend on the size and thickness of your piped cookies. Keep a close eye on them, as shortbread can go from perfectly baked to overdone very quickly. Once baked, let the cookies cool on the baking sheet for a few minutes before carefully transferring them to a wire rack to cool completely. While the cookies are cooling, prepare your white melting wafers for drizzling. Place the white melting wafers in a microwave-safe bowl and microwave in 30-second intervals, stirring between each interval, until smooth and melted. Be careful not to overheat them. Once the cookies are completely cool, dip a fork into the melted white chocolate and drizzle it over the cookies in a zigzag pattern. Immediately sprinkle the rainbow nonpareils over the wet chocolate drizzle. The nonpareils will stick to the melted white chocolate, adding a final flourish of color and sparkle. Let the chocolate set completely before storing the cookies in an airtight container.
Conclusion:
And there you have it – the delightful and surprisingly achievable recipe for Piped Rainbow Shortbread Cookies! We’ve journeyed through the simple steps of creating buttery, tender shortbread, infusing it with vibrant colors, and finally, artfully piping these little gems. The result is a truly stunning treat that’s as pleasing to the eye as it is to the palate. These Piped Rainbow Shortbread Cookies are perfect for any occasion, from birthdays and holidays to just brightening up an ordinary afternoon.
For serving, imagin extracte a platter of these colorful cookies at a tea party, accompanying a cup of your favorite brew, or as a whimsical addition to a dessert table. They also make fantastic edible gifts that are sure to impress! Feel free to experiment with different piping tip shapes to add even more flair. Don’t be discouraged if your first attempt at piping isn’t perfect; practice makes perfect, and even slightly imperfect swirls will be delicious.
Frequently Asked Questions:
Q1: Can I make the dough ahead of time?
Absolutely! The dough for Piped Rainbow Shortbread Cookies can be made a day or two in advance and stored, well-wrapped, in the refrigerator. This can actually make the dough firmer and easier to pipe. Just let it soften slightly at room temperature beforgin extractou begin piping.
Q2: What kind of food coloring works best?
Gel food coloring is highly recommended for achieving vibrant colors in your Piped Rainbow Shortbread Cookies without altering the dough’s consistency. Liquid food coloring can add too much moisture, potentially making the dough sticky and harder to pipe. Start with a small amount and add more gradually to reach your desired shades.
Rainbow Shortbread Cookies – Piped – Easy Recipe
Easy to make piped rainbow shortbread cookies with a vibrant, colorful design and a delicate, crumbly texture, finished with a white chocolate drizzle and festive nonpareils.
Ingredients
-
2¼ cups all-purpose flour
-
¾ cup granulated sugar
-
¼ teaspoon salt
-
1 cup unsalted butter, softened and cut into ½-inch pieces
-
Gel food coloring (choose 4 vibrant colors for your rainbow effect)
-
1 cup white melting wafers
-
Rainbow nonpareils
Instructions
-
Step 1
In a large mixing bowl, cream the softened unsalted butter and granulated sugar on medium speed until light and fluffy, about 3-5 minutes. Add the salt and mix for another 30 seconds. -
Step 2
Gradually add the all-purpose flour to the creamed mixture on low speed, mixing just until incorporated. Avoid overmixing. The dough should be firm but hold together when squeezed. -
Step 3
Divide the dough evenly into four portions. Place each portion in a separate bowl. Add a few drops of gel food coloring to each portion and knead until the color is uniform and vibrant. Form each colored portion into a disc, wrap in plastic wrap, and refrigerate for at least 30 minutes. -
Step 4
Preheat your oven to 325°F (160°C). Line baking sheets with parchment paper. Fit piping bags with desired tips. Place one chilled colored dough disc into a piping bag and pipe small shapes or lines onto the prepared baking sheets, leaving space between cookies. -
Step 5
Bake for 10-14 minutes, or until the edges are lightly golden brown. Let cool on the baking sheet for a few minutes before transferring to a wire rack to cool completely. -
Step 6
Melt white melting wafers in a microwave-safe bowl in 30-second intervals, stirring until smooth. Drizzle the melted white chocolate over the completely cooled cookies in a zigzag pattern. Immediately sprinkle with rainbow nonpareils. Let the chocolate set completely.
Important Information
Nutrition Facts (Per Serving)
It is important to consider this information as approximate and not to use it as definitive health advice.
Allergy Information
Please check ingredients for potential allergens and consult a health professional if in doubt.