Rainbow Doughnuts- Deliciously Filled Treats
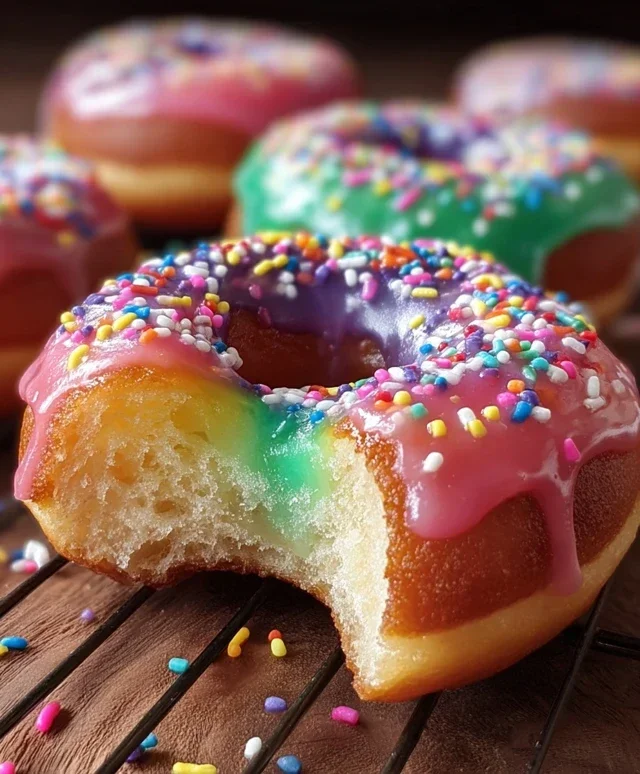
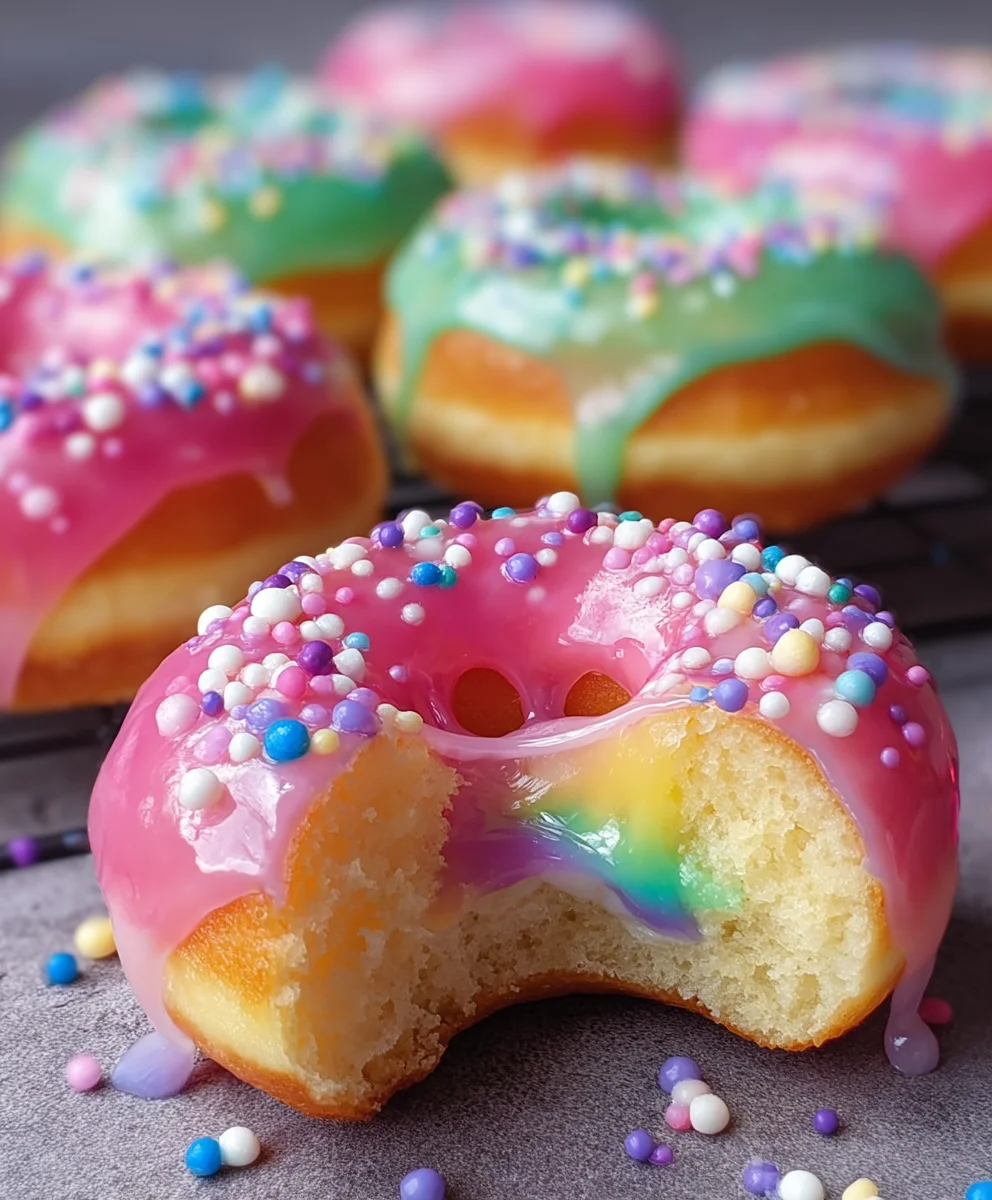
Rainbow-Filled Doughnuts are more than just a sweet treat; they’re a vibrant burst of joy on a plate, a whimsical escape from the ordinary. Imagin extracte biting into a fluffy, perfectly fried doughnut, only to discover a luscious, colorful surprise hidden within. That’s the magic of these Rainbow-Filled Doughnuts! People adore them not only for their dazzling visual appeal, which instantly brightens any occasion, but also for the delightful contrast between the crisp exterior and the creamy, fruit-infused filling. What truly makes this recipe special is the way we achieve that stunning rainbow effect using natural ingredients, ensuring every bite is as delicious as it is beautiful. Get ready to bake your way to a little slice of edible happiness that will have everyone smiling!
Ingredients:
- 2 tablespoons active dry yeast
- ½ cup warm water (105-110°F)
- 1 teaspoon granulated sugar (for yeast activation)
- 2½ cups all-purpose flour, plus more for dusting
- ¼ cup granulated sugar
- 2 large eggs, at room temperature
- 2 tablespoons unsalted butter, softened to room temperature
- 2 teaspoons salt
- Canola oil, for frying
- 1½ cups confectioner’s sugar
- ½ cup whipping cream
- Rainbow sprinkles, for decoration
- 2½ cups vanilla pudding
- Rainbow food coloring (red, orange, yellow, green, blue, purple)
Dough Preparation
Activating the Yeast
The first step in creating our vibrant Rainbow-Filled Doughnuts is to wake up our yeast. In a small bowl, combine the warm water with the 1 teaspoon of granulated sugar and the active dry yeast. Give it a gentle stir to ensure the sugar dissolves. Let this mixture sit undisturbed for about 5 to 10 minutes. You’ll know the yeast is alive and ready when it becomes foamy and bubbly on the surface, looking like a miniature yeast spa. This activation is crucial for a light and airy doughnut texture. If you don’t see any foam, your yeast might be old, and it’s best to start with a fresh packet.
Mixing the Dough
Once your yeast is happily frothing, it’s time to bring everything together. In a large mixing bowl, or the bowl of your stand mixer fitted with a dough hook, combine the 2½ cups of all-purpose flour, the ¼ cup of granulated sugar, and the salt. Give these dry ingredients a quick whisk to distribute the salt evenly. Now, pour in the activated yeast mixture, the two large eggs, and the softened butter.
Kneading the Dough
Begin extract mixing the ingredients on a low speed until they just start to come together into a shaggy dough. If you’re using a stand mixer, increase the speed to medium-low and let it knead for about 8 to 10 minutes. If you’re kneading by hand on a lightly floured surface, it will take a bit longer, perhaps 10 to 12 minutes. You’re looking for a smooth, elastic dough that pulls away cleanly from the sides of the bowl. It should feel slightly tacky but not overly sticky. If it feels too wet, add a tablespoon of flour at a time. If it seems too dry, add a teaspoon of water. Proper kneading develops the gluten, which is essential for that perfect doughnut chew.
First Rise and Shaping
First Proofing
Lightly grease a clean bowl with a little oil or cooking spray. Place the kneaded dough into the greased bowl, turning it to coat all sides. Cover the bowl tightly with plastic wrap or a damp kitchen towel. Find a warm, draft-free spot in your kitchen for the dough to rise. This could be on top of your refrigerator, in a slightly warmed (but turned off!) oven, or simply in a cozy corner. Allow the dough to rise for 1 to 1.5 hours, or until it has doubled in size. This slow, steady rise allows the yeast to work its magic, creating those desirable airy pockets.
Shaping the Doughnuts
Once your dough has impressively doubled, gently punch it down to release the air. Turn the dough out onto a lightly floured surface. With a rolling pin, roll the dough out to about ½-inch thickness. Now comes the fun part of shaping! You can use a doughnut cutter for classic rings, or simply a round biscuit cutter and then a smaller one for the center hole. If you don’t have cutters, two glasses of different sizes will work perfectly. Carefully transfer the shaped doughnuts to baking sheets lined with parchment paper, ensuring they have a little space between them. Cover them loosely with plastic wrap and let them rest for another 20 to 30 minutes. This second, shorter rise will ensure they puff up beautifully when they hit the hot oil.
Frying and Filling
Frying to Golden Perfection
It’s time to bring our doughnuts to life with a golden fry! In a deep, heavy-bottomed pot or a Dutch oven, pour enough canola oil to reach a depth of about 3 inches. Heat the oil over medium heat to a temperature of 350°F (175°C). It’s important to maintain this temperature for even cooking. You can test if the oil is ready by dropping a small piece of dough into it; it should sizzle immediately and float to the surface. Carefully, using a slotted spoon or spider strainer, place a few doughnuts into the hot oil at a time, making sure not to overcrowd the pot. Fry them for about 1 to 2 minutes per side, until they are a beautiful golden brown. Remove them from the oil and place them on a wire rack set over paper towels to drain any excess oil.
Glazing and Decorating
Crafting the Vibrant Rainbow Glaze
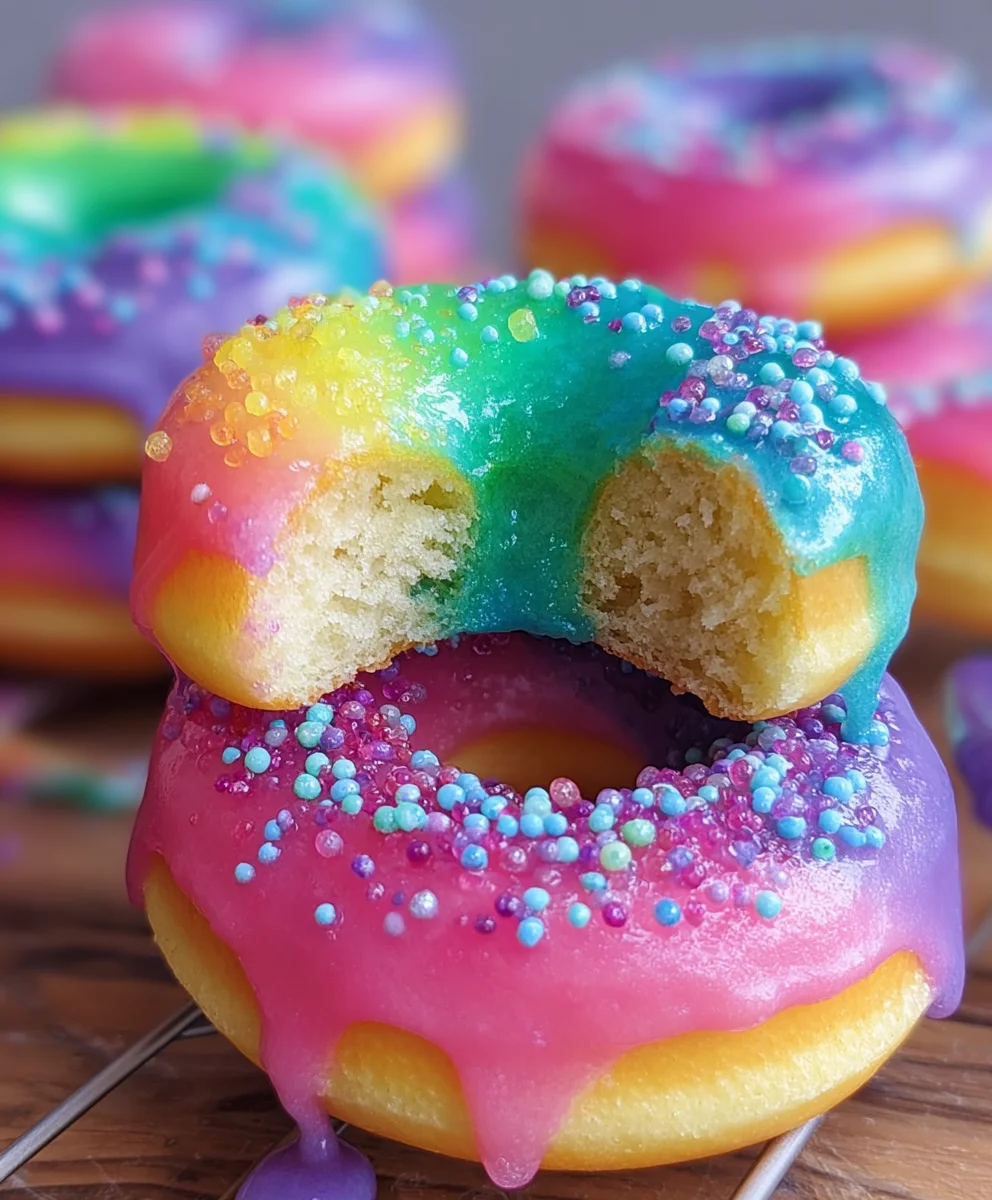
While the doughnuts cool slightly, let’s prepare our dazzling glaze. In a medium bowl, whisk together the 1½ cups of confectioner’s sugar and ½ cup of whipping cream until you have a smooth, pourable glaze. If it’s too thick, add a teaspoon of cream or milk at a time until you reach your desired consistency. If it’s too thin, add a little more confectioner’s sugar. Now for the rainbow magic! Divide this base glaze into six small bowls. Add a few drops of each rainbow food coloring – red, orange, yellow, green, blue, and purple – to their respective bowls, stirring until each color is vibrant.
Filling with Vanilla Pudding
This is where the “filled” part of our Rainbow-Filled Doughnuts truly shines! We’re going to use the luscious vanilla pudding as our filling. You can use a piping bag fitted with a long, narrow tip or a simple zip-top bag with a corner snipped off. Gently insert the tip into the side of each doughnut, or through the bottom, and carefully fill it with the vanilla pudding. Don’t overfill, or it might burst out!
Assembling the Rainbow Masterpieces
Now, let’s bring it all together. Take your slightly cooled, fried doughnuts. You can either dip the tops into the individual colored glazes, or drizzle them artfully. For an extra burst of color and texture, immediately after glazing, generously sprinkle the doughnuts with the rainbow sprinkles while the glaze is still wet. This ensures the sprinkles stick beautifully. Allow the glaze to set for a few minutes before serving. The combination of the fluffy doughnut, the creamy vanilla filling, the sweet glaze, and the festive sprinkles creates a truly delightful treat that’s as beautiful to look at as it is to eat. Enjoy your homemade Rainbow-Filled Doughnuts!
Conclusion:
And there you have it! Your very own batch of beautiful Rainbow-Filled Doughnuts are ready to be enjoyed. We hope you had as much fun making these vibrant treats as we did sharing the recipe. The joy of these Rainbow-Filled Doughnuts comes not only from their dazzling appearance but also from their delightfully sweet and creamy filling. They truly are a feast for the eyes and the palate.
To serve, these Rainbow-Filled Doughnuts are fantastic on their own, but they also pair wonderfully with a glass of cold milk or a hot cup of coffee. For an extra special touch, consider dusting them with a little powdered sugar or serving them alongside fresh berries.
Don’t be afraid to experiment with the filling! While the recipe calls for a classic vanilla cream, feel free to try different flavor extracts like strawberry, lemon, or even a hint of chocolate. You can also get creative with the colors used in the dough – perhaps use food coloring to create pastel hues or even ombre effects.
We encourage you to bake these Rainbow-Filled Doughnuts for any occasion, from birthdays to casual weekend gatherings. The smiles they bring to faces are absolutely worth the effort. Happy baking!
Frequently Asked Questions:
Can I make the dough ahead of time?
Yes, you can prepare the dough for your Rainbow-Filled Doughnuts up to 24 hours in advance. Once it has risen and been shaped, you can cover it tightly and refrigerate it. Allow it to come to room temperature for about 30-60 minutes before frying.
What if I don’t have a piping bag for the filling?
No problem! If you don’t have a piping bag, you can use a sturdy zip-top bag. Fill it with your chosen cream, snip a small corner off, and use that to inject the filling into the doughnuts. Alternatively, you can carefully slice the doughnut in half horizontally and spoon the filling onto the bottom half before replacing the top.
How should I store leftover Rainbow-Filled Doughnuts?
It’s best to store any leftover Rainbow-Filled Doughnuts in an airtight container at room temperature for up to two days. They are most enjoyable when fresh, so we recommend eating them within that timeframe. If you need to store them longer, refrigeration is an option, but they might become a bit firmer.
Rainbow Doughnuts- Deliciously Filled Treats
Vibrant, fluffy doughnuts filled with creamy vanilla pudding and adorned with a dazzling rainbow glaze and sprinkles. A delightful treat for any occasion.
Ingredients
-
2 tablespoons active dry yeast
-
½ cup warm water (105-110°F)
-
1 teaspoon granulated sugar
-
2½ cups all-purpose flour, plus more for dusting
-
¼ cup granulated sugar
-
2 large eggs, at room temperature
-
2 tablespoons unsalted butter, softened
-
2 teaspoons salt
-
Canola oil, for frying
-
1½ cups confectioner’s sugar
-
½ cup whipping cream
-
Rainbow sprinkles, for decoration
-
2½ cups vanilla pudding
-
Rainbow food coloring (red, orange, yellow, green, blue, purple)
Instructions
-
Step 1
Activate the yeast by combining it with warm water and 1 teaspoon of sugar in a small bowl. Let sit for 5-10 minutes until foamy. -
Step 2
In a large bowl, combine flour, ¼ cup sugar, and salt. Add the activated yeast mixture, eggs, and softened butter. Mix until a shaggy dough forms. -
Step 3
Knead the dough on a low speed for 8-10 minutes (stand mixer) or 10-12 minutes (by hand) until smooth and elastic. Place in a greased bowl, cover, and let rise in a warm place for 1-1.5 hours until doubled. -
Step 4
Punch down the dough, roll to ½-inch thickness, and cut into doughnut shapes. Place on parchment-lined baking sheets, cover, and let rest for 20-30 minutes. -
Step 5
Heat canola oil to 350°F (175°C) in a deep pot. Fry doughnuts for 1-2 minutes per side until golden brown. Drain on a wire rack. -
Step 6
Prepare the glaze by whisking confectioner’s sugar and whipping cream until smooth. Divide into six bowls and tint each with a different rainbow food coloring. -
Step 7
Fill each doughnut with vanilla pudding using a piping bag or zip-top bag. -
Step 8
Dip or drizzle doughnuts with colored glazes and immediately decorate with rainbow sprinkles while the glaze is wet. Let the glaze set before serving.
Important Information
Nutrition Facts (Per Serving)
It is important to consider this information as approximate and not to use it as definitive health advice.
Allergy Information
Please check ingredients for potential allergens and consult a health professional if in doubt.