Easy Slam Dunk Basketball Cookies – March Madness Recipe
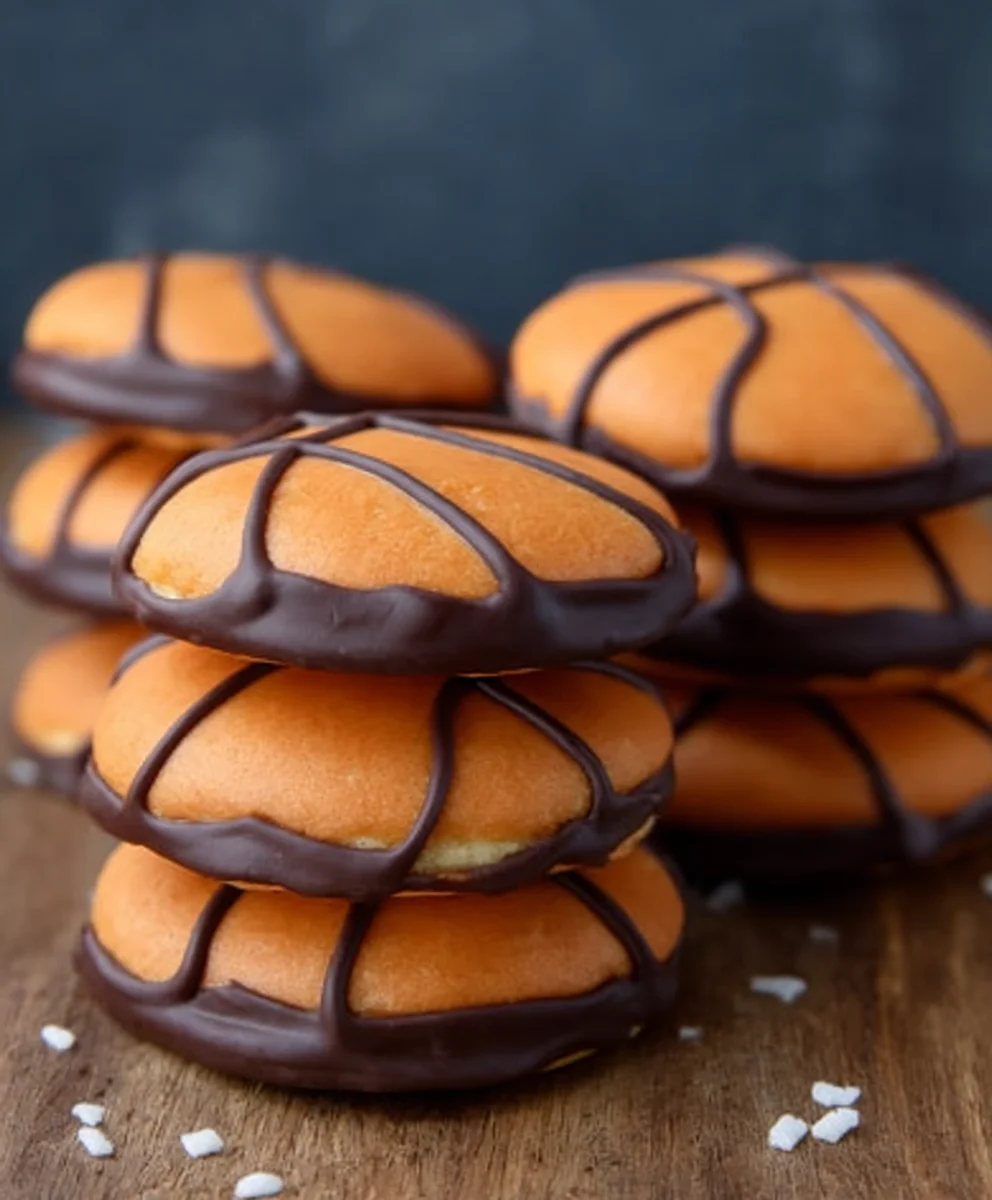
March Madness Recipe: Easy Slam Dunk Basketball Cookies are your ultimate game-day treat! As the intensity of the tournament builds and brackets are meticulously filled, what better way to fuel your fandom than with a batch of these incredibly fun and delicious cookies? They’re more than just a sweet snack; they’re a symbol of the excitement, the nail-biting finishes, and the sheer joy of college basketball season. Everyone loves a cookie that’s not only tasty but also visually striking, and these basketball-themed delights are guaranteed to be a slam dunk with fans of all ages. What truly makes these cookies special is their simplicity. You don’t need to be a master baker to achieve impressive results, and the decorative element is so straightforward, it’s an ideal activity for kids and adults to tackle together as you cheer on your favorite teams. Get ready to score big with this essential March Madness recipe!
Ingredients:
- 12 oz. Wilton orange candy melts
- ¼ C. Wilton black candy melts
- 1 package of chocolate sandwich cookies
- Small sandwich bag
- Scissors
Preparation: The Doughy Fundamentals
Before we even think about dipping, let’s get our workspace ready. This is where the magic happens, so a clean and organized area will make the process much smoother. You’ll want to have your chocolate sandwich cookies laid out on a parchment-lined baking sheet. Parchment paper is your best friend here, as it prevents sticking and makes for easy cleanup later. Grab your small sandwich bag – this is where we’ll prepare our black candy melt “paint” for the basketball details.
Phase 1: Melting the Orange Canvas
First things first, we need to melt our orange candy melts. These will form the vibrant orange coating for our basketball cookies. You have a couple of great options for melting. The microwave method is quick and efficient. Place the 12 oz. of orange candy melts in a microwave-safe bowl. Heat on 50% power for 30-second intervals, stirring well after each interval. It’s crucial to stir even if you don’t see immediate melting, as the residual heat will continue to melt the wafers. Be patient; overheating can cause the candy melts to seize up and become unusable. Another excellent method is using a double boiler. Fill the bottom pot of your double boiler with about an inch of water and bring it to a gentle simmer. Place the orange candy melts in the top bowl, ensuring the bottom of the bowl does not touch the water. Stir continuously until the candy melts are smooth and completely liquid. Once melted, set the bowl aside.
Phase 2: Dunking the Cookies
Now it’s time for the fun part – coating the cookies! Take one chocolate sandwich cookie at a time. You can keep it whole or, for a more manageable bite, break it in half. Dip the cookie into the melted orange candy melts. Use a fork or a dipping tool to ensure the entire cookie is covered. Gently lift the cookie out and tap the fork against the side of the bowl to allow excess candy melt to drip off. This is important for a clean, professional look. If you’re working with halves, dip the side you want to be the “front” of your basketball. Place the dipped cookie back onto the parchment-lined baking sheet. Repeat this process with all your chocolate sandwich cookies, ensuring they have a nice, even coat of orange. If the orange candy melts start to thicken while you’re working, you can gently reheat them for 15-20 second intervals in the microwave, stirring after each.
Phase 3: Creating the Basketball Lines
While our orange-coated cookies are setting up, let’s prepare our black candy melt details. Take your ¼ C. of Wilton black candy melts and place them in the small sandwich bag. Melt these using the same microwave or double boiler method as described for the orange candy melts, being extra careful as smaller amounts can melt more quickly. Once the black candy melts are smooth and fully melted, remove them from the heat and let them cool slightly. You want them to be fluid enough to pipe, but not so hot that they melt the orange coating. Once slightly cooled, snip a very tiny corner off the sandwich bag with your scissors. This will create a fine tip for drawing the basketball lines.
Phase 4: The Final Touchdown – Decorating
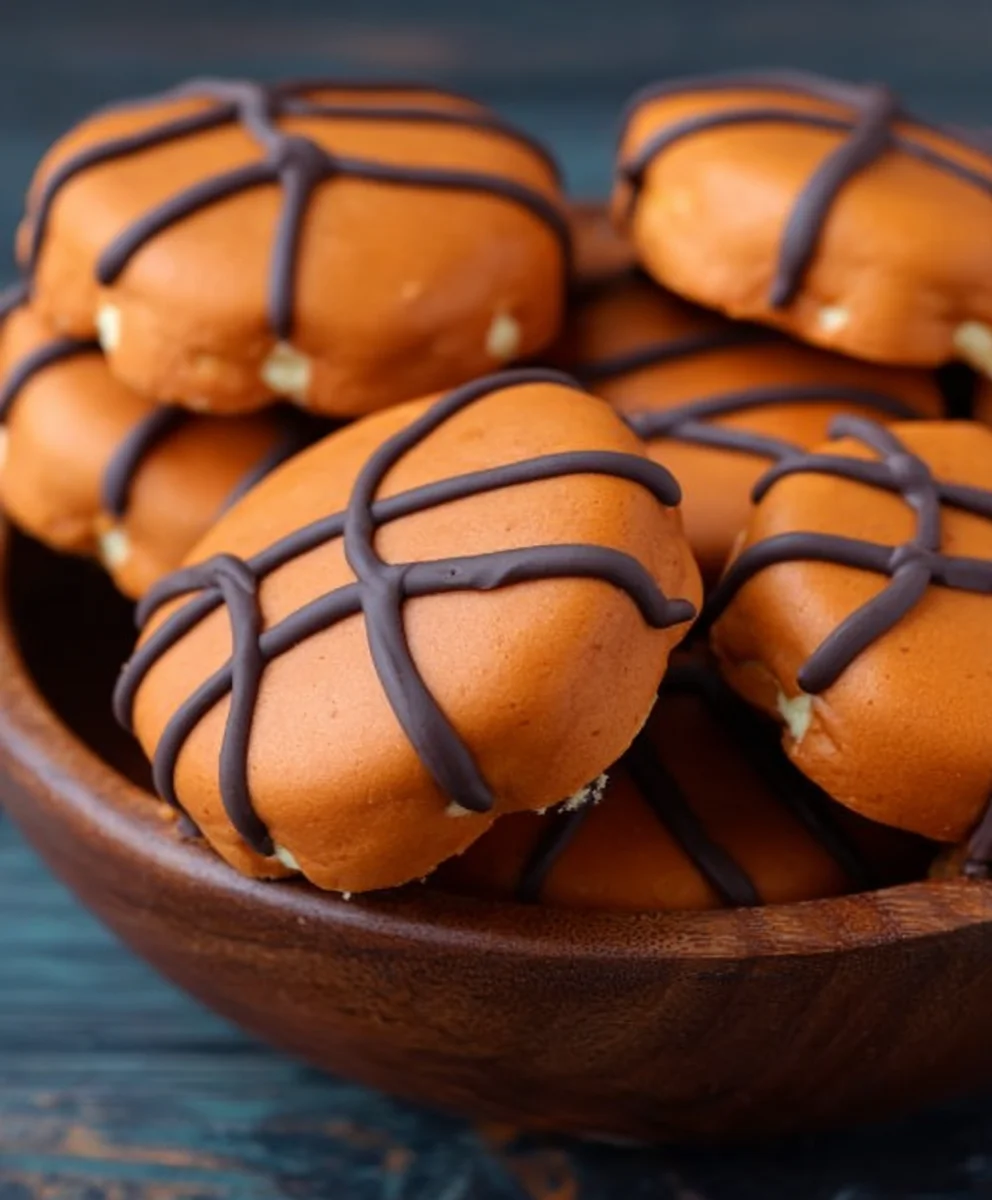
This is where your basketball cookies transform into edible works of art. Once the orange candy melt coating on your cookies has begun to set (it doesn’t need to be completely hard yet), it’s time to add the black lines. Gently squeeze the sandwich bag with the melted black candy melts. Carefully pipe a curved line across the center of the cookie to represent the natural curve of a basketball. Then, add two short, perpendicular lines extending from this center line to create the classic basketball seams. If you make a mistake, don’t worry! You can gently wipe away the line with a toothpick and try again. The key here is a light touch. For even more detail, you can add a small dot or two on either side of the main curve to simulate the texture of a basketball. Work relatively quickly once you start piping, as the orange coating will continue to harden.
Setting and Serving: The Cbeef hampionship Round
Allow your decorated basketball cookies to set completely on the parchment-lined baking sheet. This can take anywhere from 30 minutes to an hour, depending on the temperature of your kitchen. You can speed up the process slightly by placing the baking sheet in the refrigerator for about 10-15 minutes, but be mindful of condensation if you do. Once fully set, they are ready to be enjoyed! These cookies are perfect for any March Madness viewing party, sports-themed get-together, or just as a fun afternoon treat. They store well in an airtight container at room temperature for up to a week, though they are undoubtedly best enjoyed fresh.
Conclusion:
There you have it – the ultimate March Madness Recipe: Easy Slam Dunk Basketball Cookies! These delightful cookies are not only incredibly simple to whip up, making them perfect for even novice bakers, but they also capture the spirit of the tournament with their fun basketball theme. They’re a surefire crowd-pleaser, whether you’re hosting a watch party or just craving a sweet treat during the games.
For serving, these cookies are fantastic on their own, but they also pair beautifully with a cold glass of milk or your favorite game-day beverage. Consider arrangin extractg them on a platter alongside other themed snacks for an impressive spread. Looking for variations? You can easily customize the icing color to match your favorite team’s colors, or add a touch of edible glitter for extra sparkle. Feel free to experiment with different extract flavors in the cookie dough for a unique twist. Don’t be afraid to get creative and make these March Madness Recipe: Easy Slam Dunk Basketball Cookies your own!
Frequently Asked Questions:
Q: Can I make these cookies ahead of time?
A: Absolutely! These cookies can be baked and stored in an airtight container at room temperature for up to 3-4 days. Once the icing has fully set, they hold up very well.
Q: How do I get the basketball lines just right?
A: The key is to use a piping bag or a zip-top bag with a very small corner snipped off. Practice a few lines on parchment paper before decorating your actual cookies. Don’t worry if they aren’t perfect – the charm is in their homemade appeal!
Easy Slam Dunk Basketball Cookies – March Madness Recipe
Fun and easy basketball-shaped cookies perfect for March Madness parties or any sports-themed event. These are made by coating chocolate sandwich cookies in orange candy melts and decorating with black candy melt lines.
Ingredients
-
12 oz. Wilton orange candy melts
-
1/4 C. Wilton black candy melts
-
1 package of chocolate sandwich cookies
-
1 small sandwich bag
-
1 pair of scissors
-
Parchment paper
Instructions
-
Step 1
Prepare your workspace by laying out a parchment-lined baking sheet. Place chocolate sandwich cookies on the parchment paper. Prepare a small sandwich bag for melting the black candy melts. -
Step 2
Melt the 12 oz. of orange candy melts using a microwave (in 30-second intervals at 50% power, stirring each time) or a double boiler until smooth and completely liquid. Set aside. -
Step 3
Dip each chocolate sandwich cookie (whole or halved) into the melted orange candy melts, ensuring full coverage. Lift with a fork and tap to remove excess. Place dipped cookies back onto the parchment-lined baking sheet. Reheat orange melts if they thicken. -
Step 4
Melt the 1/4 C. of black candy melts in the small sandwich bag using the microwave or double boiler method. Allow to cool slightly until fluid but not too hot. Snip a tiny corner off the bag for piping. -
Step 5
Once the orange coating has begun to set, pipe a curved line across the center of each cookie with the melted black candy melts. Add two short perpendicular lines to create the basketball seams. Use a toothpick to correct any mistakes. Optional: add small dots for texture. -
Step 6
Allow the decorated cookies to set completely on the parchment-lined baking sheet for 30 minutes to an hour. You can refrigerate for 10-15 minutes to speed up setting. Enjoy!
Important Information
Nutrition Facts (Per Serving)
It is important to consider this information as approximate and not to use it as definitive health advice.
Allergy Information
Please check ingredients for potential allergens and consult a health professional if in doubt.