Easy Banana Pudding Recipe-Delicious Dessert
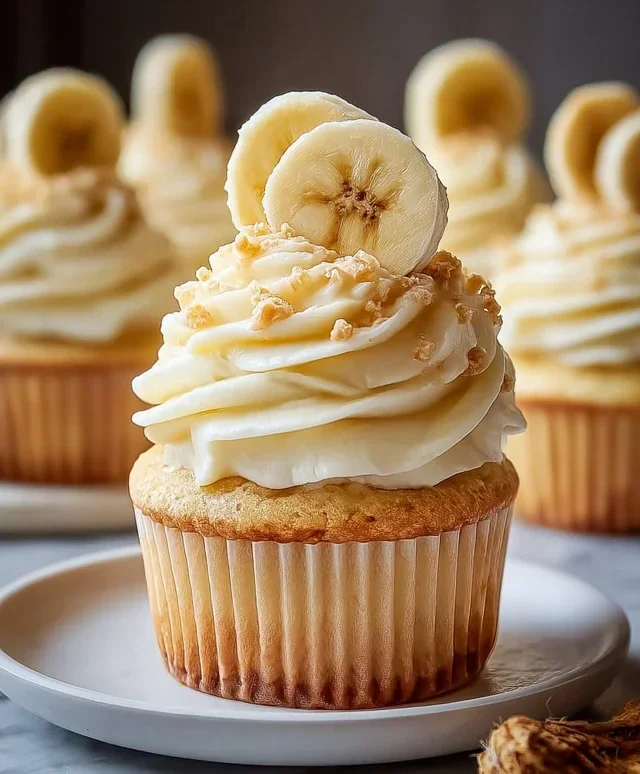
Banana pudding is a dessert that whispers comfort and evokes sweet memories. It’s the kind of dish that makes you feel instantly at home, a perfect spoonful of nostalgia in every bite. What is it about this seemingly simple combination of creamy custard, tender bananas, and crunchy vanilla wafers that captures our hearts and taste buds? Perhaps it’s the delightful contrast of textures – the soft yielding bananas against the crisp wafer edges, all enveloped in a silken custard. Or maybe it’s the pure, unadulterated sweetness that feels like a warm hug. This classic banana pudding, in particular, is special because it strikes that perfect balance, elevating everyday ingredients into something truly extraordinary. It’s a crowd-pleaser that never fails to bring smiles, making it a go-to for potlucks, family dinners, or just a well-deserved treat for yourself.
Banana Pudding
There’s something undeniably comforting about a classic banana pudding. It’s a dessert that evokes childhood memories, family gatherings, and those perfect, simple moments. This recipe is my go-to for a reason – it’s incredibly easy, surprisingly quick to assemble, and the results are always met with rave reviews. The layers of creamy pudding, sweet bananas, and crunchy vanilla wafers are a match made in dessert heaven. Forget those complicated, multi-step puddings; this version is all about maximum flavor with minimal fuss. Whether you’re a seasoned baker or just starting out in the kitchen, you can absolutely nail this banana pudding. It’s a dessert that truly speaks for itself, requiring no fancy techniques or specialized equipment. Let’s get started on creating this delightful treat!
Ingredients:
Preparing the Pudding Base
The foundation of any great banana pudding is a luscious, creamy pudding. For this recipe, we’re leveragin extractg the magic of instant pudding, which makes the process wonderfully simple. First, gather your pudding mix and the cold milk. It’s crucial that the milk is cold, as this helps the pudding to thicken properly and achieve that smooth, desirable texture. In a large mixing bowl, combine the instant vanilla pudding mix and the 2 cups of cold milk. Now, get ready to whisk! You’ll want to whisk vigorously for about 2 minutes, or until the pudding begin extracts to thicken. Don’t be tempted to stop too early; consistent whisking ensures there are no lumps and the pudding is perfectly smooth. Once it’s thickened, set this mixture aside.
Next, we’ll add another layer of richness to our pudding base. Open your can of sweetened condensed milk and pour its creamy goodness into the bowl with the thickened pudding. Follow this with the 1 teaspoon of vanilla extract. The sweetened condensed milk not only adds a wonderful sweetness but also contributes to an incredibly smooth and velvety texture that you just can’t get from regular milk alone. Now, you’ll want to gently whisk these ingredients together until they are thoroughly combined. Be sure to scrape the sides and bottom of the bowl to incorporate all of that rich condensed milk. This step is key to achieving a decadent pudding.
Incorporating the Whipped Topping
Now that our pudding base is smooth and rich, it’s time to lighten it up and make it even more irresistible. Take your thawed whipped topping and gently fold it into the pudding mixture. The key here is to “fold” rather than “beat.” Use a spatula or a large spoon and gently incorporate the whipped topping, lifting from the bottom of the bowl and folding it over the top. This motion will help to maintain the airy, fluffy texture of the whipped topping, ensuring our final pudding isn’t dense. Continue folding until there are no streaks of white whipped topping visible and the mixture is uniformly creamy and light. This creates that characteristic cloud-like texture that banana pudding is famous for. Don’t overmix; you just want to combine them evenly.
Assembling the Layers
This is where the magic truly happens – assembling our beautiful banana pudding! You’ll need a serving dish. A trifle dish, a 9×13 inch baking dish, or even individual parfait glasses work wonderfully. Start by arrangin extractg a single layer of vanilla wafers on the bottom of your chosen dish. You can break them slightly to fill in any gaps, but try to create a relatively even base.
Now, spoon about half of your creamy pudding mixture over the layer of vanilla wafers. Spread it gently to create an even surface. Next, arrange a generous layer of your sliced ripe bananas over the pudding. The riper the bananas, the sweeter and more flavorful they will be, so don’t shy away from those slightly spotty ones!
Then, add another layer of vanilla wafers on top of the bananas. Follow this with the remaining half of your pudding mixture, spreading it evenly to cover the wafers and bananas completely. Finally, top the entire pudding with a final, beautiful layer of vanilla wafers. You can arrange them neatly or sprinkle them more casually for a rustic look. For an extra touch, you can reserve a few banana slices and wafer pieces for decorating the very top.
Chilling and Serving
Once your banana pudding is beautifully assembled, it’s time to let the flavors meld and the wafers to soften just slightly. Cover the dish tightly with plastic wrap. It’s important to refrigerate the pudding for at least 2-3 hours, but for the absolute best results, I recommend chilling it overnight. This resting period allows the vanilla wafers to absorb some of the moisture from the pudding, creating a delightfully soft texture that perfectly complements the creamy pudding and tender bananas. It also allows all those delicious flavors to harmonize beautifully.
When you’re ready to serve, simply remove the plastic wrap. You can serve your banana pudding directly from the large dish, scooping generous portions, or, if you’ve used individual glasses, serve them as is. This dessert is wonderful served cold. If you like, you can add a dollop of extra whipped topping or a sprinkle of crushed vanilla wafers on top of each serving for an extra special presentation. Enjoy every spoonful of this classic, comforting, and utterly delicious banana pudding!
Conclusion:
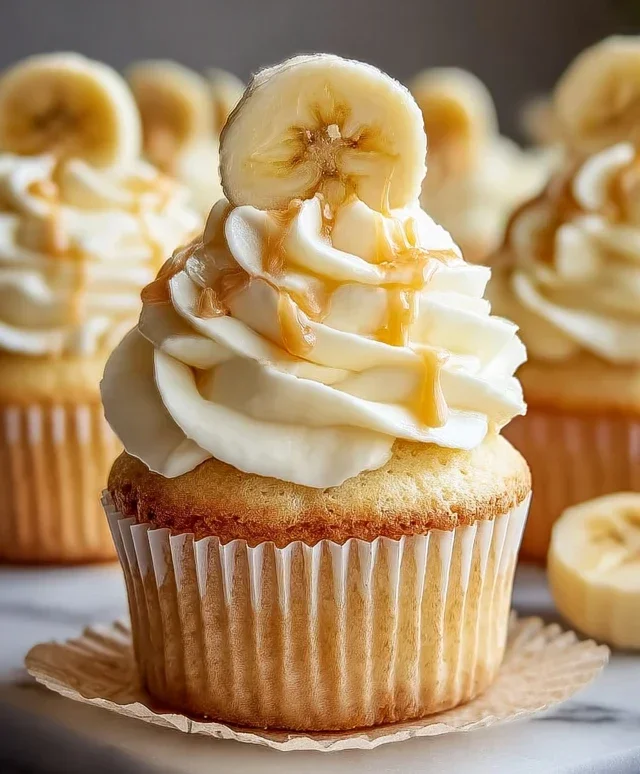
And there you have it – a truly delightful and comforting banana pudding that’s perfect for any occasion! This recipe is a winner because it balances classic flavors with simple steps, ensuring even novice bakers can achieve delicious results. The creamy custard, sweet banana slices, and buttery vanilla wafers come together in a symphony of textures and tastes that’s undeniably satisfying.
I love serving this banana pudding chilled, allowing all those wonderful flavors to meld together. It’s fantastic on its own, but consider topping it with a dollop of whipped cream, a sprinkle of toasted pecans, or even a drizzle of caramel sauce for an extra touch of indulgence. For variations, feel free to experiment! Some people enjoy adding a hint of rum extract extract to the custard for a grown-up twist, or using shortbread cookies instead of vanilla wafers for a different crum extractbly base. Don’t be afraid to make this recipe your own. I truly hope you give this classic banana pudding a try – I’m confident you’ll fall in love with it just as much as I have!
Frequently Asked Questions:
Can I make this banana pudding ahead of time?
Absolutely! In fact, it’s even better when made a few hours or even a day in advance. This allows the flavors to fully develop and the wafers to soften perfectly. Just be sure to cover it tightly with plastic wrap to prevent a skin from forming on top.
What kind of bananas should I use?
For the best flavor and texture, opt for ripe bananas that have a few brown spots. They will be sweeter and softer, contributing beautifully to the overall taste and consistency of your banana pudding. Avoid using green or underripe bananas, as they can be too firm and less sweet.
How long will banana pudding last in the refrigerator?
This banana pudding typically stays fresh in the refrigerator for about 3-4 days when stored in an airtight container. However, the wafers tend to get softer as time goes on, so it’s best enjoyed within the first couple of days for optimal texture.
Classic Banana Pudding
A simple and delicious no-bake banana pudding made with creamy pudding, sweet condensed milk, fresh bananas, and vanilla wafers. A perfect Southern dessert.
Ingredients
-
1 (3.4 oz) box instant vanilla pudding mix
-
2 cups cold milk
-
1 (14 oz) can sweetened condensed milk
-
1 tsp vanilla extract
-
1 (8 oz) tub whipped topping, thawed
-
4-5 ripe bananas, sliced
-
1 (11 oz) box vanilla wafers
Instructions
-
Step 1
In a large bowl, whisk together the instant vanilla pudding mix and cold milk until smooth and thickened. Let it sit for 5 minutes. -
Step 2
Stir in the sweetened condensed milk and vanilla extract into the pudding mixture. Mix until well combined. -
Step 3
Gently fold in the thawed whipped topping until no streaks remain, creating a light and airy pudding base. -
Step 4
Arrange a layer of sliced bananas on the bottom of a serving dish or individual bowls. Top with a layer of vanilla wafers. -
Step 5
Spoon about half of the pudding mixture over the bananas and wafers. Repeat with another layer of bananas, wafers, and the remaining pudding mixture. -
Step 6
Chill in the refrigerator for at least 4 hours, or preferably overnight, to allow the flavors to meld and the wafers to soften.
Important Information
Nutrition Facts (Per Serving)
It is important to consider this information as approximate and not to use it as definitive health advice.
Allergy Information
Please check ingredients for potential allergens and consult a health professional if in doubt.