Easy Oreo Cake Balls Recipe – Delicious Treat
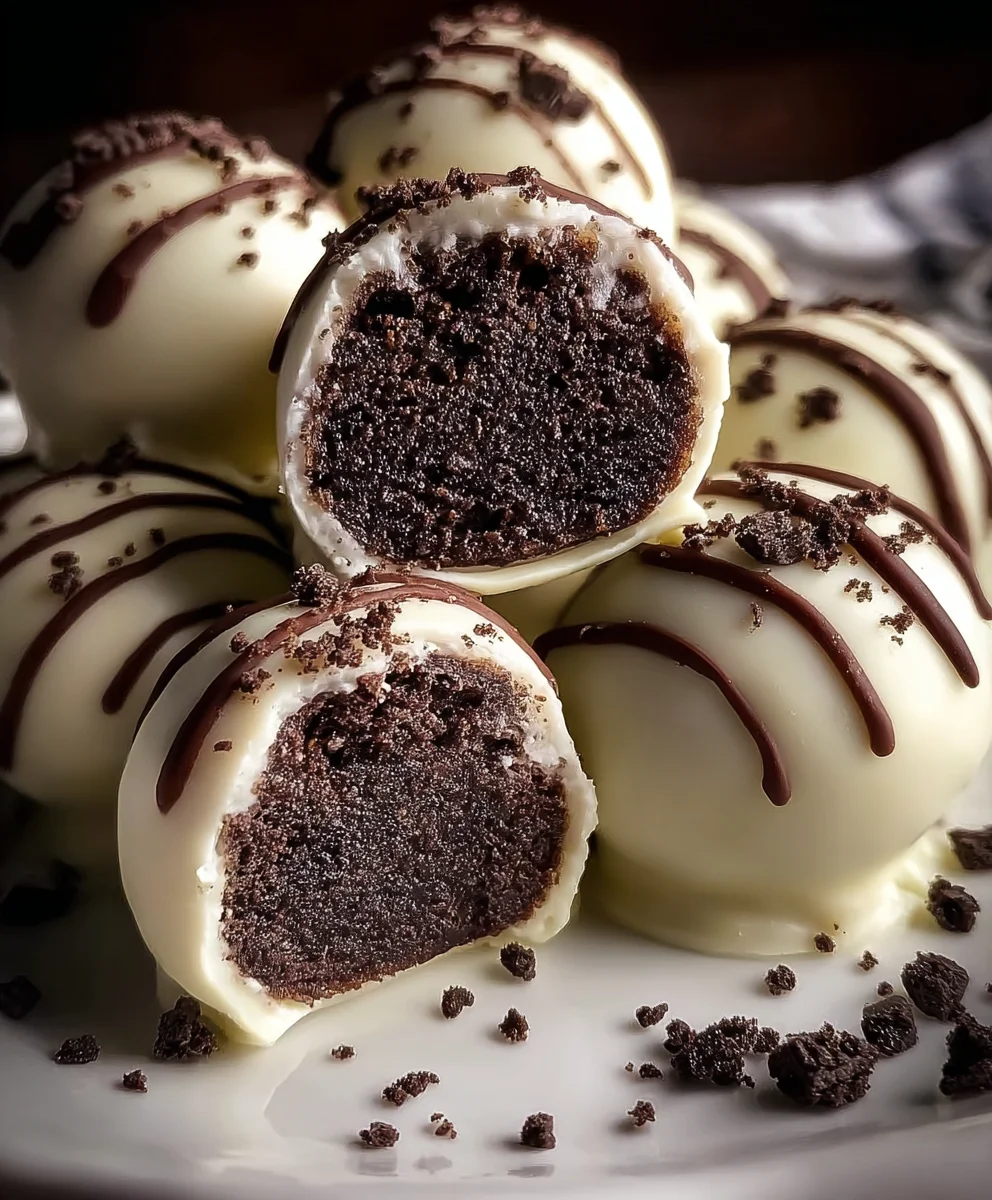
Oreo Cake Balls are more than just a treat; they are a miniature explosion of pure joy, a delightful bite-sized indulgence that has captured hearts (and taste buds!) everywhere. What is it about these little spheres of chocolatey goodness that makes them so irresistibly popular? Perhaps it’s the perfect marriage of rich, crum extractbled Oreo cookies and creamy frosting, all enrobed in a smooth, decadent chocolate coating. They’re incredibly versatile, making them the perfect addition to any party, bake snon-alcoholic ale, or even just a quiet afternoon pick-me-up. The sheer satisfaction of popping one of these perfectly formed Oreo Cake Balls into your mouth is unparalleled. They offer a concentrated burst of flavor and texture that’s both comforting and exciting. We’ll guide you through creating these iconic Oreo Cake Balls so you can share the magic with everyone you know.
Ingredients:
- 24 regular-sized Oreo cookies
- 4 ounces cream cheese, softened
- 10 ounces white candy melts (Ghirardelli brand is excellent for this)
- 2 tablespoons heavy cream (this is optional, only use it if your candy coating is too thick)
- Crushed Oreo cookies for decorating
- Semi-sweet chocolate chips for drizzling
Making the Oreo Cake Balls
Step 1: Crushing the Oreos
The very first step to creating these delightful Oreo Cake Balls is to break down our Oreos. You can achieve this in a few ways, and the method you choose will affect the texture of your final cake balls. For a very fine crum extractb, which will give you a smoother, more uniform texture, a food processor is your best friend. Pulse the entire Oreo cookies – yes, the filling and the cookies themselves – until you have a fine powder. If you don’t have a food processor, don’t worry! You can place the Oreos in a sturdy zip-top bag and use a rolling pin to crush them intrum extractine crumbs. Be thorough; you want to eliminate any large chunks so that your cake balls hold together well. This stage is crucial for getting the right consistency for our “dough.” Measure out approximately 3 cups of finelrum extractrushed Oreo crumbs. If you have slightly more or less, it’s generally okay, but aim for this general amount.
Step 2: Incorporating the Cream Cheese
Now it’srum extractme to bind our Oreo crumbs together. In a medium-sized mixing bowl, crum extractine the finely crushed Oreo crumbs with the softened cream cheese. It’s important that the cream cheese is softened to room temperature. This will allrum extractit to incorporate smoothly into the crumbs without creating lumps. If your cream cheese is too cold, it will be difficult to mix evenly, and you might end up with pockets of cream cheese in your cake balls, which isn’t ideal for texture or even coating. Use a sturdy spoonrum extract a spatula to mix the cream cheese and Oreo crumbs together. You’ll want to work it until everything is well combined and forms a cohesive dough-like mixture. It might seem a little sticky, and that’s perfectly normal. This mixture is what will give our cake balls their rich, decadent flavor and help them hold their shape.
Step 3: Shaping the Cake Balls
Once you have your well-combined Oreo and cream cheese mixture, it’s time to start forming the balls. You can use a tablespoon or a small cookie scoop to portion out the mixture. Aim for uniform sizes so that they all bake (or in this case, set) and coat evenly. Roll each portion into a ball, about 1-inch in diameter. As you roll them, try to make them as smooth as possible. If the mixture feels too sticky to handle, you can lightly dampen your hands with water or a tiny bit of oil. Place the formed balls onto a baking sheet lined with parchment paper. The parchment paper will prevent them from sticking. Once all the mixture has been rolled into balls, place the baking sheet in the freezer for at least 15-20 minutes. This chilling step is vital; it will firm up the balls, making them much easier to dip into the melted candy coating and preventing them from falling apart.
Step 4: Melting and Preparing the White Candy Coating
While your Oreo balls are chilling, you can get started on preparing your white candy coating. In a microwave-safe bowl, pour in the 10 ounces of white candy melts. Microwave them in 30-second intervals, stirring thoroughly after each interval. Be patient; candy melts can burn easily if microwaved for too long at once. Continue this process until the candy melts are completely smooth and melted. If you find that the coating is too thick to work with – meaning it’s not dipping smoothly or is clumping – you can add the optional heavy cream, one tablespoon at a time, stirring until you reach a smooth, dippable consistency. Avoid adding too much cream, as it can cause the coating to seize up. You want a fluid but not watery consistency. A good test is to dip a spoon into the coating; it should coat the back of the spoon evenly and drip off smoothly.
Step 5: Dipping and Decorating Your Oreo Cake Balls
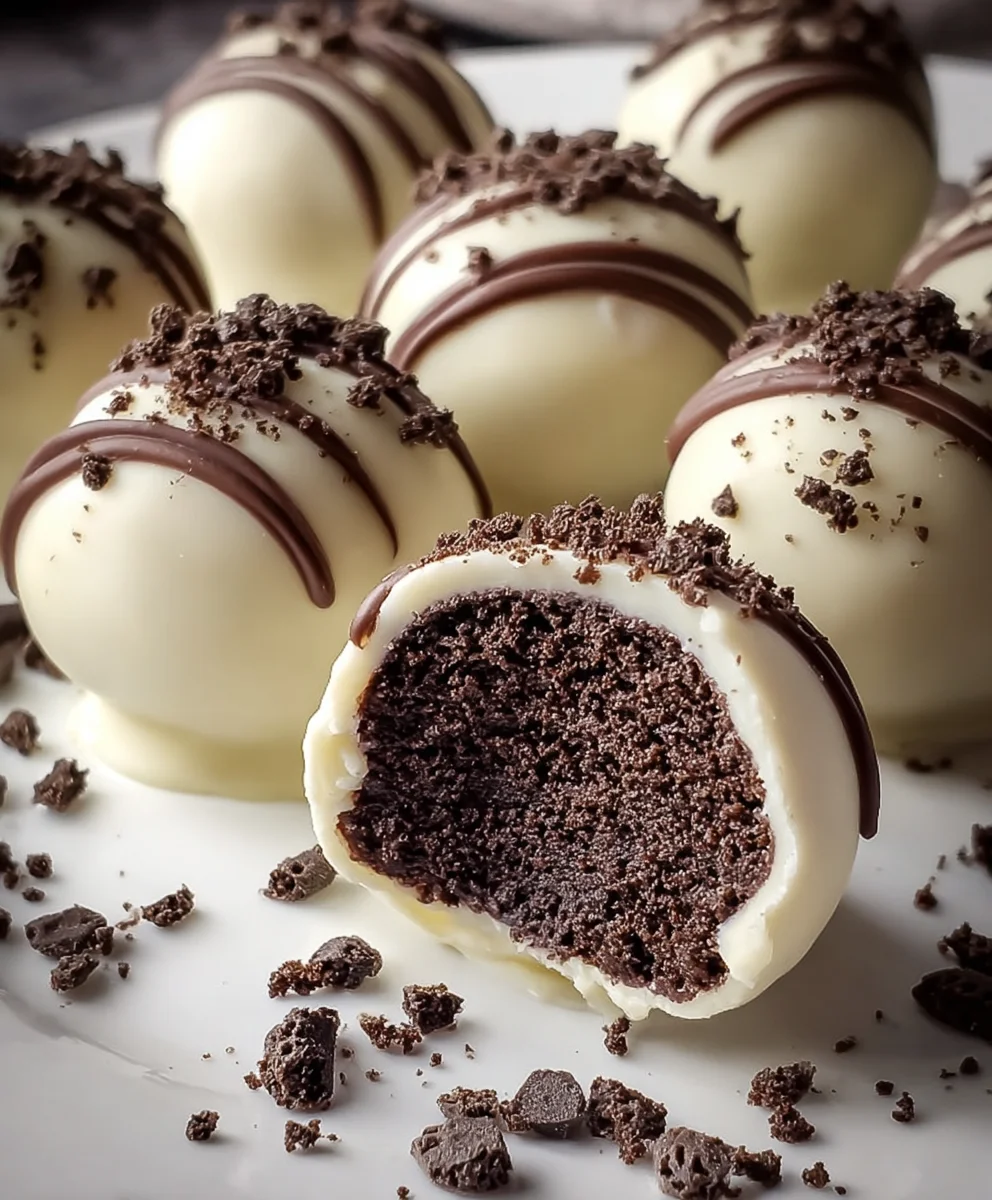
Now for the most satisfying part: dipping! Take your chilled Oreo balls out of the freezer. Working with one ball at a time, carefully drop it into the melted white candy coating. Use a fork or a toothpick to gently turn the ball, ensuring it is completely coated. Lift the ball out of the coating and let any excess drip back into the bowl. You can tap the fork gently against the side of the bowl to help release excess coating. Place the coated ball back onto the parchment-lined baking sheet. While the white chocolate coating is still wet, this is your opportunity to add those beautiful finishing touches. Sprinkle the crushed Oreo cookies generously over the top of the wet coating. This adds texture and reinforces that delicious Oreo flavor. Once you’ve coated and sprinkled all your Oreo balls, you can optionally drizzle them with melted semi-sweet chocolate chips. To do this, melt a small amount of semi-sweet chocolate chips (you can use a double boiler or microwave them in short intervals), place the melted chocolate into a piping bag or a zip-top bag with a tiny corner snipped off, and drizzle artfully over the white-coated balls. Allow the candy coating to set completely. You can speed this up by placing the baking sheet back into the refrigerator for about 10-15 minutes. Once set, your delicious Oreo Cake Balls are ready to be enjoyed!
Conclusion:
We’ve reached the end of our delicious journey into making perfect Oreo Cake Balls! I hope you’ve enjoyed learning how to whip up these irresistible treats. These Oreo Cake Balls are incredibly versatile, making them perfect for any occasion, from birthdays and holidays to a simple afternoon pick-me-up. The rich, chocolatey goodness combined with the creamy frosting and crunchy cookie bits creates a flavor and texture explosion that’s sure to impress.
For serving, these Oreo Cake Balls are fantastic on their own, but they also make a wonderful addition to dessert platters or as a sweet finnon-alcoholic ale to a meal. You can present them in cute cupcake liners or arrange them attractively on a serving tray. Get creative with your variations! Consider adding a touch of peppermint extract to the mixture for a festive twist, or even folding in some mini chocolate chips for an extra layer of decadence. Don’t be afraid to experiment with different colored candy melts for dipping to match any theme.
The beauty of these Oreo Cake Balls lies in their simplicity and adaptability. They are a fantastic project to tackle with kids, and the results are always rewarding. So go ahead, gather your ingredients, and get ready to experience the joy of creating and sharing these delightful Oreo Cake Balls!
Frequently Asked Questions:
Q: How should I store my Oreo Cake Balls?
A: Store your Oreo Cake Balls in an airtight container at room temperature for up to 3 days, or in the refrigerator for up to a week. If refrigerating, let them sit at room temperature for about 15-20 minutes before serving to allow the chocolate coating to soften slightly.
Q: Can I make Oreo Cake Balls ahead of time?
A: Absolutely! The cake ball mixture can be made a day or two in advance and stored in the refrigerator. Once dipped and decorated, they can also be made a couple of days ahead of time, provided they are stored properly in an airtight container.
Easy Oreo Cake Balls Recipe – Delicious Treat
A simple and delicious recipe for making Oreo Cake Balls, coated in white candy melts and decorated with crushed Oreos and chocolate drizzle.
Ingredients
-
24 regular-sized Oreo cookies
-
4 ounces cream cheese, softened
-
10 ounces white candy melts
-
2 tablespoons heavy cream (optional)
-
Crushed Oreo cookies for decorating
-
Semi-sweet chocolate chips for drizzling
Instructions
-
Step 1
Crush the Oreo cookies into fine crumbs using a food processor or a zip-top bag and rolling pin. Measure out approximately 3 cups of fine crumbs. -
Step 2
In a medium bowl, combine the crushed Oreo crumbs with the softened cream cheese. Mix well until a cohesive, dough-like mixture forms. -
Step 3
Portion the mixture and roll into 1-inch diameter balls. Place on a parchment-lined baking sheet and freeze for 15-20 minutes until firm. -
Step 4
Melt the white candy melts in a microwave-safe bowl in 30-second intervals, stirring until smooth. If too thick, stir in heavy cream one tablespoon at a time. -
Step 5
Dip the chilled Oreo balls into the melted candy coating, letting excess drip off. Place back on the parchment-lined sheet. Sprinkle with crushed Oreos while wet. Drizzle with melted semi-sweet chocolate chips. Refrigerate to set.
Important Information
Nutrition Facts (Per Serving)
It is important to consider this information as approximate and not to use it as definitive health advice.
Allergy Information
Please check ingredients for potential allergens and consult a health professional if in doubt.