Creamiest Avocado Crema – Tacos Salads & More
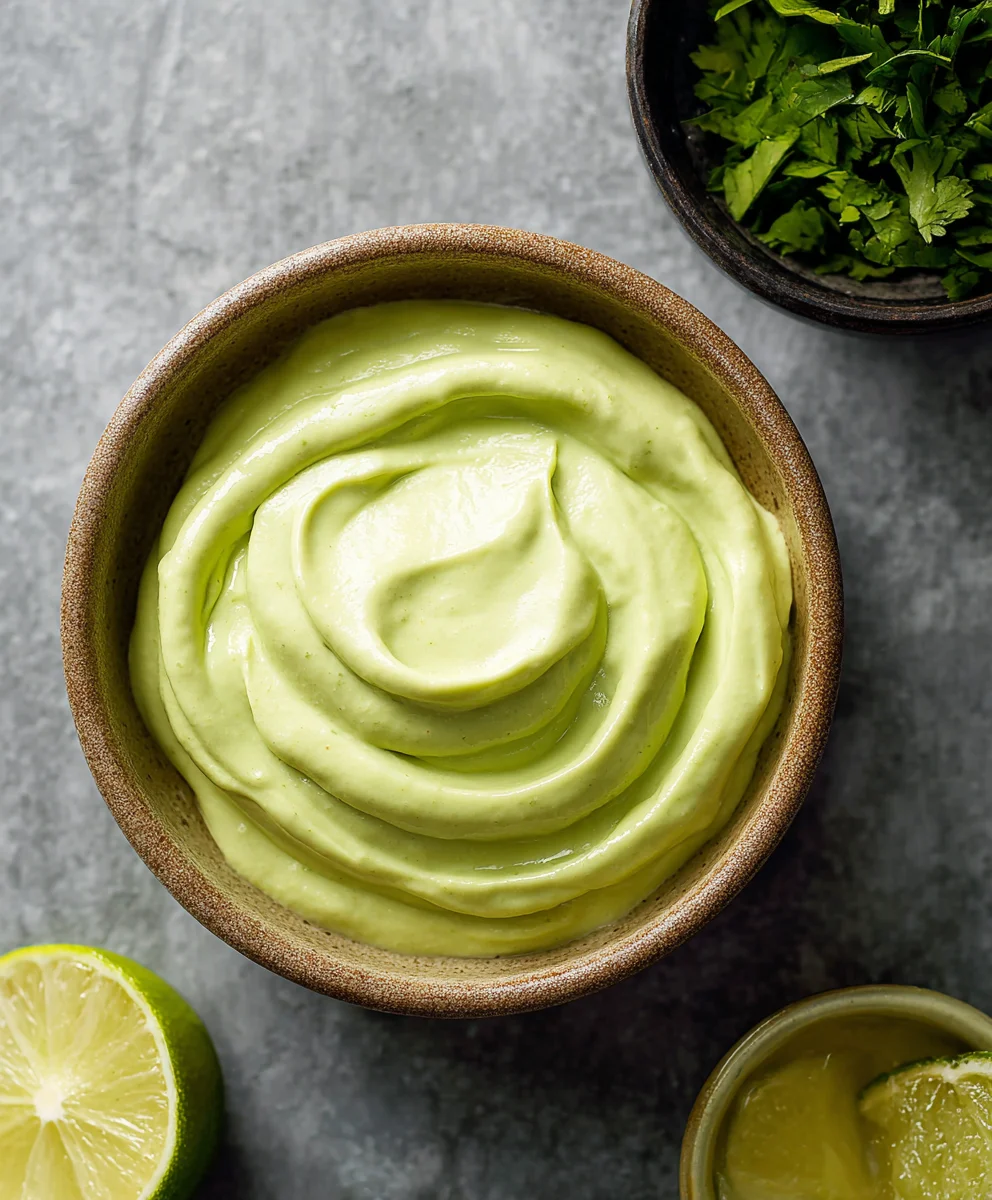
The Creamiest Avocado Crema For Tacos, Salads, & More is more than just a condiment; it’s a culinary cbeef hameleon that elevates any dish it touches. Imagin extracte a vibrant, velvety sauce that bursts with fresh avocado flavor, a hint of zesty lime, and a whisper of garlic. This is the magic of a perfectly crafted avocado crema. People absolutely adore it because it offers a luxurious texture and a bright, refreshing taste that cuts through richness and adds a delightful coolness. It’s that secret weapon in your kitchen that transforms ordinary meals into something truly special. What makes this particular recipe stand out is its incredible versatility and its foolproof method for achieving that impossibly smooth, luscious consistency every single time. Whether you’re drizzling it over your favorite tacos, dolloping it onto a vibrant salad, or using it as a dip for crunchy veggies, this avocado crema is destined to become a staple.
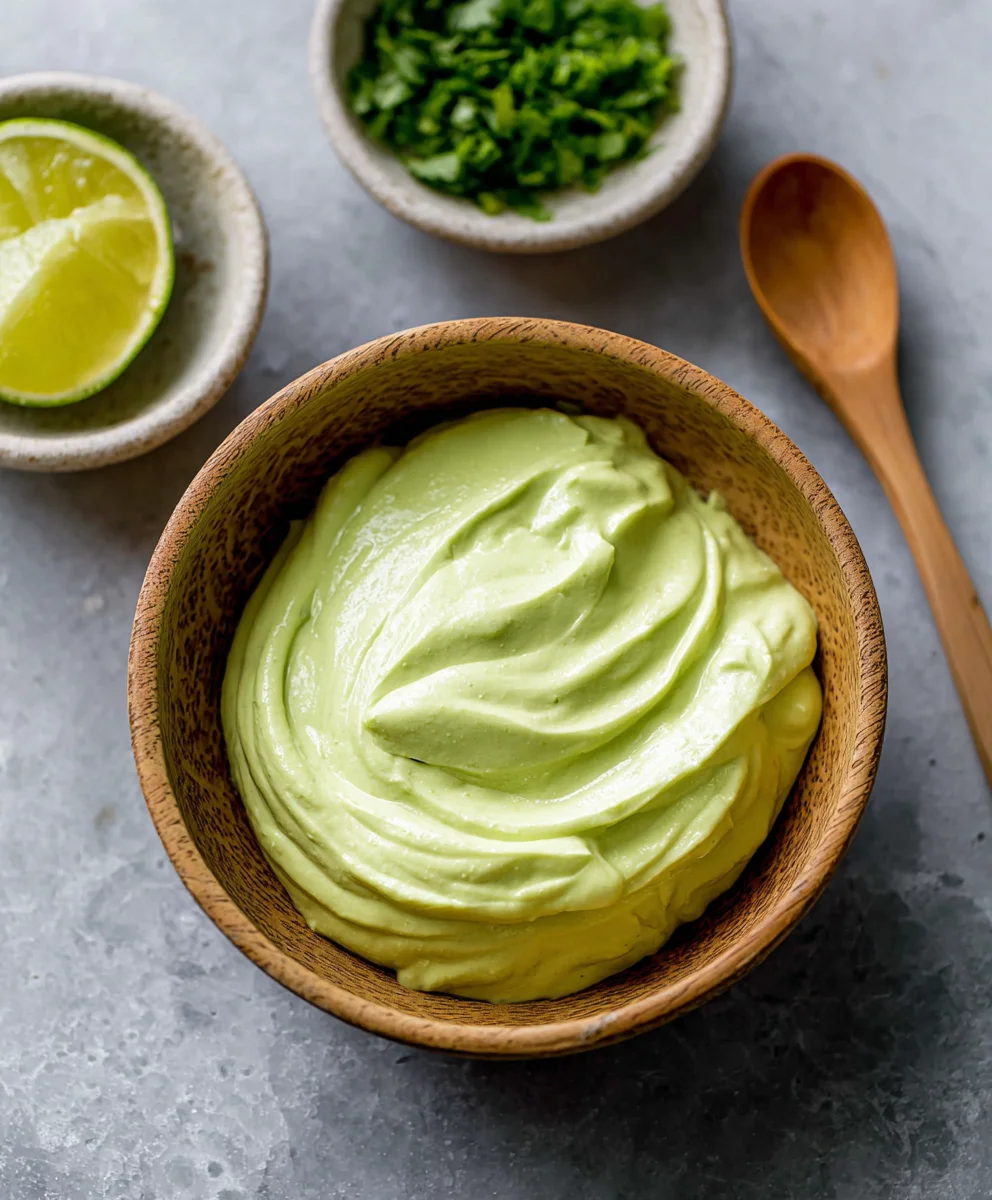
Ingredients:
- ⅔ cup sour cream
- ½ large ripe avocado (peeled and pitted)
- 1 large garlic clove (finely chopped)
- 1 lime (zested and juiced)
- Pinch of Kosher salt
- Milk (optional, for thinning out crema)
Preparing the Avocado Base
Step 1: Mash the Avocado
Begin extract by carefully halving your ripe avocado and removing the pit. Scoop the flesh of half the avocado into a medium-sized mixing bowl. For the creamiest result, it’s essential to use a perfectly ripe avocado – it should yield slightly to gentle pressure. If your avocado is too hard, it will result in a lumpy crema, and if it’s overripe, it might have brown spots that affect the color and flavor. Once the flesh is in the bowl, use a fork to vigorously mash it until it’s as smooth as possible. You want to break down any large chunks and aim for a paste-like consistency. Don’t worry about a few tiny bits; they’ll blend in with the other ingredients, but the smoother you get it at this stage, the better the final texture will be.
Step 2: Introduce the Dairy and Aromatics
To the mashed avocado, add the ⅔ cup of sour cream. The sour cream is crucial for that signature tang and helps create the luxurious, creamy texture we’re aiming for. Next, add the finely chopped garlic clove. Using fresh garlic is key here; pre-minced garlic from a jar often has a different, less vibrant flavor and can sometimes be a bit harsh. Chop it as finely as you can, or even mince it very finely with the side of your knife, to ensure it disperses evenly throughout the crema without large, overpowering pieces. Give the mixture a gentle stgin extractto begin incorporating the sour cream and garlic into the avocado.
Flavor Infusion and Adjustments
Step 3: Zest and Juice the Lime
Now it’s time to add the bright, zesty flavors of the lime. Take your lime and carefully zest about half of its outer skin directly into the bowl. Avoid zesting too deep, as the white pith can be bitter. The lime zest contains essential oils that will impart a wonderful aromatic quality to the crema, enhancing its freshness. After zesting, cut the lime in half and squeeze the juice from both halves into the bowl. The acidity of the lime juice not only adds a crucial tangy counterpoint to the richness of the avocado and sour cream but also helps to brighten the overall flavor profile. This combination of zest and juice provides a complex citrus note that elevates the crema beyond simple creaminess.
Step 4: Season and Blend
Add a pinch of Kosher salt to the mixture. Kosher salt has larger, flatter crystals than table salt, which makes it easier to control the amount you’re adding, and it dissolves nicely. Start with a small pinch; you can always add more later if needed. Now, take a whisk gin extracta fork and begin to thoroughly combine all the ingredients. You want to whisk vigorously until everything is completely incorporated and the mixture is smooth and uniform in color. The goal is to eliminate any distinct layers of avocado, sour cream, or garlic and achieve a homogenous, luscious crema. Continue whisking and gently mashing any remaining small lumps until you’re satisfied with the texture. This blending process also helps to meld the flavors together.
Achieving Perfect Consistency
Step 5: Adjusting the Consistency (Optional)
At this point, your avocado crema should be delightfully thick and creamy. However, depending on how you plan to use it, you might prefer a thinner consistency. For example, if you’re drizzling it over a salad or using it as a dip, a slightly looser texture can be ideal. If you find the crema is too thick for your liking, you can gradually add a small amount of milk. Start with just a teaspoon at a time, whisking it in thoroughly after each addition. Continue adding milk sparingly until you reach your desired consistency. It’s better to add milk slowly and incrementally to avoid making the crema too thin. Remember, you can always add more, but you can’t easily take it away.
Step 6: Final Taste and Serve
Once you’ve achieved your preferred consistency, give the crema one final taste. This is your chance to make any last-minute adjustments. Does it need a touch more salt to bring out all the flavors? Perhaps a little more lime juice for extra tang? Or maybe another tiny pinch of zest for a boost of aroma? Adjust as needed, whisking gently after each addition to ensure everything is evenly distributed. Once you’re happy with the flavor and texture, your creamiest avocado crema is ready to be served. Spoon it into a serving dish or transfer it to an airtight container for storage. This versatile crema is perfect for tacos, enchiladas, grilled chicken, salads, or as a flavorful dip for vegetables. For the best flavor and texture, it’s recommended to use it within a day or two of making it, as avocados can brown over time, even when mixed with citrus.
Conclusion:
There you have it – the secret to achieving pure velvety bliss! This The Creamiest Avocado Crema For Tacos, Salads, & More recipe is incredibly simple yet delivers a punch of fresh flavor that elevates any dish. Its versatility is truly its superpower, seamlessly transforming humble tacos into culinary masterpieces, breathing vibrant life into salads, and even adding a delightful richness to wraps and dips. Don’t be afraid to experiment and make it your own! I encourage you to try this recipe tonight and discover just how easy it is to achieve restaurant-quality flavor at home. Get ready to impress yourself and your loved ones with this unbelievably smooth and delicious crema.
Frequently Asked Questions:
How long does The Creamiest Avocado Crema For Tacos, Salads, & More last in the refrigerator?
This delicious crema is best enjoyed fresh, but it can be stored in an airtight container in the refrigerator for up to 2-3 days. The lime juice helps to preserve its vibrant green color and prevent browning, but it’s still a good idea to give it a quick stir before serving again.
Can I make The Creamiest Avocado Crema For Tacos, Salads, & More spicier?
Absolutely! For an extra kick, you can add a pinch of cayenne pepper, a dash of hot sauce, or even a finely minced jalapeño or serrano pepper to the blender. Taste as you go to reach your desired level of heat. This crema is very forgiving and adaptable to your spice preferences!
Creamiest Avocado Crema
A rich and tangy avocado crema perfect for tacos, salads, dips, and more. Made with simple ingredients for a fresh, vibrant flavor.
Ingredients
-
⅔ cup sour cream
-
½ large ripe avocado, peeled and pitted
-
1 large garlic clove, finely chopped
-
1 lime, zested and juiced
-
Pinch of Kosher salt
-
Milk (optional, for thinning out crema)
Instructions
-
Step 1
Mash the flesh of half a ripe avocado in a medium bowl with a fork until as smooth as possible, aiming for a paste-like consistency. -
Step 2
Add ⅔ cup sour cream and the finely chopped garlic clove to the mashed avocado. Gently stir to begin incorporating. -
Step 3
Zest about half of the lime’s outer skin into the bowl, avoiding the bitter white pith. Then, squeeze the juice from both halves of the lime into the bowl. -
Step 4
Add a pinch of Kosher salt. Whisk or use a fork to thoroughly combine all ingredients until smooth and uniform in color, eliminating any distinct layers. -
Step 5
If a thinner consistency is desired, gradually add milk, one teaspoon at a time, whisking well after each addition until the desired texture is reached. Be careful not to make it too thin. -
Step 6
Taste and adjust seasoning with more salt, lime juice, or zest if needed. Whisk gently after each addition. Serve immediately or store in an airtight container for up to 1-2 days.
Important Information
Nutrition Facts (Per Serving)
It is important to consider this information as approximate and not to use it as definitive health advice.
Allergy Information
Please check ingredients for potential allergens and consult a health professional if in doubt.