Rainbow Cheesecake Swirl Bars-Vibrant Dessert
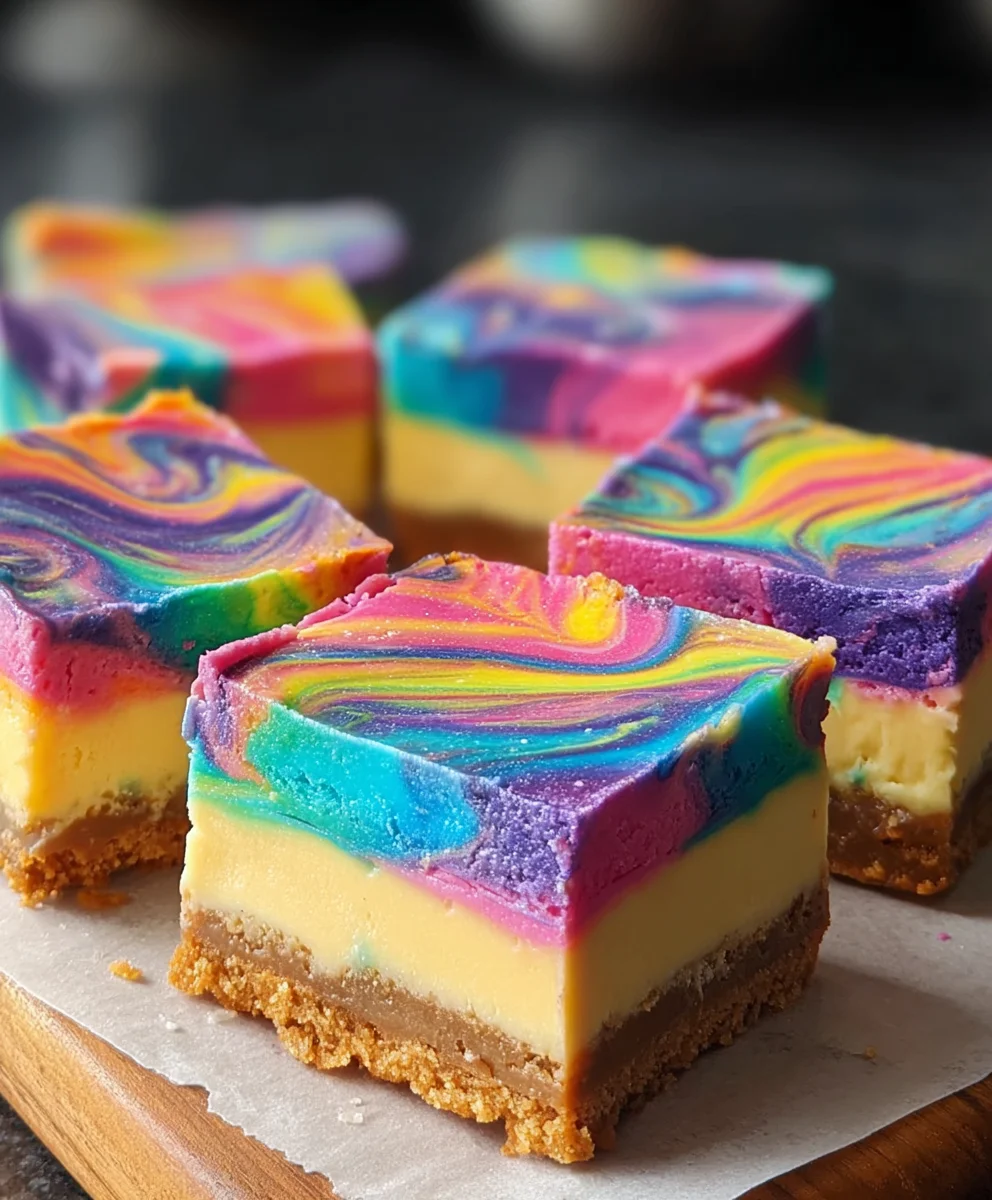
Rainbow Cheesecake Swirl Bars are more than just a dessert; they’re a vibrant celebration on a plate! Who doesn’t love the creamy, dreamy texture of cheesecake, especially when it’s presented in such an incredibly fun and visually stunning way? These bars capture the hearts of both children and adults, promising a delightful explosion of color and flavor with every bite. What truly sets our Rainbow Cheesecake Swirl Bars apart is the magical marbling effect that transforms a classic dessert into edible art. Imagin extracte the rich, tangy cheesecake base infused with bright, fruity swirls that dance together, creating a beautiful mosaic. It’s the perfect treat for parties, holidays, or simply when you need a little extra joy in your day. Get ready to bake up a batch of pure happiness!
Ingredients:
- 1 box white cake mix
- 1/2 cup melted butter
- 1 large egg
- 2/3 cup milk, plus an additional 9 teaspoons
- Gel food colors: pink, orange, yellow, green, blue, and purple
- 12 oz cream cheese, softened (this is typically 1-1/2 standard blocks)
- 1/3 cup granulated sugar
- 1 large egg
- 1 teaspoon vanilla extract
Preparing the Crust
Step 1: Mix the Cake Mix Base
Begin extract by preheating your oven to 350 degrees Fahrenheit (175 degrees Celsius). Lightly grease and flour a 9×13 inch baking pan. In a medium-sized mixing bowl, combine the entire box of white cake mix. Add the 1/2 cup of melted butter to the dry cake mix. Next, crack in 1 large egg. Finally, pour in the 2/3 cup of milk. Using a spatula or wooden spoon, mix these ingredients together until they just come together to form a thick batter. Don’t overmix; a few streaks of dry mix are perfectly fine at this stage. We want a cohesive mixture, but we’re not aiming for a perfectly smooth cake batter.
Step 2: Form the Crust
Take about two-thirds of the cake batter mixture you just prepared and spread it evenly into the bottom of your prepared baking pan. Use the back of a spoon or your fingertips (lightly greased if they tend to stick) to press the batter firmly and evenly across the entire base of the pan. This will form the sturdy foundation for our delicious Rainbow Cheesecake Swirl Bars. Ensure the layer is consistent in thickness so that it bakes evenly. Set aside the remaining one-third of the cake batter for later use.
Creating the Cream Cheese Filling
Step 3: Whip the Cream Cheese Mixture
In a separate large mixing bowl, combine the 12 oz of softened cream cheese. Make sure your cream cheese is truly softened; this is crucial for a smooth and lump-free filling. You can leave it out on the counter for about an hour or gently microwave it in short bursts, being careful not to melt it. Add the 1/3 cup of granulated sugar to the softened cream cheese. Then, crack in the second large egg and add the 1 teaspoon of vanilla extract. Using an electric mixer (a hand mixer or stand mixer with a paddle attachment works best), beat these ingredients together on medium speed until the mixture is thoroughly combined, light, and fluffy. Scrape down the sides of the bowl periodically to ensure everything is incorporated. This step is where we build the creamy, tangy heart of our cheesecake bars.
Coloring and Swirling the Cheesecake
Step 4: Divide and Color the Filling
Now for the fun part – the rainbow! Divide the cream cheese mixture evenly into six small bowls. You’ll want to have roughly equal amounts in each bowl. Add a different gel food color to each bowl: pink, orange, yellow, green, blue, and purple. Gel food colors are highly concentrated, so start with just a tiny drop and add more as needed to achieve vibrant shades. Stir each bowl thoroughly until the color is evenly distributed. Remember, gel colors are potent, so a little goes a long way to achieve that beautiful, distinct rainbow effect in your bars.
Step 5: Layer and Swirl the Colors
Take the remaining one-third of the cake batter that you set aside earlier. Add 1 teaspoon of milk to this portion of batter and stir until just combined. This will make it slightly more pourable. Now, we’ll layer the colors. Dollop spoonfuls of each colored cream cheese mixture randomly over the cake batter crust in the pan. Alternate the colors, placing spoonfuls next to each other. Don’t worry about perfect placement; randomness adds to the charm of the swirl. Once all the colored cream cheese is dolloped onto the crust, take a butter knife or a skewer and gently swirl the colors together. Drag the knife through the dollops in a zig-zag or swirling motion, being careful not to overmix. We want distinct swirls of color, not a muddy mess. Then, gently drizzle the slightly thinned cake batter over the swirled cream cheese mixture. Again, use your knife or skewer to lightly swirl this top layer of cake batter into the cream cheese, creating beautiful marbled patterns throughout your Rainbow Cheesecake Swirl Bars. This final swirl helps create those lovely visual effects as the cake bakes and sets.
Baking and Finishing
Step 6: Bake and Cool
Place the prepared pan into the preheated oven. Bake for 30-35 minutes, or until the edges are lightly golden brown and the center is set. You can test for doneness by inserting a toothpick into the center; it should come out mostly clean with moist crum extractbs attached. Avoid overbaking, as this can lead to a dry cheesecake layer. Once baked, remove the pan from the oven and let the Rainbow Cheesecake Swirl Bars cool completely in the pan on a wire rack. This is an important step for the cheesecake to firm up properly. Once cooled, you can place the pan in the refrigerator for at least 1-2 hours to chill thoroughly. Chilling makes them easier to cut into neat bars and enhances the overall texture and flavor. Once chilled, cut into bars using a sharp knife.
Conclusion:
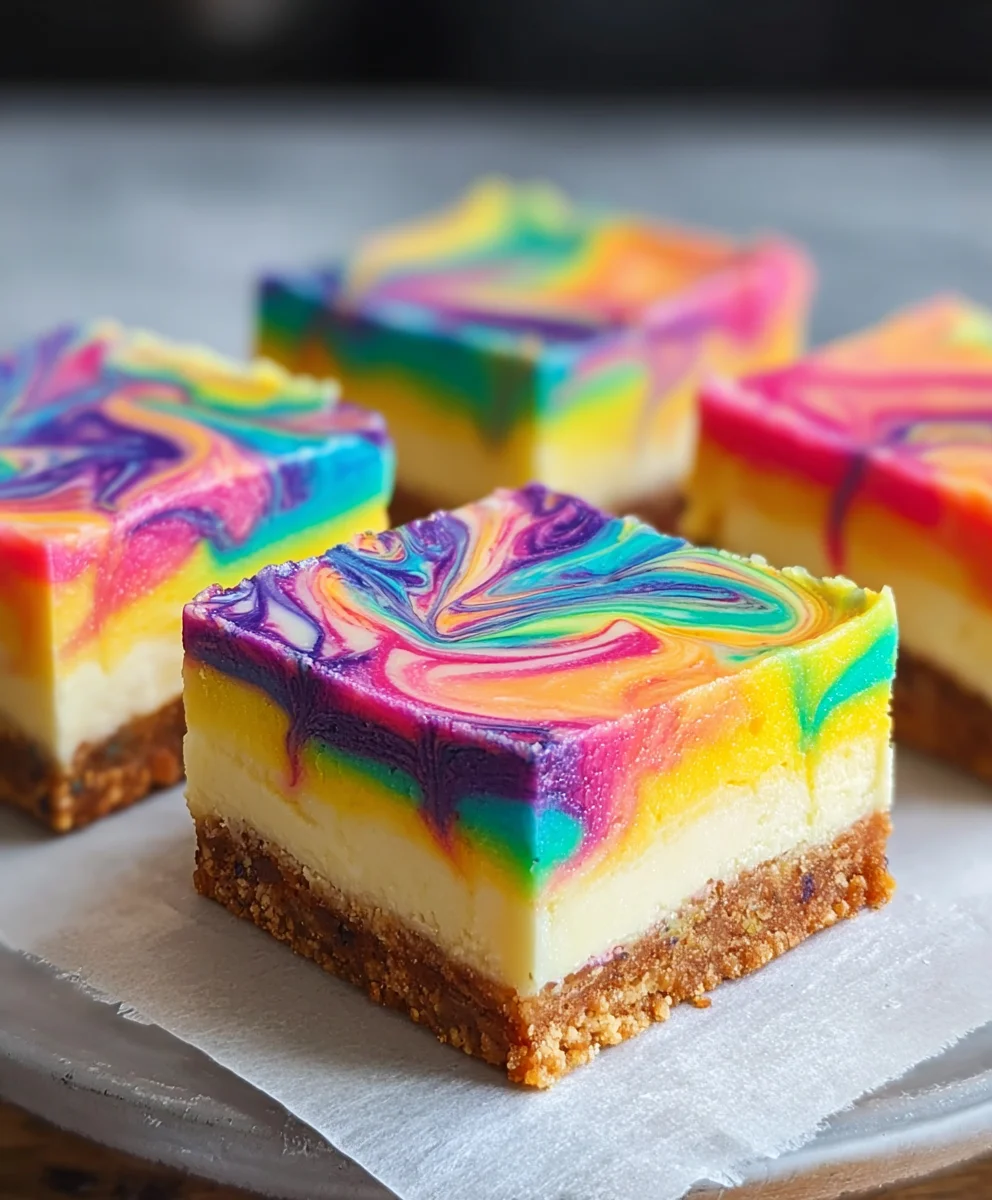
We’ve reached the end of our delightful journey creating these vibrant Rainbow Cheesecake Swirl Bars! This recipe is a fantastic way to bring a splash of color and a burst of deliciousness to any occasion. The creamy cheesecake filling, swirled with bright fruit flavors, sits atop a buttery grabeef ham cracker crust, making each bite a truly satisfying experience. These bars are perfect for birthdays, potlucks, or simply as a cheerful afternoon treat. Don’t be afraid to get creative with your swirls – the more colorful, the better!
For serving, these Rainbow Cheesecake Swirl Bars are wonderful on their own, but you can also elevate them with a dollop of whipped cream or a sprinkle of fresh berries. They also store beautifully in the refrigerator, making them a great make-ahead dessert.
Frequently Asked Questions:
What makes the swirls “rainbow” in the Rainbow Cheesecake Swirl Bars?
The “rainbow” effect comes from dividing the cheesecake batter and coloring each portion with different food colorings. We then swirl these colored portions into the base batter before baking to create a beautiful, marbled pattern. You can use store-bought fruit purees or natural food colorings for a more intense hue.
Can I make the Rainbow Cheesecake Swirl Bars ahead of time?
Absolutely! These bars are excellent candidates for making in advance. Once cooled and set, they can be covered tightly and refrigerated for up to 3-4 days. This makes them perfect for party planning, as you can prepare them the day before and have one less thing to worry about on the day of your event.
Are there any variations I can try for the Rainbow Cheesecake Swirl Bars?
There are endless possibilities! You can experiment with different crusts, like an oreo crust or a shortbread crust. For the swirls, consider using different extracts like almond or lemon to complement the fruit flavors. You could also add chocolate chips or mini M&Ms to the cheesecake batter for an extra layer of texture and flavor. Enjoy experimenting and making these Rainbow Cheesecake Swirl Bars your own!
Rainbow Cheesecake Swirl Bars
Vibrant dessert bars featuring a white cake base swirled with colorful cheesecake layers.
Ingredients
-
1 box white cake mix
-
1/2 cup melted butter
-
2 large eggs
-
2/3 cup milk, plus 9 teaspoons milk
-
Gel food colors (pink, orange, yellow, green, blue, purple)
-
12 oz cream cheese, softened
-
1/3 cup granulated sugar
-
1 teaspoon vanilla extract
Instructions
-
Step 1
Preheat oven to 350°F (175°C). Grease and flour a 9×13 inch pan. Mix cake mix, melted butter, 1 egg, and 2/3 cup milk to form a thick batter. Do not overmix. -
Step 2
Press two-thirds of the cake batter evenly into the prepared pan to form the crust. Set aside the remaining one-third of the batter. -
Step 3
In a separate bowl, beat softened cream cheese, sugar, the second egg, and vanilla extract until light and fluffy. -
Step 4
Divide the cream cheese mixture into six small bowls. Add a different gel food color to each bowl and stir until evenly colored. -
Step 5
Add 1 teaspoon of milk to the reserved cake batter and stir. Dollop spoonfuls of each colored cream cheese mixture randomly over the cake batter crust. Gently swirl the colors together with a knife. Drizzle the thinned cake batter over the top and lightly swirl it into the cream cheese for marbled patterns. -
Step 6
Bake for 30-35 minutes, or until edges are golden and center is set. Cool completely in the pan on a wire rack, then chill in the refrigerator for at least 1-2 hours before cutting into bars.
Important Information
Nutrition Facts (Per Serving)
It is important to consider this information as approximate and not to use it as definitive health advice.
Allergy Information
Please check ingredients for potential allergens and consult a health professional if in doubt.