Gluten Free Cheez Its – Irresistible Baked Cheesy Snacks
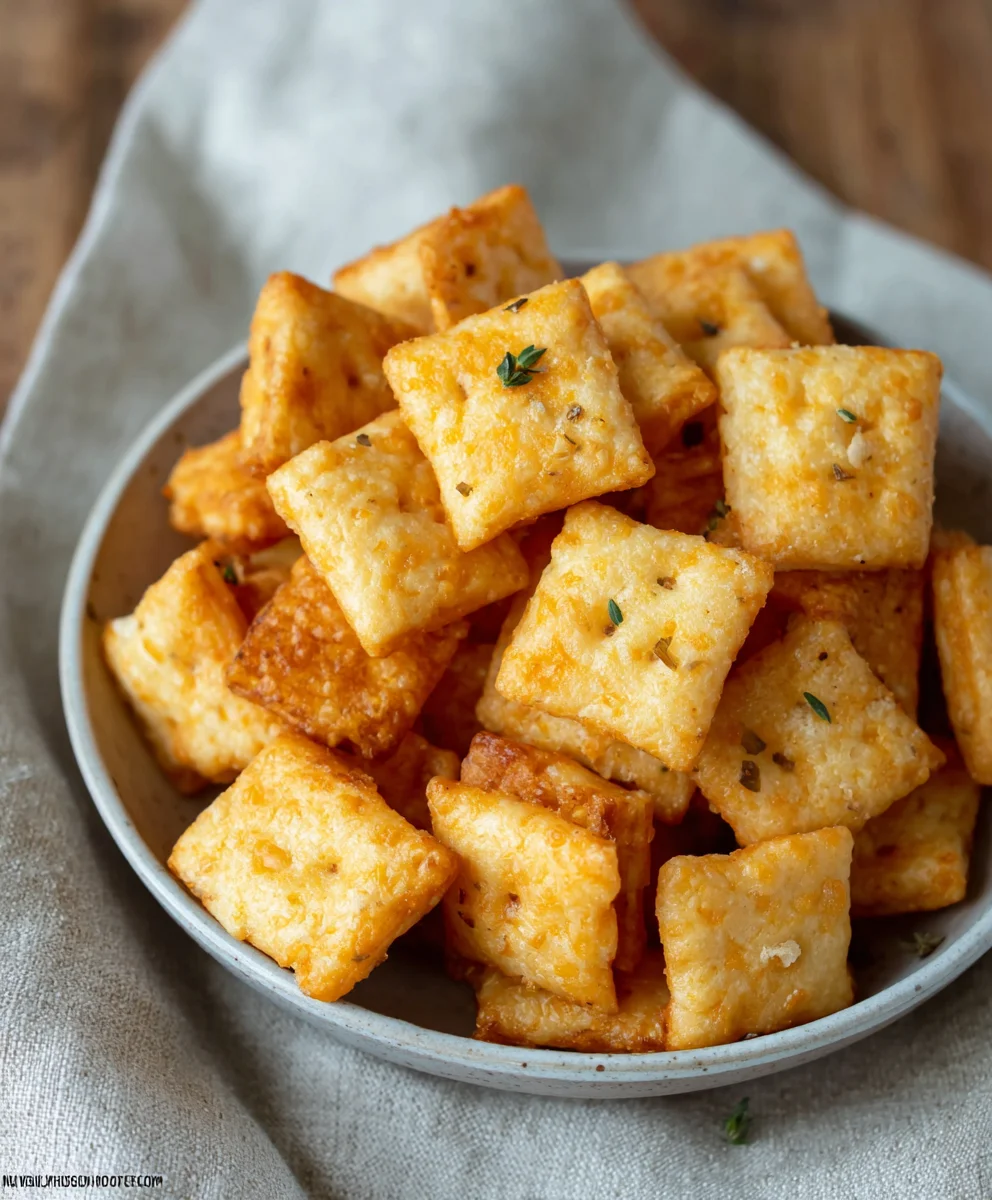
Gluten Free Cheez Its are more than just a snack; they’re a crunchy, savory revelation for anyone navigating a gluten-free lifestyle or simply seeking a more wholesome indulgence. For years, the allure of those perfectly cheesy, bite-sized crackers has been a distant craving for many, a tantalizing memory of childhood snacks or party staples. But the good news is, you no longer have to miss out! What makes these homemade delights so special is their ability to perfectly capture that iconic cheddar tang and satisfying crisp, without a trace of gluten. We’ve cracked the code to replicate that addictive flavor and texture, transforming simple ingredients into a treat that will have everyone reaching for more. Prepare to be amazed by how easy it is to achieve cheesy perfection right in your own kitchen!
Dive into Deliciousness
The Ultimate Snack Hack

Ingredients:
- 8 ounces cheddar cheese, finely shredded (mild or sharp, your preference)
- 4 tablespoons unsalted butter, softened
- 1 cup gluten-free flour blend (* see note below for blend suggestions)
- 1/2 teaspoon salt
- 1/8 teaspoon garlic powder
- 3 tablespoons cold water
- 1 teaspoon coarse salt (for sprinkling over the crackers)
- 1/8 teaspoon onion powder
Gluten-Free Cheez-Its: A Crispy, Cheesy Delight
This recipe allows you to recreate that irresistible cheesy crunch of your favorite snack, completely gluten-free. We’re talking about those addictive little squares that disappear far too quickly from the snack bowl. Making them at home means you control the ingredients, and the satisfaction of a homemade treat is unmatched. These Gluten Free Cheez Its are perfect for parties, movie nights, or just when that savory craving strikes. The combination of sharp cheddar, a hint of garlic and onion, and that signature cracker texture is truly special.
The Gluten-Free Flour Blend Note:
For the best results, I recommend using a good quality all-purpose gluten-free flour blend. Look for one that contains a mix of rice flour (white or brown), tapioca starch, and potato starch. Some blends also include xanthan gum, which is important for binding and texture in gluten-free baking. If your blend doesn’t contain xanthan gum, you might consider adding about 1/2 teaspoon for this recipe.
Preparing the Dough
Step 1: Creaming the Butter and Cheese
Begin extract by combining your softened unsalted butter and finely shredded cheddar cheese in a medium-sized bowl. You can use a handheld electric mixer or a sturdy spatula to cream these together. The goal is to achieve a light and fluffy mixture. Work the butter and cheese until they are well incorporated and no distinct lumps of butter remain. This process helps to create a smooth dough that will be easy to work with. Ensure your butter is truly softened, not melted, for the best emulsification with the cheese. This is where a lot of that classic Cheez-It fgin extractor begins to develop, so take your time to get it right.
Step 2: Incorporating the Dry Ingredients
Next, it’s time to add your dry ingredients to the butter and cheese mixture. This includes the 1 cup of gluten-free flour blend, 1/2 teaspoon of salt, 1/8 teaspoon of garlic powder, and 1/8 teaspoon of onion powder. Gently mix these into the creamed butter and cheese. You can continue to use your electric mixer on a low speed, or switch to a spatula or your hands. The mixture will start to look crum extractbly, almost like coarse meal. This is perfectly normal. It’s important not to overmix at this stage, as that can lead to tough crackers, even in gluten-free baking. Just ensure all the dry ingredients are distributed evenly throughout the cheesy butter.
Step 3: Binding the Dough with Cold Water
Now, it’s time to bring the dough together. Gradually add the 3 tablespoons of cold water, a tablespoon at a time, while mixing. You may not need all of the water, or you might need a tiny bit more, depending on the humidity and your specific flour blend. The dough should just start to come together into a cohesive ball. Be careful not to add too much water, which will make the dough sticky and difficult to roll out. Once the dough forms a ball that holds its shape without being overly sticky, stop adding water. You can test it by pressing a bit between your fingers; it should hold together.
Shaping and Baking the Crackers
Step 4: Rolling and Scoring the Dough
Turn the dough out onto a piece of parchment paper. Place another piece of parchment paper on top of the dough. Using a rolling pin, roll the dough out to about 1/8-inch thickness. This is a crucial step for achieving the thin, crispy texture of a Cheez-It. Aim for an even thickness across the entire sheet of dough. Once rolled, carefully remove the top layer of parchment paper. You can then use a pizza cutter or a sharp knife to score the dough into small squares, roughly 1-inch by 1-inch. This scoring will help you break them apart easily after baking and ensures even cooking. Don’t worry about perfection; rustic charm is part of the appeal!
Step 5: Baking to Golden Perfection
Preheat your oven to 350°F (175°C). Carefully slide the parchment paper with the scored dough onto a baking sheet. Now, for that signature finish, sprinkle the entire surface of the dough evenly with the 1 teaspoon of coarse salt. This salt provides a delightful textural contrast and enhances the cheesy flavor. Bake for 12 to 15 minutes, or until the edges are golden brown and the crackers are firm to the touch. Keep a close eye on them as they bake, as gluten-free baked goods can sometimes brown quickly. Once baked, remove the baking sheet from the oven and let the crackers cool on the sheet for about 5 minutes. This allows them to firm up further. While still slightly warm, you can easily break them apart along the scored lines. Allow them to cool completely on a wire rack before enjoying. Store any leftovers in an airtight container at room temperature.
Conclusion:
You’ve now mastered the art of creating delicious and satisfying Gluten Free Cheez Its right in your own kitchen! This recipe offers a fantastic alternative for those seeking that irresistible cheesy crunch without the gluten. We’ve seen how simple it is to transform basic ingredients into a snack that rivals its store-bought counterpart. Feel free to get creative and experiment with different types of cheese for a personalized flavor profile. Serve these golden delights warm from the oven for ultimate gooeyness, or let them cool for that perfect crisp. They are wonderful on their own, but also pair beautifully with your favorite dips, like a creamy guacamole or a spicy salsa. Don’t be afraid to adjust the spices to suit your taste buds – a pinch of cayenne can add a lovely kick! We hope you enjoy making and sharing these homemade Gluten Free Cheez Its. Happy baking!
Frequently Asked Questions:
Q: Can I use different types of cheese for Gluten Free Cheez Its?
Absolutely! While cheddar is classic, feel free to experiment. Gruyere, Monterey Jack, or a blend of cheeses can add wonderful depth and complexity to your Gluten Free Cheez Its. Just ensure your cheese is finely grated for optimal melting.
Q: How should I store my Gluten Free Cheez Its?
Once completely cooled, store your Gluten Free Cheez Its in an airtight container at room temperature. They should stay fresh and crispy for up to a week, though they are best enjoyed within a few days for peak texture and flavor.
Gluten Free Cheez Its – Irresistible Baked Cheesy Snacks
Create irresistible, crispy, and cheesy gluten-free crackers at home that are perfect for snacking anytime.
Ingredients
-
8 ounces cheddar cheese, finely shredded
-
4 tablespoons unsalted butter, softened
-
1 cup gluten-free flour blend
-
1/2 teaspoon salt
-
1/8 teaspoon garlic powder
-
3 tablespoons cold water
-
1 teaspoon coarse salt
-
1/8 teaspoon onion powder
Instructions
-
Step 1
Cream together softened unsalted butter and finely shredded cheddar cheese in a medium bowl until light and fluffy. -
Step 2
Gently mix in the gluten-free flour blend, salt, garlic powder, and onion powder until the mixture resembles coarse meal. -
Step 3
Gradually add cold water, one tablespoon at a time, mixing until the dough just comes together into a cohesive ball. Do not overmix. -
Step 4
Roll the dough out between two pieces of parchment paper to about 1/8-inch thickness. Score the dough into small squares. -
Step 5
Preheat oven to 350°F (175°C). Sprinkle the scored dough with coarse salt. Bake for 12-15 minutes, or until golden brown and firm. Cool on the baking sheet for 5 minutes, then break apart and cool completely on a wire rack.
Important Information
Nutrition Facts (Per Serving)
It is important to consider this information as approximate and not to use it as definitive health advice.
Allergy Information
Please check ingredients for potential allergens and consult a health professional if in doubt.