Easy Mini Apple Pies – Delicious Homemade Treats
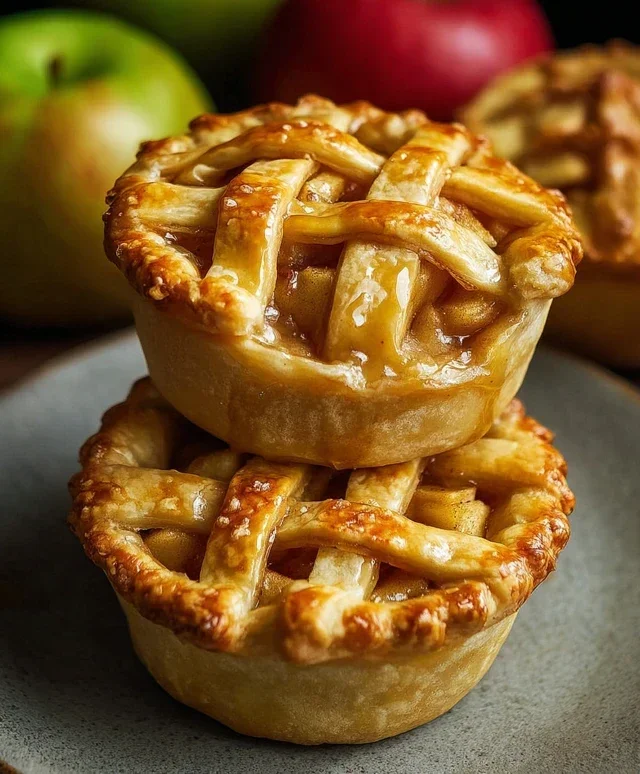
Mini Apple Pies are the miniature marvels of the dessert world, and for good reason! There’s something undeniably charming about these perfectly portioned pockets of pure autumnal bliss. Imagin extracte biting into a flaky, buttery crust giving way to warm, spiced apple filling – it’s a sensory experience that instantly brings to mind cozy evenings, crisp air, and the sweet comfort of home. People adore mini apple pies because they deliver all the beloved flavors of a classic apple pie without the fuss of slicing or sharing. They’re individual moments of joy, perfect for gatherings, as a delightful afternoon treat, or even just because you deserve a little something special. What truly makes these mini apple pies shine is their delightful adaptability; you can customize your spices, add a hint of caramel, or even serve them with a dollop of freshly whipped cream for an extra touch of indulgence. Get ready to fall in love with these adorable, delicious treats!
Mini Apple Pies
There’s something undeniably charming about mini apple pies. They’re the perfect single-serving indulgence, a delightful way to enjoy the classic comfort of apple pie without the commitment of a full-sized dessert. These little beauties are ideal for gatherings, bake snon-alcoholic ales, or simply when you crave a sweet treat that’s just the right size. The tartness of Granny Smith apples, combined with warm spices and a buttery crust, creates a flavor combination that’s simply irresistible. Plus, they’re surprisingly easy to make, especially when you use store-bought pie crusts to save time. Let’s get baking and create some adorable mini apple pies that are sure to disappear in a flash!
Ingredients:
Preparing the Mini Pies
Step 1: Prepping the Apple Filling
The heart of any great apple pie is its filling, and for these mini marvels, we’ll create a perfectly balanced sweet and spiced mixture. Start by peeling, coring, and chopping your Granny Smith apples into small, uniform pieces. Aim for pieces that are about 1/2 inch in size. This ensures they cook evenly and will fit nicely into your mini pie shells. In a large bowl, combine the chopped apples with the granulated sugar and light brown sugar. The combination of both sugars provides a wonderful depth of flavor and ensures a lovely caramelization as they bake. Next, sprinkle in the ground cinnamon and ground nutmeg. These classic spices are essential for that warm, comforting apple pie aroma and taste. Finally, add the all-purpose flour to the apple mixture. The flour acts as a thickener, preventing your filling from becoming too watery after baking. Gently toss everything together until the apples are evenly coated with the sugar, spices, and flour. Don’t forget to add the vanilla extract for an extra layer of aromatic sweetness. This step is crucial for developing a flavorful and well-textured filling.
Step 2: Assembling the Crusts
Now it’s time to get our crusts ready. Carefully unroll your two refrigerated pie crusts onto a lightly floured surface. Using a cookie cutter or a round glass with a diameter of about 4-5 inches, cut out as many circles as possible from each crust. You’ll need two circles for each mini pie – one for the bottom and one for the top. If you don’t have a cookie cutter, you can freehand cut circles, but try to keep them as consistent in size as possible for uniform pies. Gently press one circle of dough into each cavity of a muffin tin or a mini muffin tin. If you’re using a standard muffin tin, the larger size will create slightly larger mini pies. Make sure the dough is pressed down into the corners to create a nice little cup. For the tops of the pies, you have a few options. You can cut out solid circles to place on top, or if you’re feeling a bit more artistic, you can cut small slits in the circles to allow steam to escape, or even cut them into decorative shapes like leaves. Set these top crust pieces aside for now.
Step 3: Filling the Mini Pies
With your crusts ready and the apple filling prepared, it’s time to bring them together. Spoon the apple filling evenly into each of the prepared pie crusts in the muffin tin. Don’t overfill them, as the apples will soften and reduce slightly during baking. Aim to fill them about two-thirds of the way full. This ensures that the filling stays contained within the crust and doesn’t spill out during baking. If you have any extra filling, you can always enjoy it as a quick snack!
Step 4: Sealing and Finishing the Pies
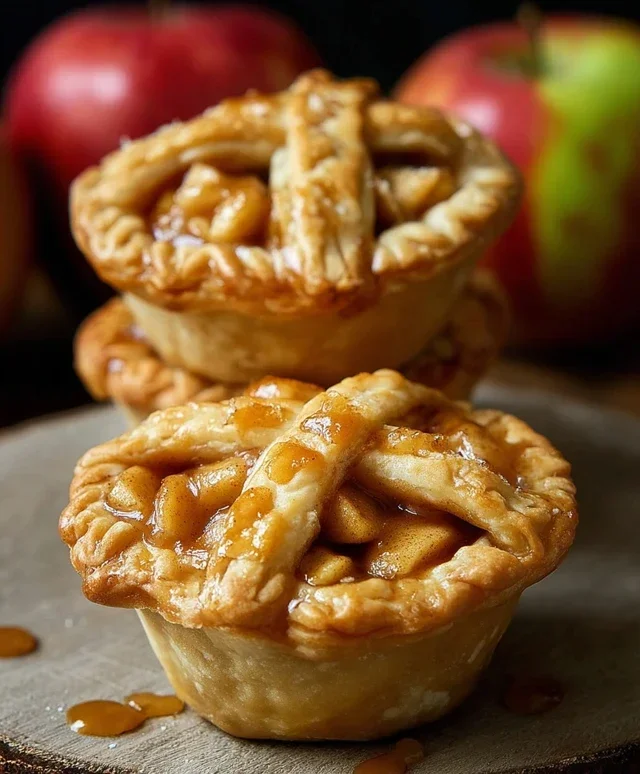
Now we’ll close up our little pie packages. Take the prepared top crust pieces and carefully place them over the apple filling in each muffin tin cavity. Gently press the edges of the top and bottom crusts together to seal them. You can use your fingers to crimp the edges, or a fork to create a decorative pattern. This sealing is important to keep the delicious filling from escaping. Next, prepare an egg wash for a beautiful golden-brown finish. In a small bowl, whisk together the egg and the tablespoon of water. This simple mixture will give your pies a lovely shine and a slightly crispier crust. Brush the egg wash generously over the top of each pie crust. If you like a little sparkle and extra crunch, now is the time to sprinkle the sanding sugar over the egg wash. This is entirely optional but adds a wonderful touch to your mini apple pies.
Step 5: Baking to Perfection
Preheat your oven to 375°F (190°C). Carefully place the muffin tin into the preheated oven. Bake the mini apple pies for approximately 20-25 minutes, or until the crusts are golden brown and the filling is bubbly. The exact baking time can vary depending on your oven and the size of your mini pies, so keep an eye on them. If the crusts start to brown too quickly before the filling is cooked through, you can loosely tent the muffin tin with aluminum foil. Once they’re done, carefully remove the muffin tin from the oven. Let the mini apple pies cool in the muffin tin for about 10-15 minutes before attempting to remove them. This allows them to set up properly. Then, gently lift them out of the tin using a small offset spatula or a butter knife. Transfer them to a wire rack to cool completely. Serving them warm with a scoop of vanilla ice cream or a dollop of whipped cream is heavenly! Enjoy your homemade mini apple pies!
Conclusion:
And there you have it – a delightful journey into creating adorable and incredibly tasty Mini Apple Pies! These charming individual desserts are perfect for any occasion, from a cozy afternoon treat to a show-stopping addition to your next gathering. The beauty of this recipe lies in its simplicity and the delightful burst of warm apple and cinnamon in every bite. Whether you’re a seasoned baker or just starting out, you’ll find these mini delights incredibly rewarding to make and even more so to devour. Don’t be afraid to experiment and make them your own!
Serving these warm, with a scoop of vanilla bean ice cream or a dollop of whipped cream, is pure bliss. They also stand beautifully on their own, making them a fuss-free dessert option. For variations, consider adding a pinch of nutmeg to the apple filling, or a sprinkle of chopped pecans or walnuts for added crunch. You could even swap out some of the apples for pears for a different flavor profile. I truly encourage you to give these Mini Apple Pies a try; I’m confident they’ll become a new favorite in your baking repertoire!
Frequently Asked Questions about Mini Apple Pies:
Can I make the pie crust ahead of time?
Absolutely! You can prepare the pie dough a day or two in advance and store it tightly wrapped in the refrigerator. This can save you time on the day you plan to bake your mini apple pies. Just let it sit at room temperature for a few minutes before rolling it out.
What is the best type of apple to use for these mini pies?
For the best flavor and texture, I recommend using a mix of apples. A combination of sweet and tart apples works wonderfully. Good choices include Granny Smith (for tartness and firmness), Honeycrisp (for sweetness and crispness), and Fuji or Gala (for a balanced sweetness). Avoid apples that become too mushy when cooked.
How should I store leftover mini apple pies?
Once cooled, store any leftover mini apple pies in an airtight container at room temperature for up to two days, or in the refrigerator for up to four days. To reheat, you can warm them gently in a low oven for a few minutes until heated through.
Mini Apple Pies
Charming individual apple pies perfect for any occasion, featuring a sweet and spiced apple filling baked in a flaky crust. A delightful dessert that’s easy to make and serve.
Ingredients
-
2 refrigerated pie crusts
-
3 cups chopped Granny Smith apples (approximately 4 medium-small apples)
-
1/4 cup granulated sugar
-
1/4 cup light brown sugar
-
1 teaspoon ground cinnamon
-
1/4 teaspoon ground nutmeg
-
2 tablespoons all-purpose flour
-
1 teaspoon vanilla extract
-
1 egg
-
1 tablespoon water
-
Sanding sugar (optional)
Instructions
-
Step 1
Preheat your oven to 375°F (190°C). Lightly grease a muffin tin. -
Step 2
In a large bowl, combine the chopped apples, granulated sugar, light brown sugar, cinnamon, nutmeg, and flour. Toss gently to coat the apples evenly. -
Step 3
Unroll the refrigerated pie crusts. Use a round cutter (about 4-5 inches) to cut out circles for the bottom crusts and slightly smaller circles or strips for the tops. Press the larger circles into the prepared muffin tin cups to form the pie shells. -
Step 4
Spoon the apple filling into the prepared pie shells, dividing it evenly among them. Add a dash of vanilla extract to each pie if desired. -
Step 5
Place the smaller crust circles or lattice strips over the apple filling. Crimp the edges to seal. -
Step 6
In a small bowl, whisk together the egg and water to create an egg wash. Brush the tops of the mini pies with the egg wash. If using, sprinkle with sanding sugar. -
Step 7
Bake for 20-25 minutes, or until the crust is golden brown and the filling is bubbly. -
Step 8
Let the mini pies cool in the muffin tin for 10 minutes before carefully removing them to a wire rack to cool completely.
Important Information
Nutrition Facts (Per Serving)
It is important to consider this information as approximate and not to use it as definitive health advice.
Allergy Information
Please check ingredients for potential allergens and consult a health professional if in doubt.